 hi, i'm
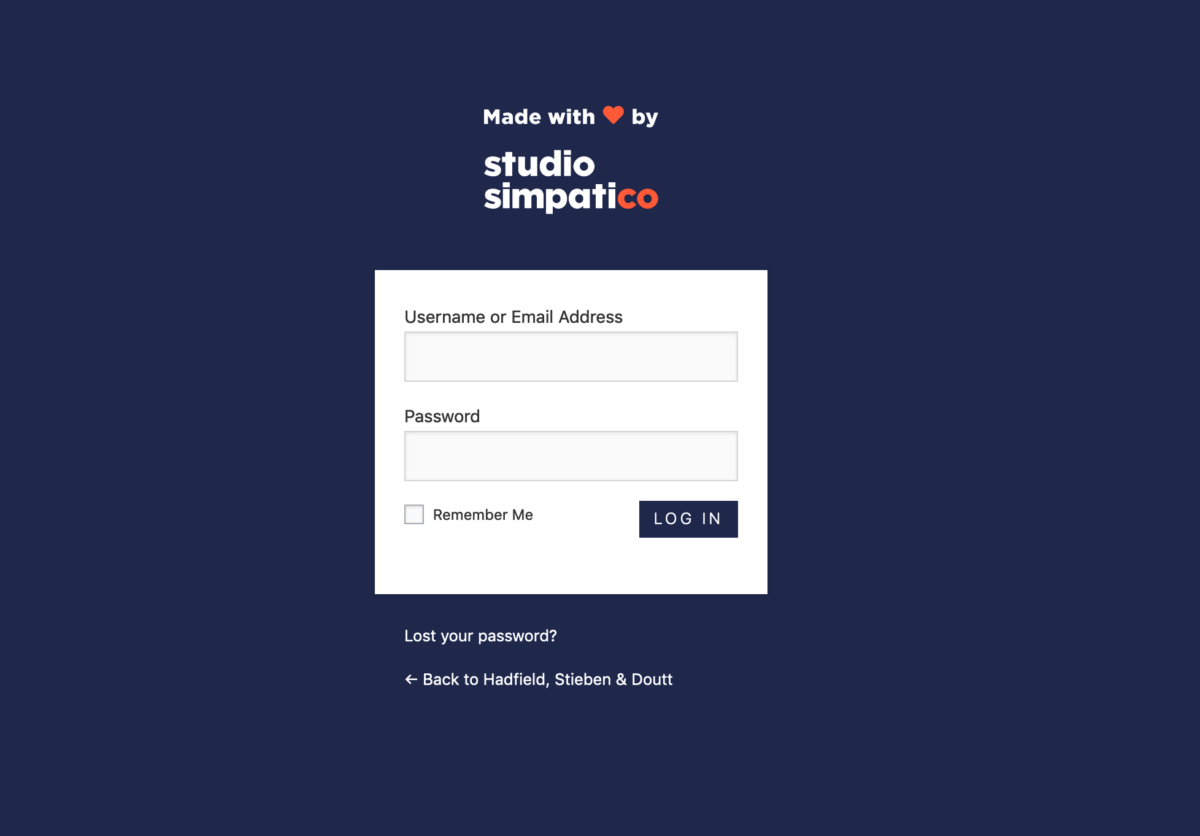
Welcome To Your New Website! That was a lot of work, wasn’t it? New websites come with strategy, content, design, development, and SEO to name a few. But once the project is “finished” (and let’s face it, a website is never truly finished!) and launched, then what?
Do you want to edit your own content instead of relying on us Simpaticos? (But of course we’d really, really love to help if you’d prefer us to do it for you!) WordPress is a really simple CMS to use when set up properly, and anyone who can navigate Facebook can find and edit their own content. So if you’re interested in editing your own content but aren’t sure where to begin, you’ve come to the right place!
I’ve created a handy jump nav, so you can skip to the parts you really need:
Logging In
In order to change anything on your website, you’ll need to log in. The login URL is typically your domain name + /wp-admin. For example: http://www.your-domain.com/wp-admin
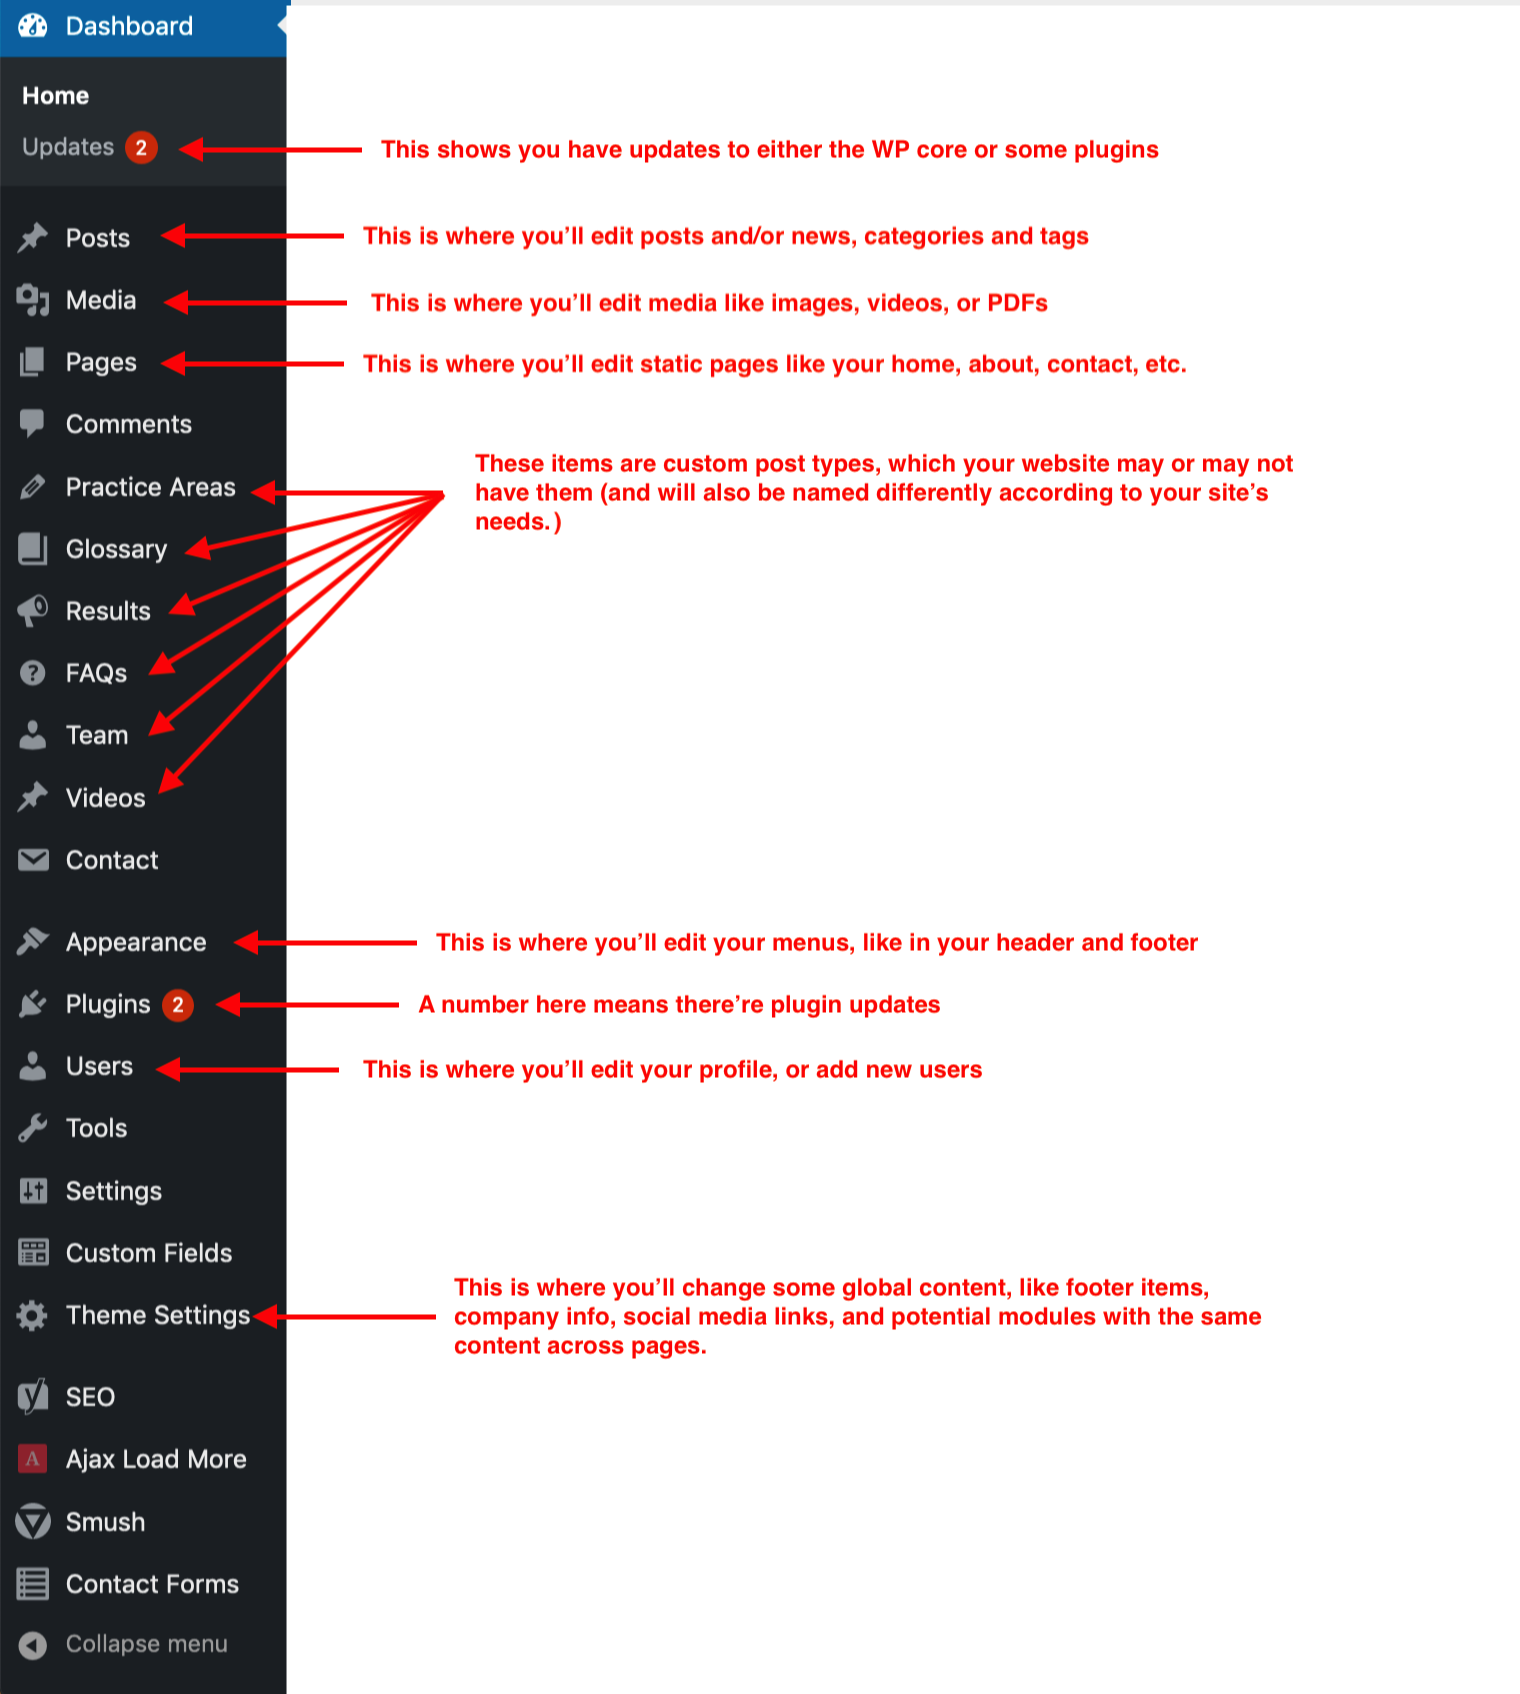
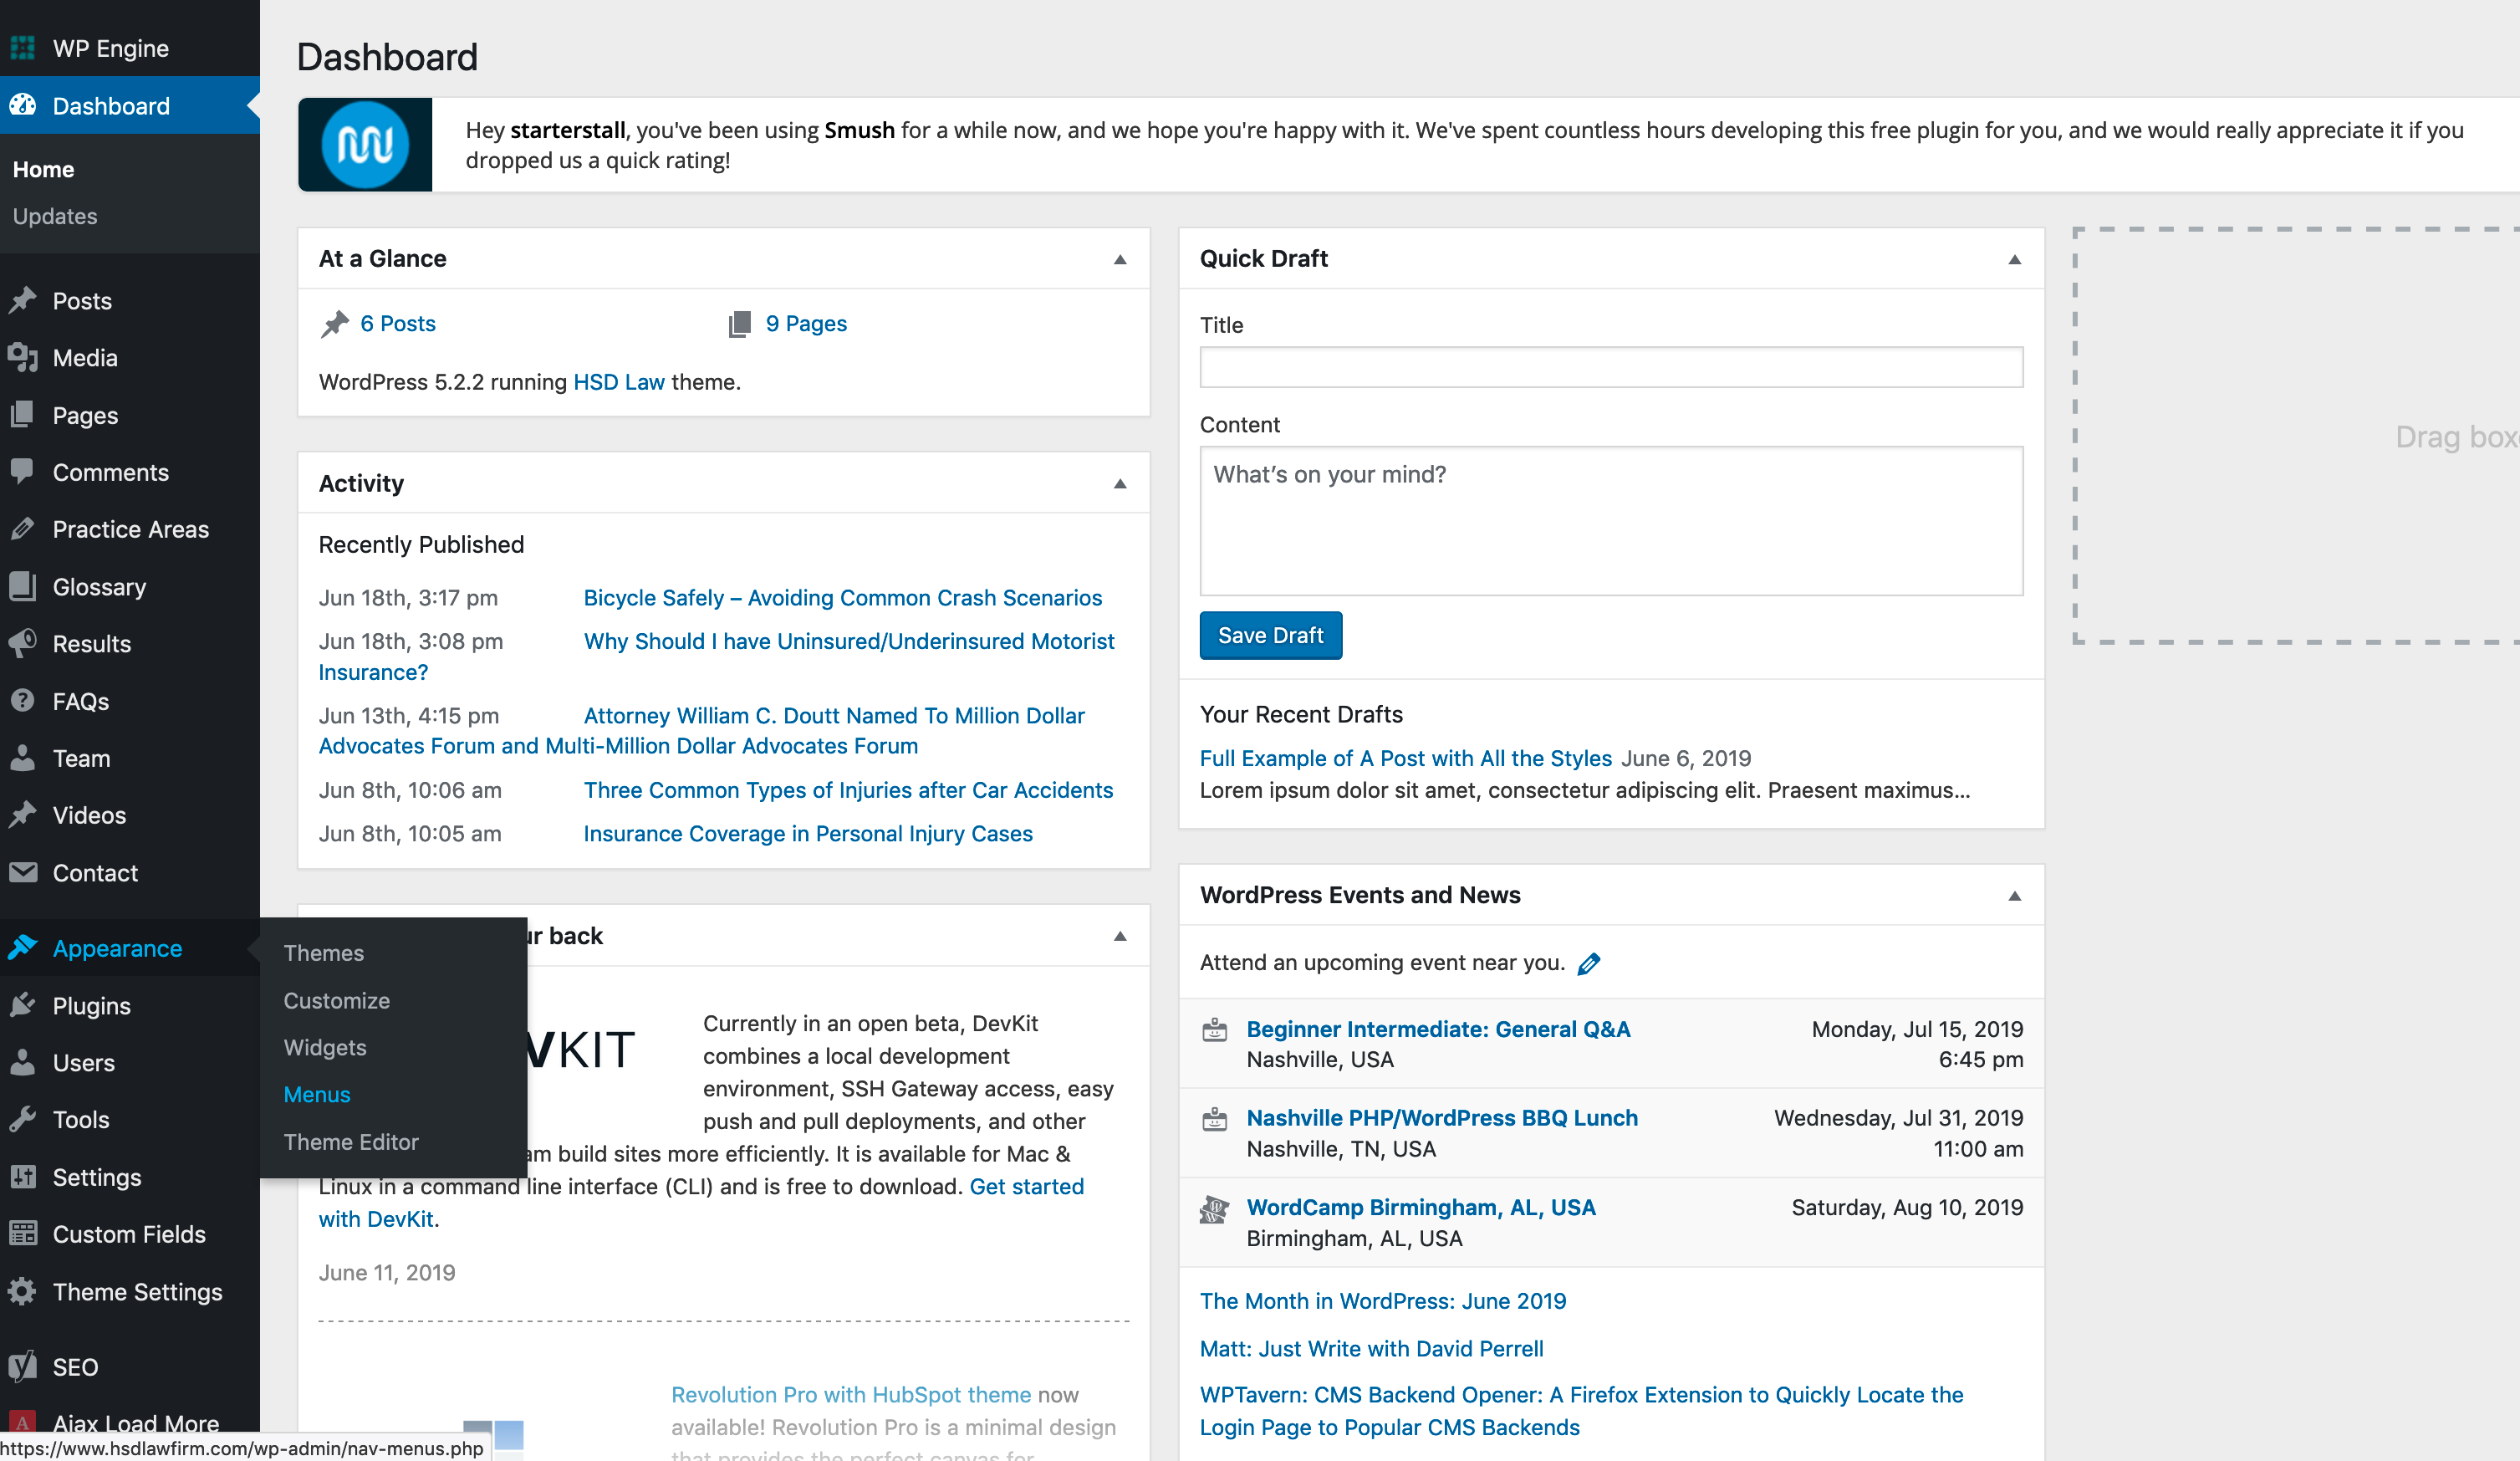
When you successfully log in, you’ll come to the admin homepage, called the Dashboard, which looks like this:
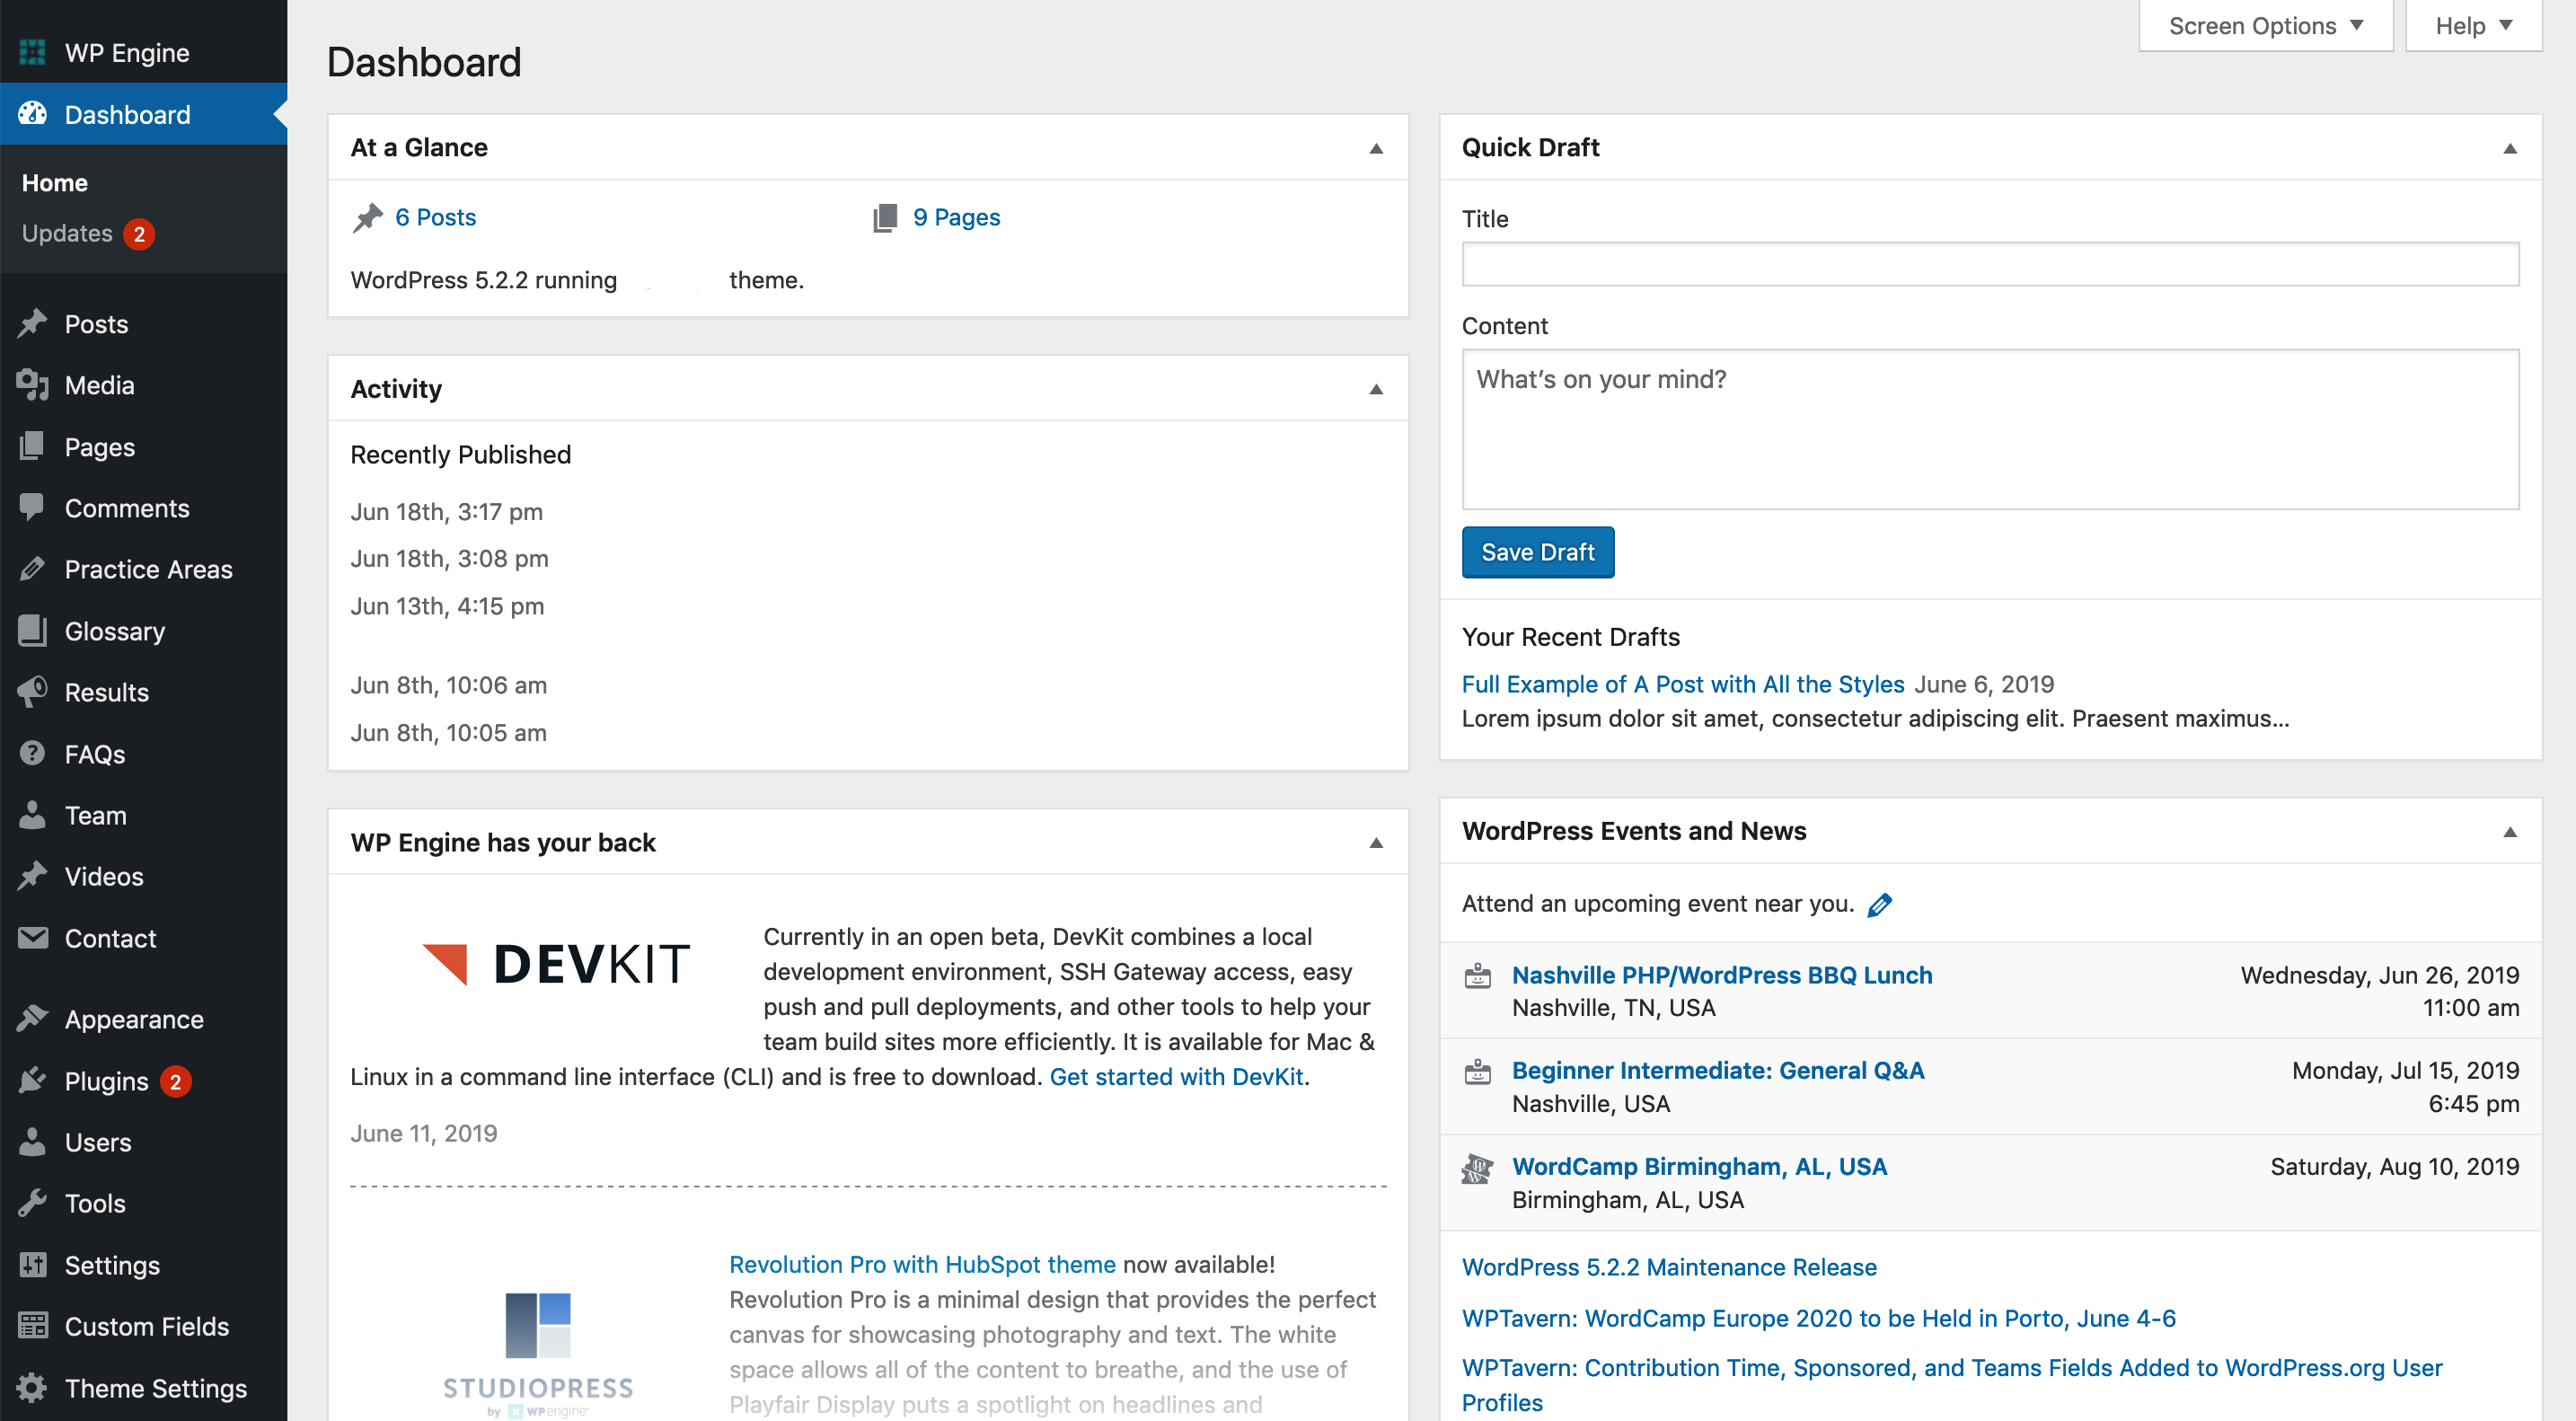
You can pretty much ignore anything in the middle of this page, which typically consists of WordPress company level news, as well as some of the latest activity on your website. The most important part of this page, is the left hand menu, which contains everything you’ll need to edit the content and images on your site.
Here’s a quick breakdown of where each item is on the menu that we’ll be looking today (you can click on it to enlarge to full size):
Now that we’re familiar with the menu, let’s crack on with editing some content!
Posts
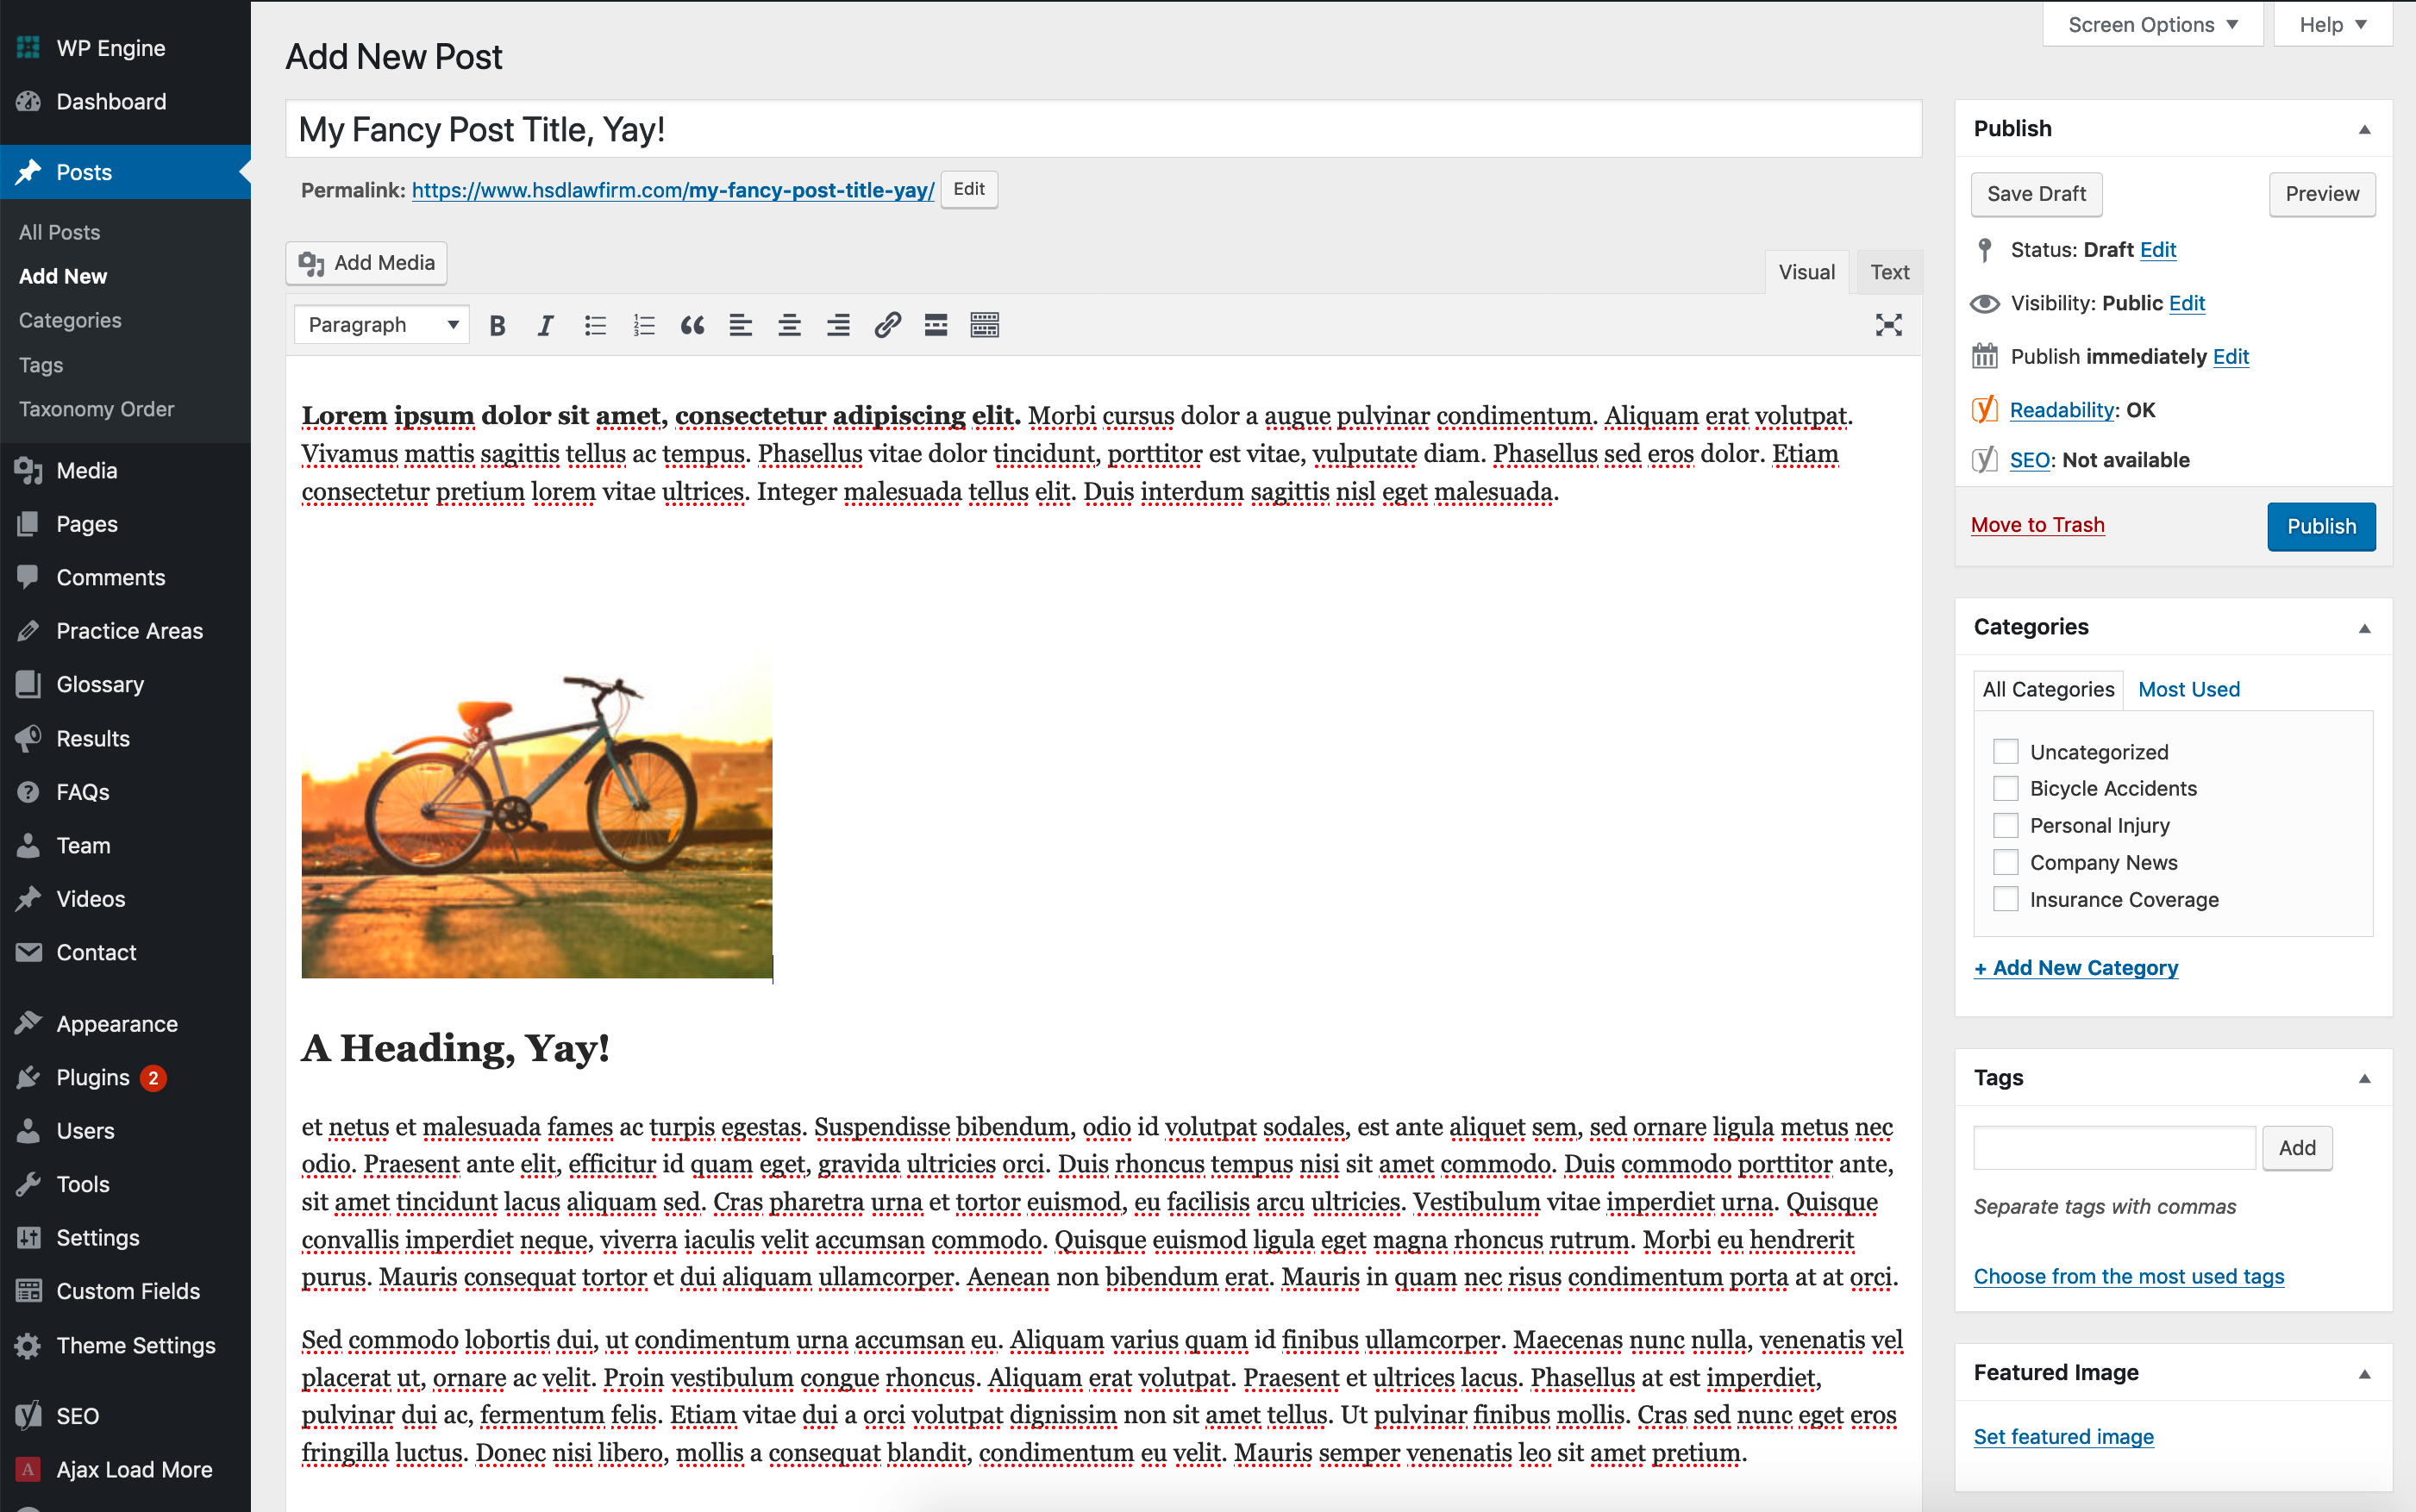
The Posts area is where you add your news and/or blog posts, any relevant categories and their tags if necessary. Usually, these pages are just plain content editors and don’t really have any settings or custom fields to edit. To add a new posts, hover over the “Posts” link in the admin menu and click on “Add New”. You’ll get a screen that looks similar to this:
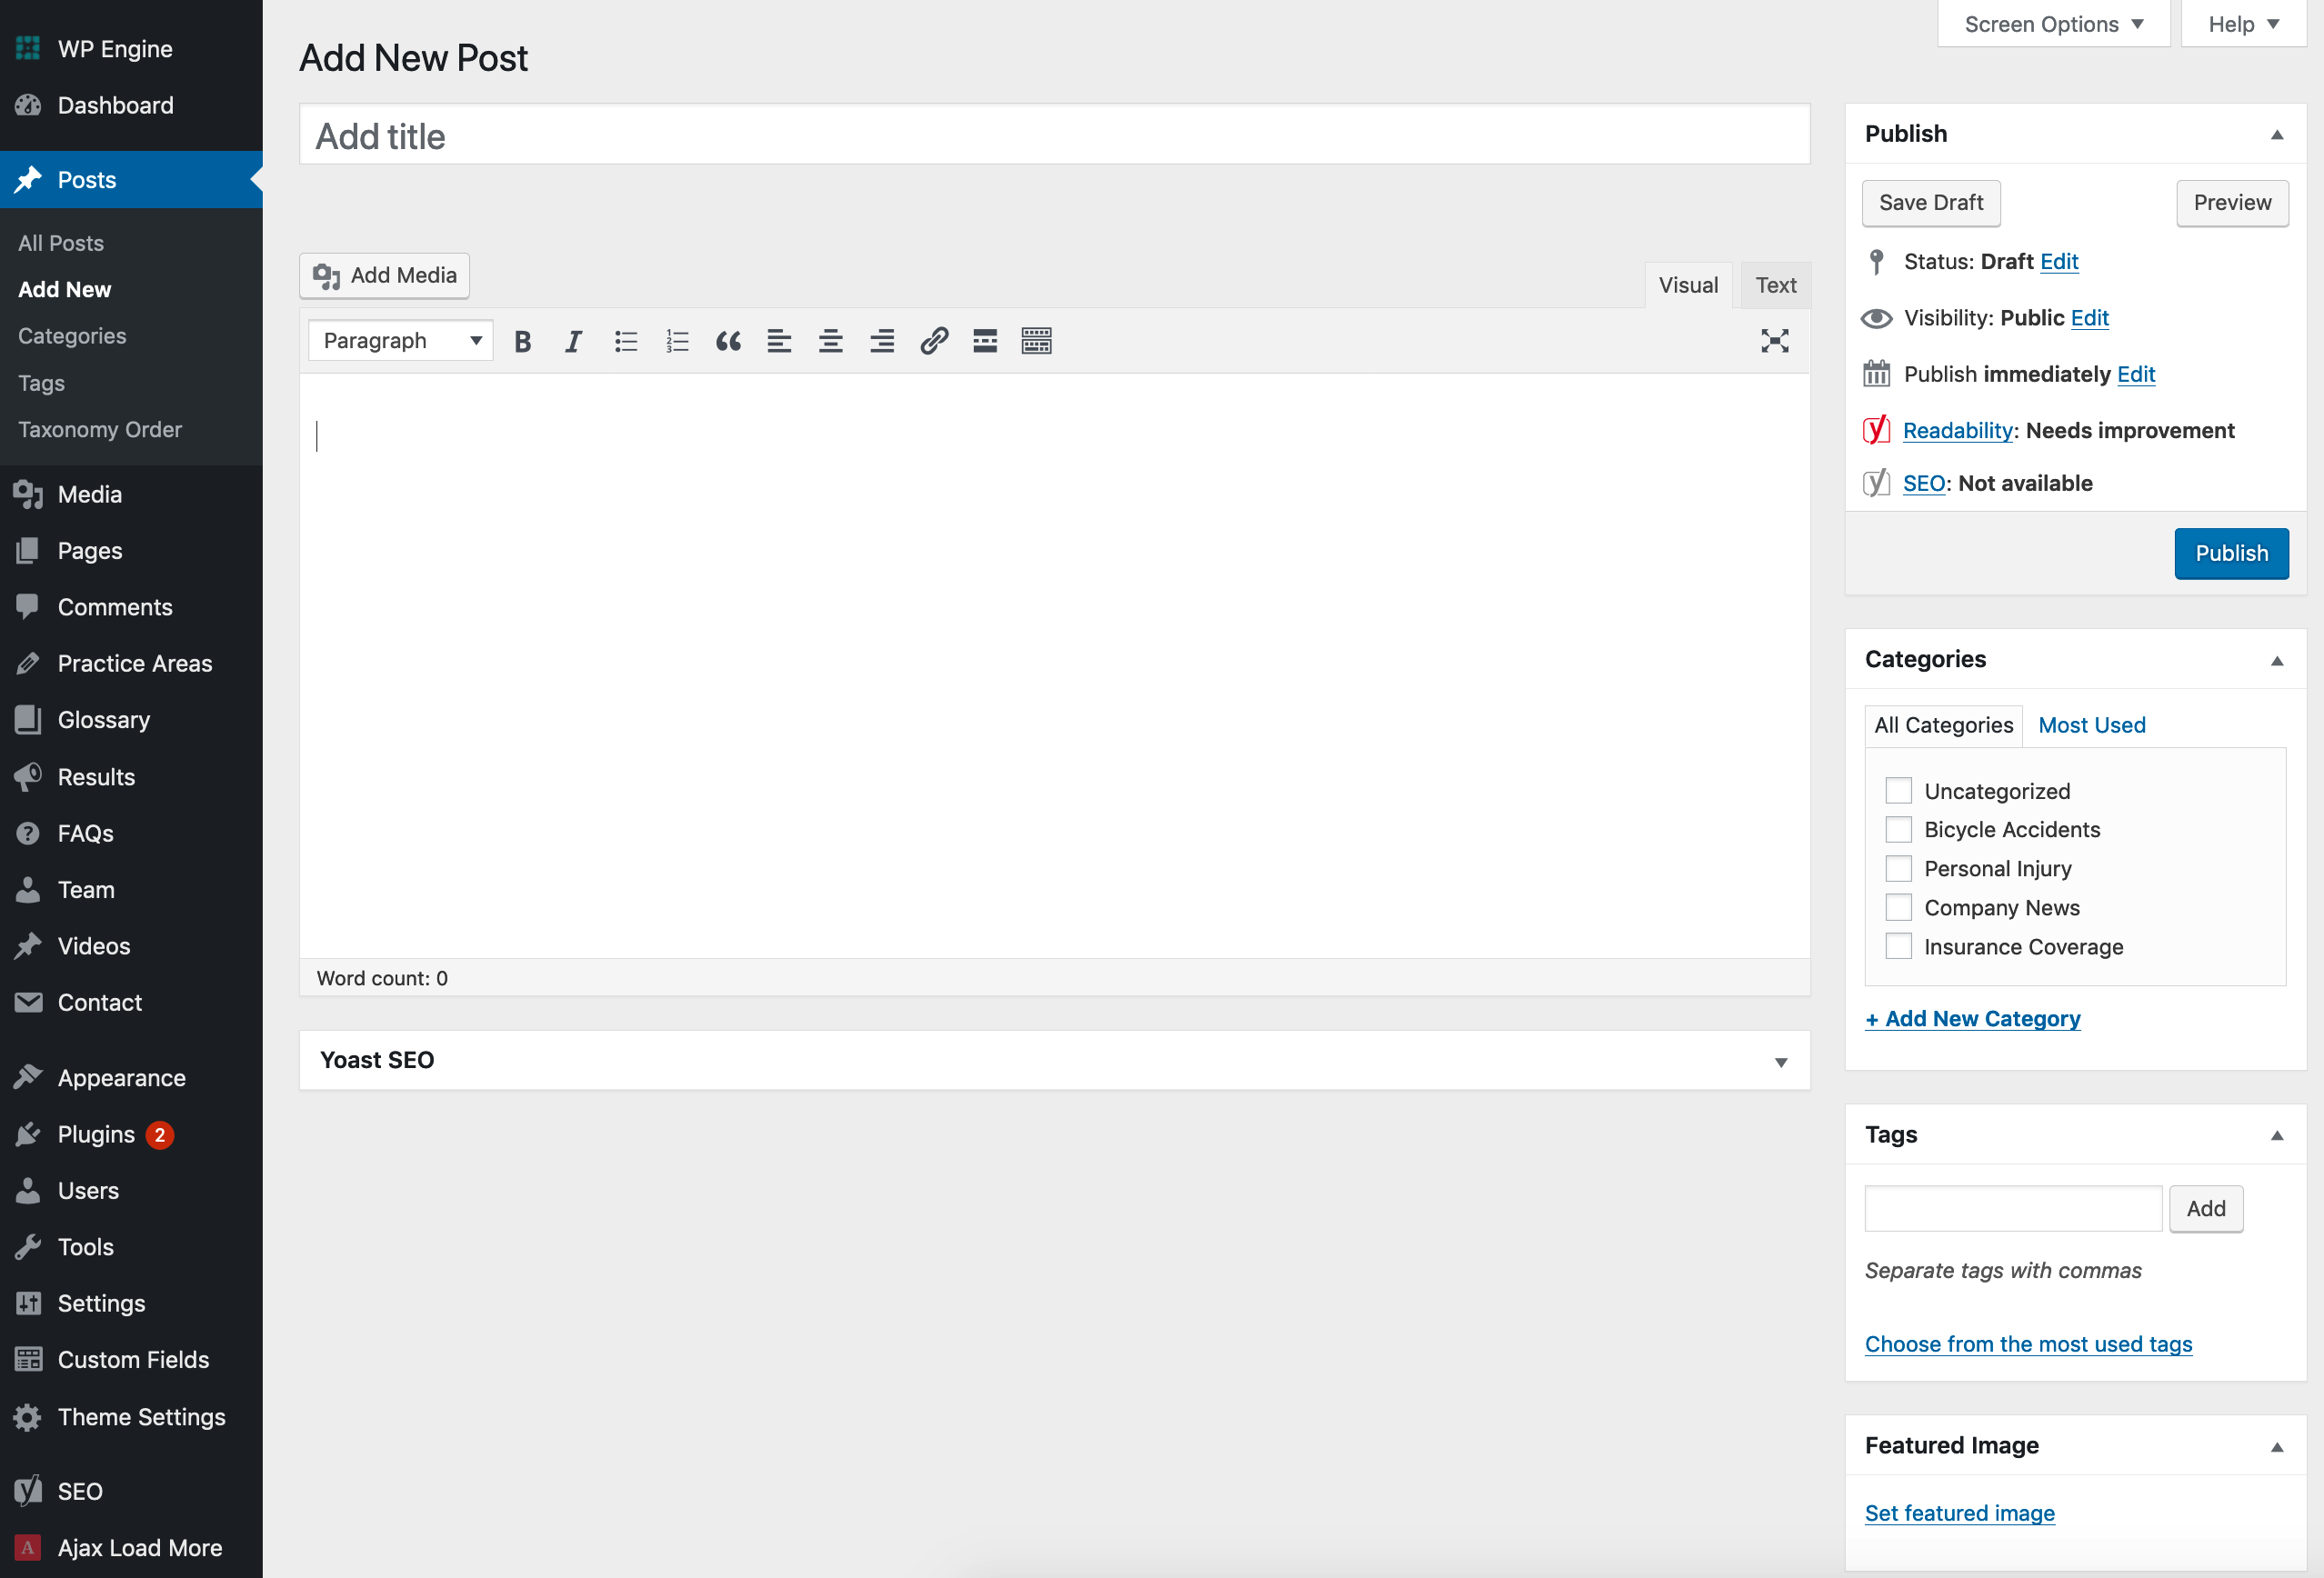
As you can see from the screenshot above, the main column is where you add your post’s title and content. From the toolbar icons you can select heading levels, bold or italicize text or create lists, similar to using Microsoft Word.
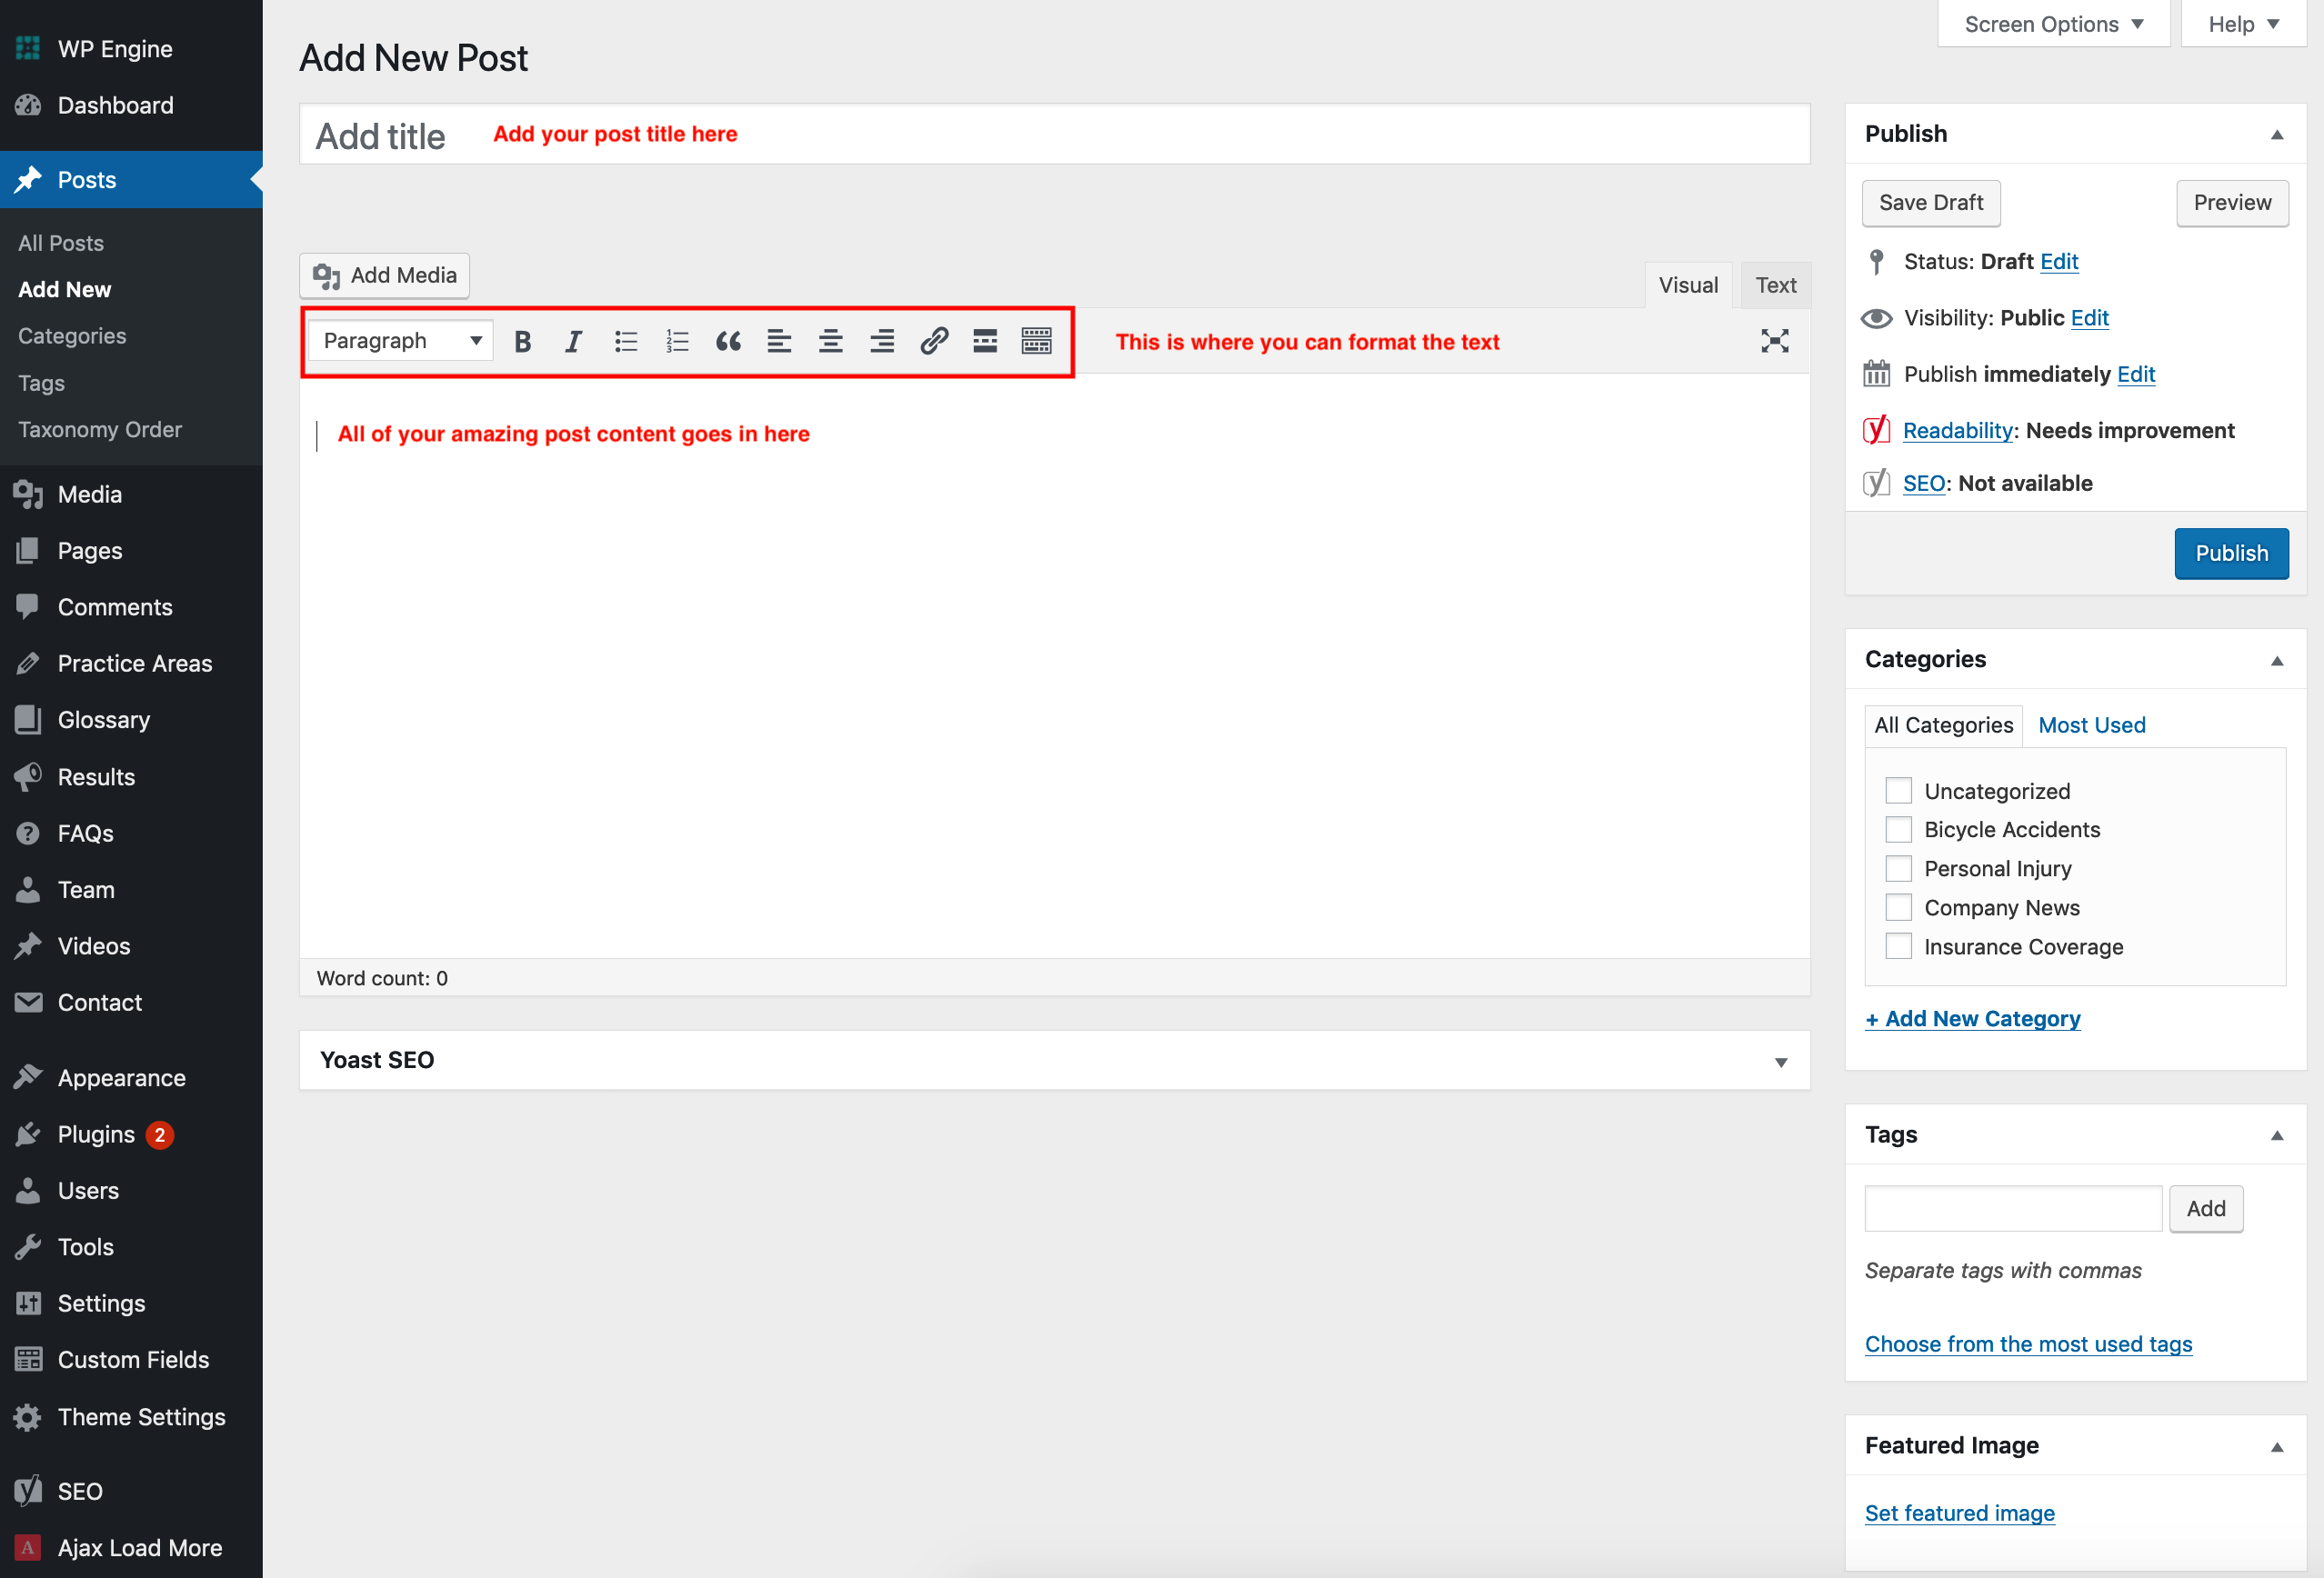
Clicking on the last icon in the editor will expand your text formatting options, allowing you to choose extra options like strike-through, underline, and more.

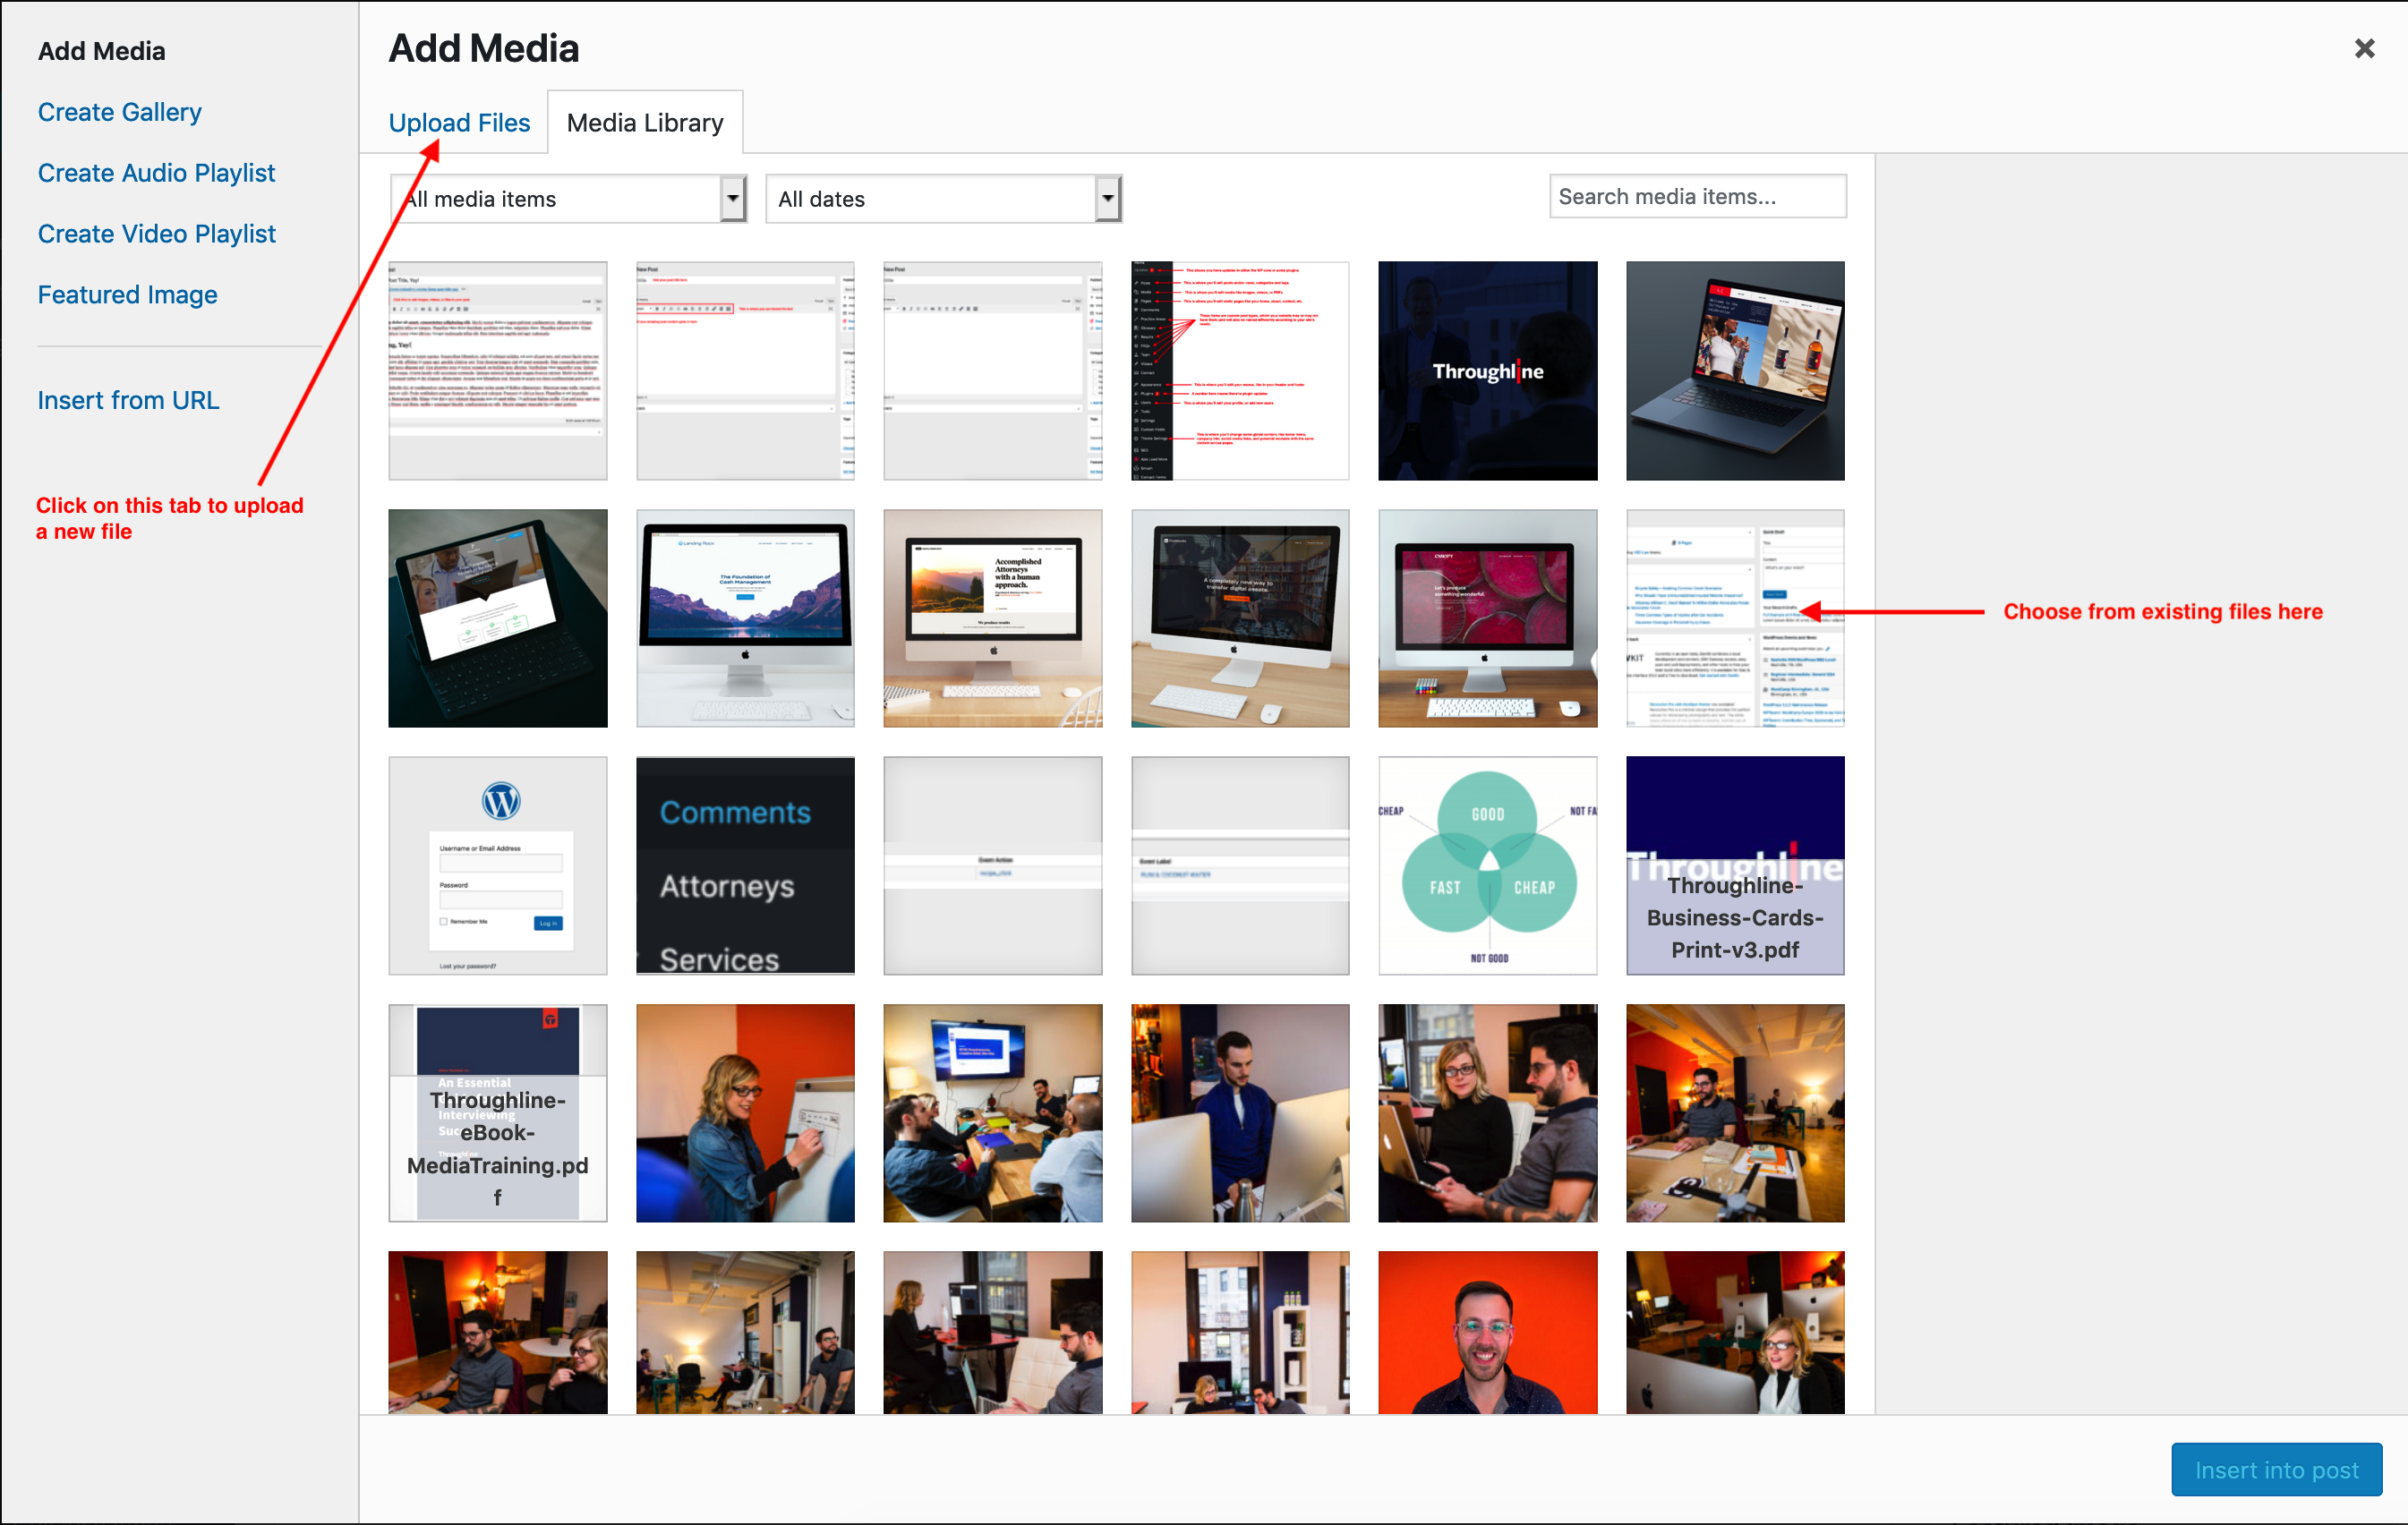
Once you’ve added some content, you may want to add some images. You do so by click on the “Add Media” button right above your text toolbar.
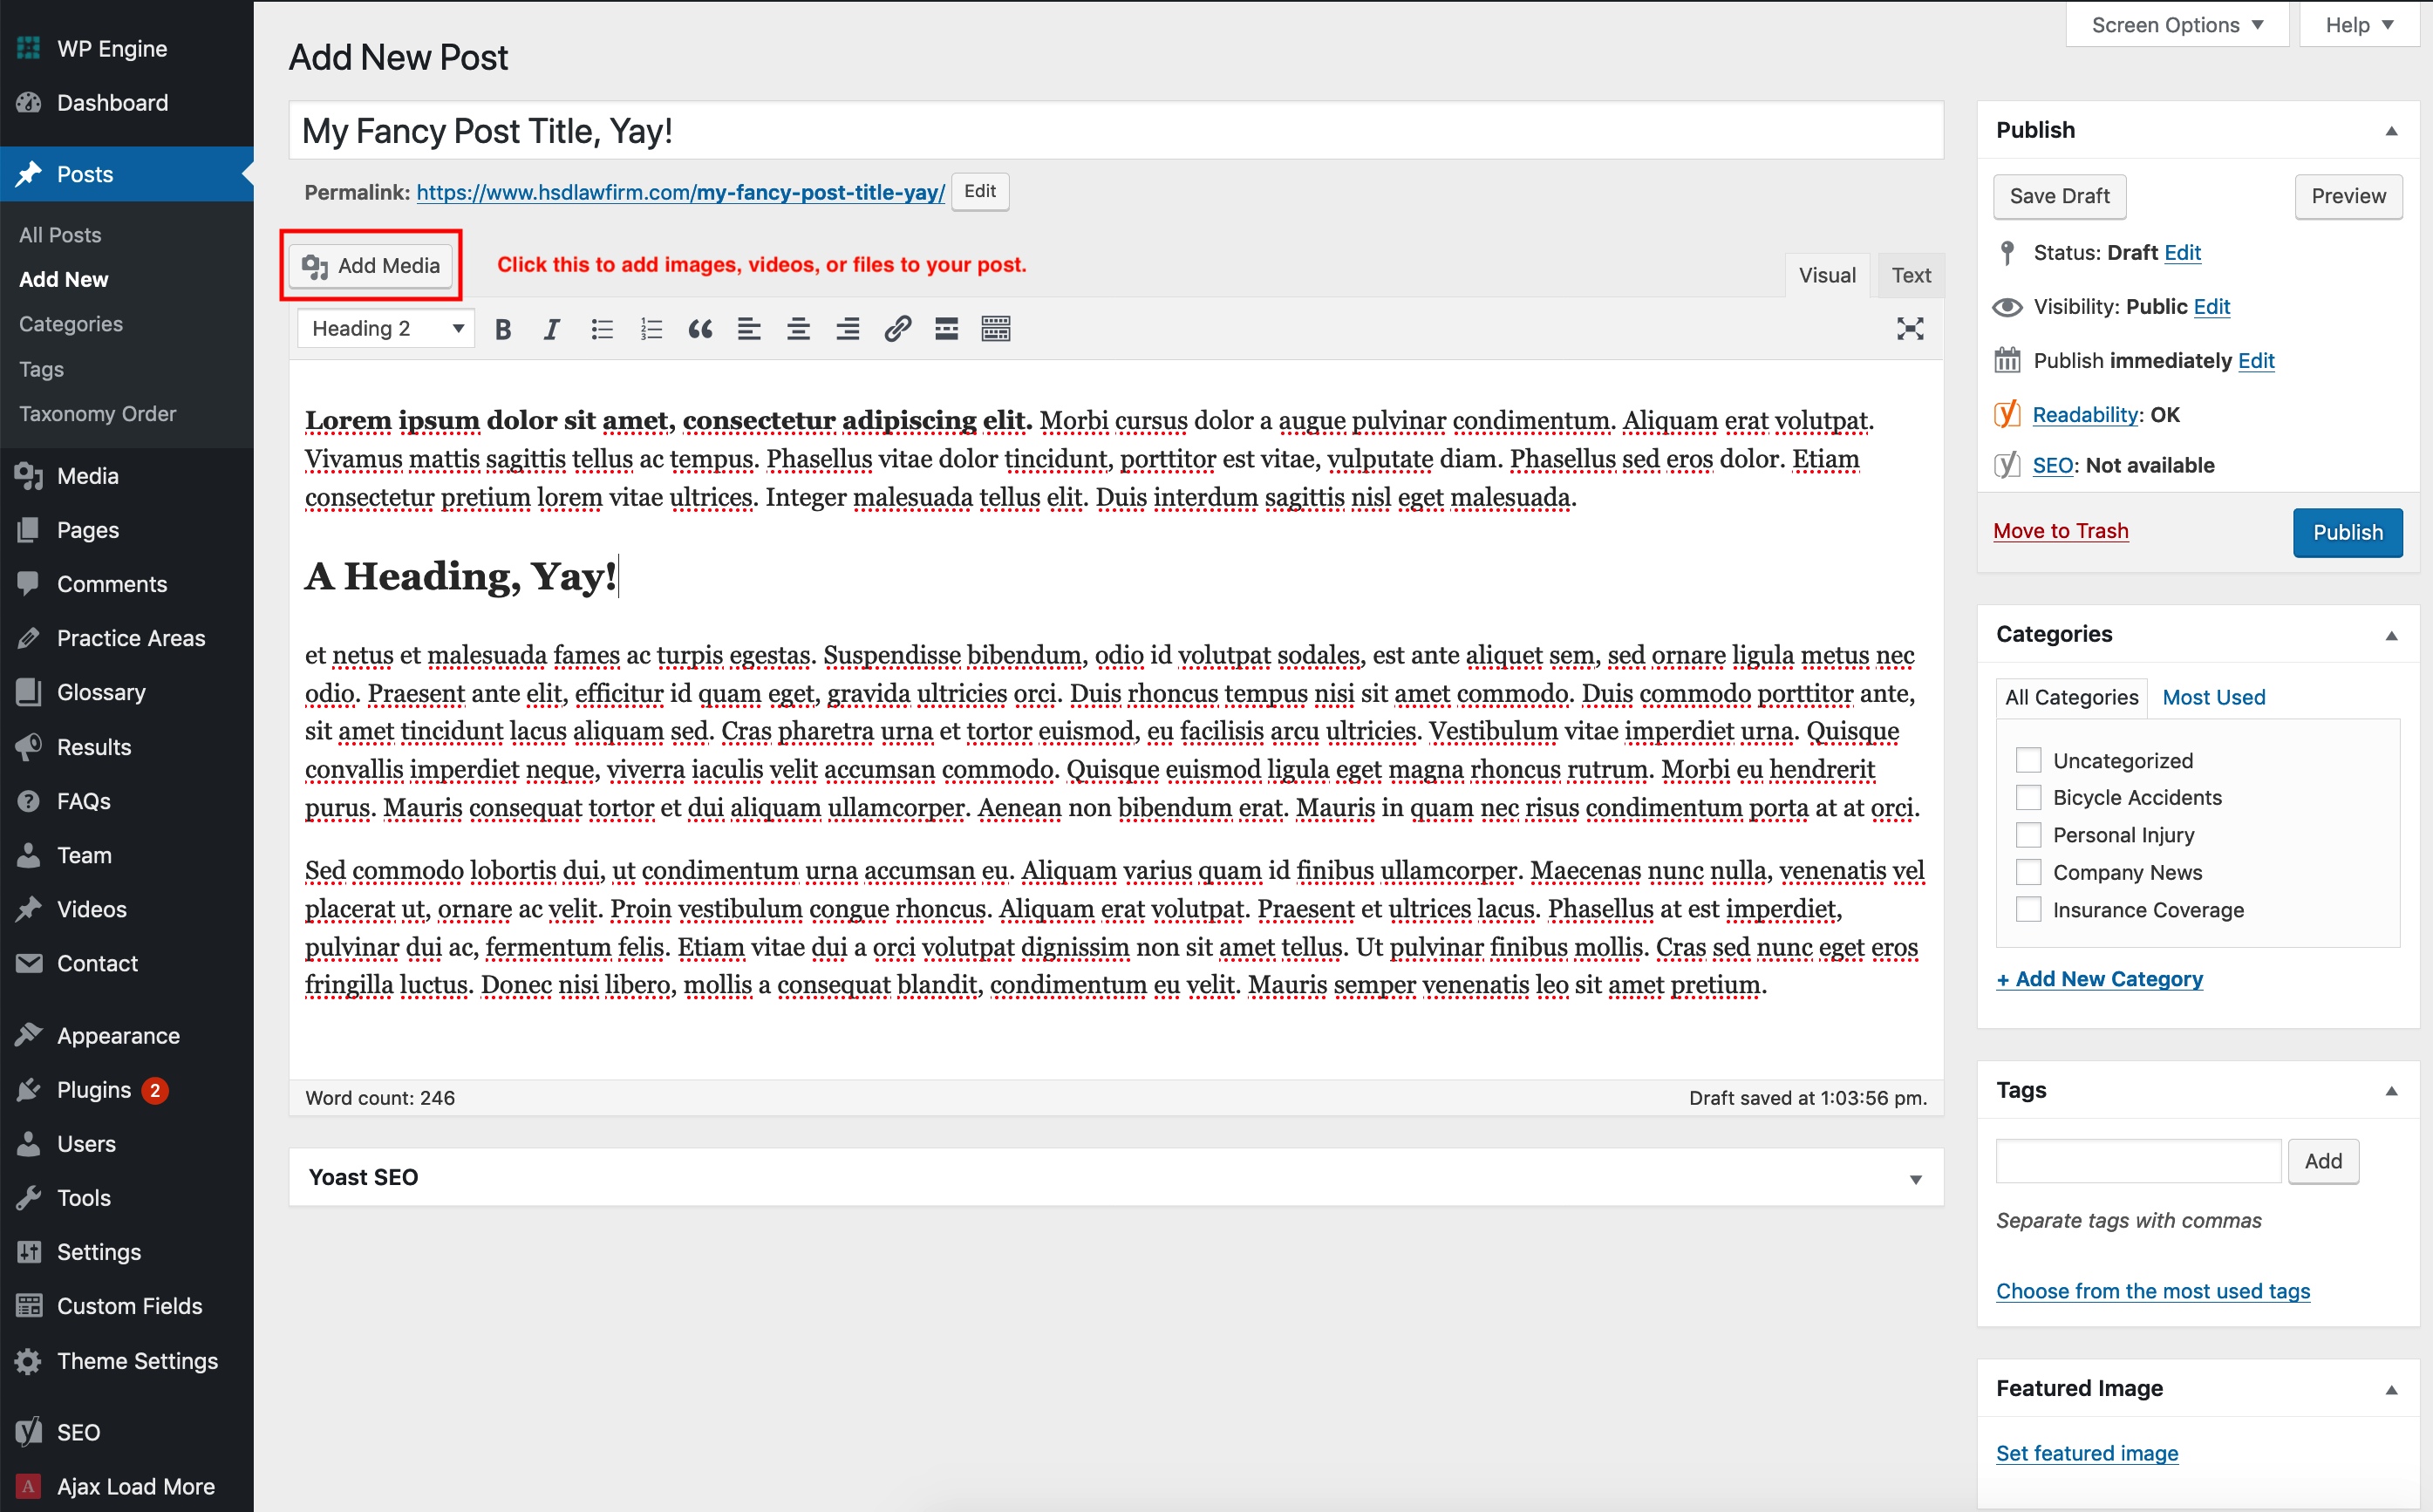
A window will popup, allowing you to choose an existing media item, or you can click on the “Upload Files” tag to add a new item.
After clicking on, or uploading an item, you’ll see some options on the very right hand side of the menu.
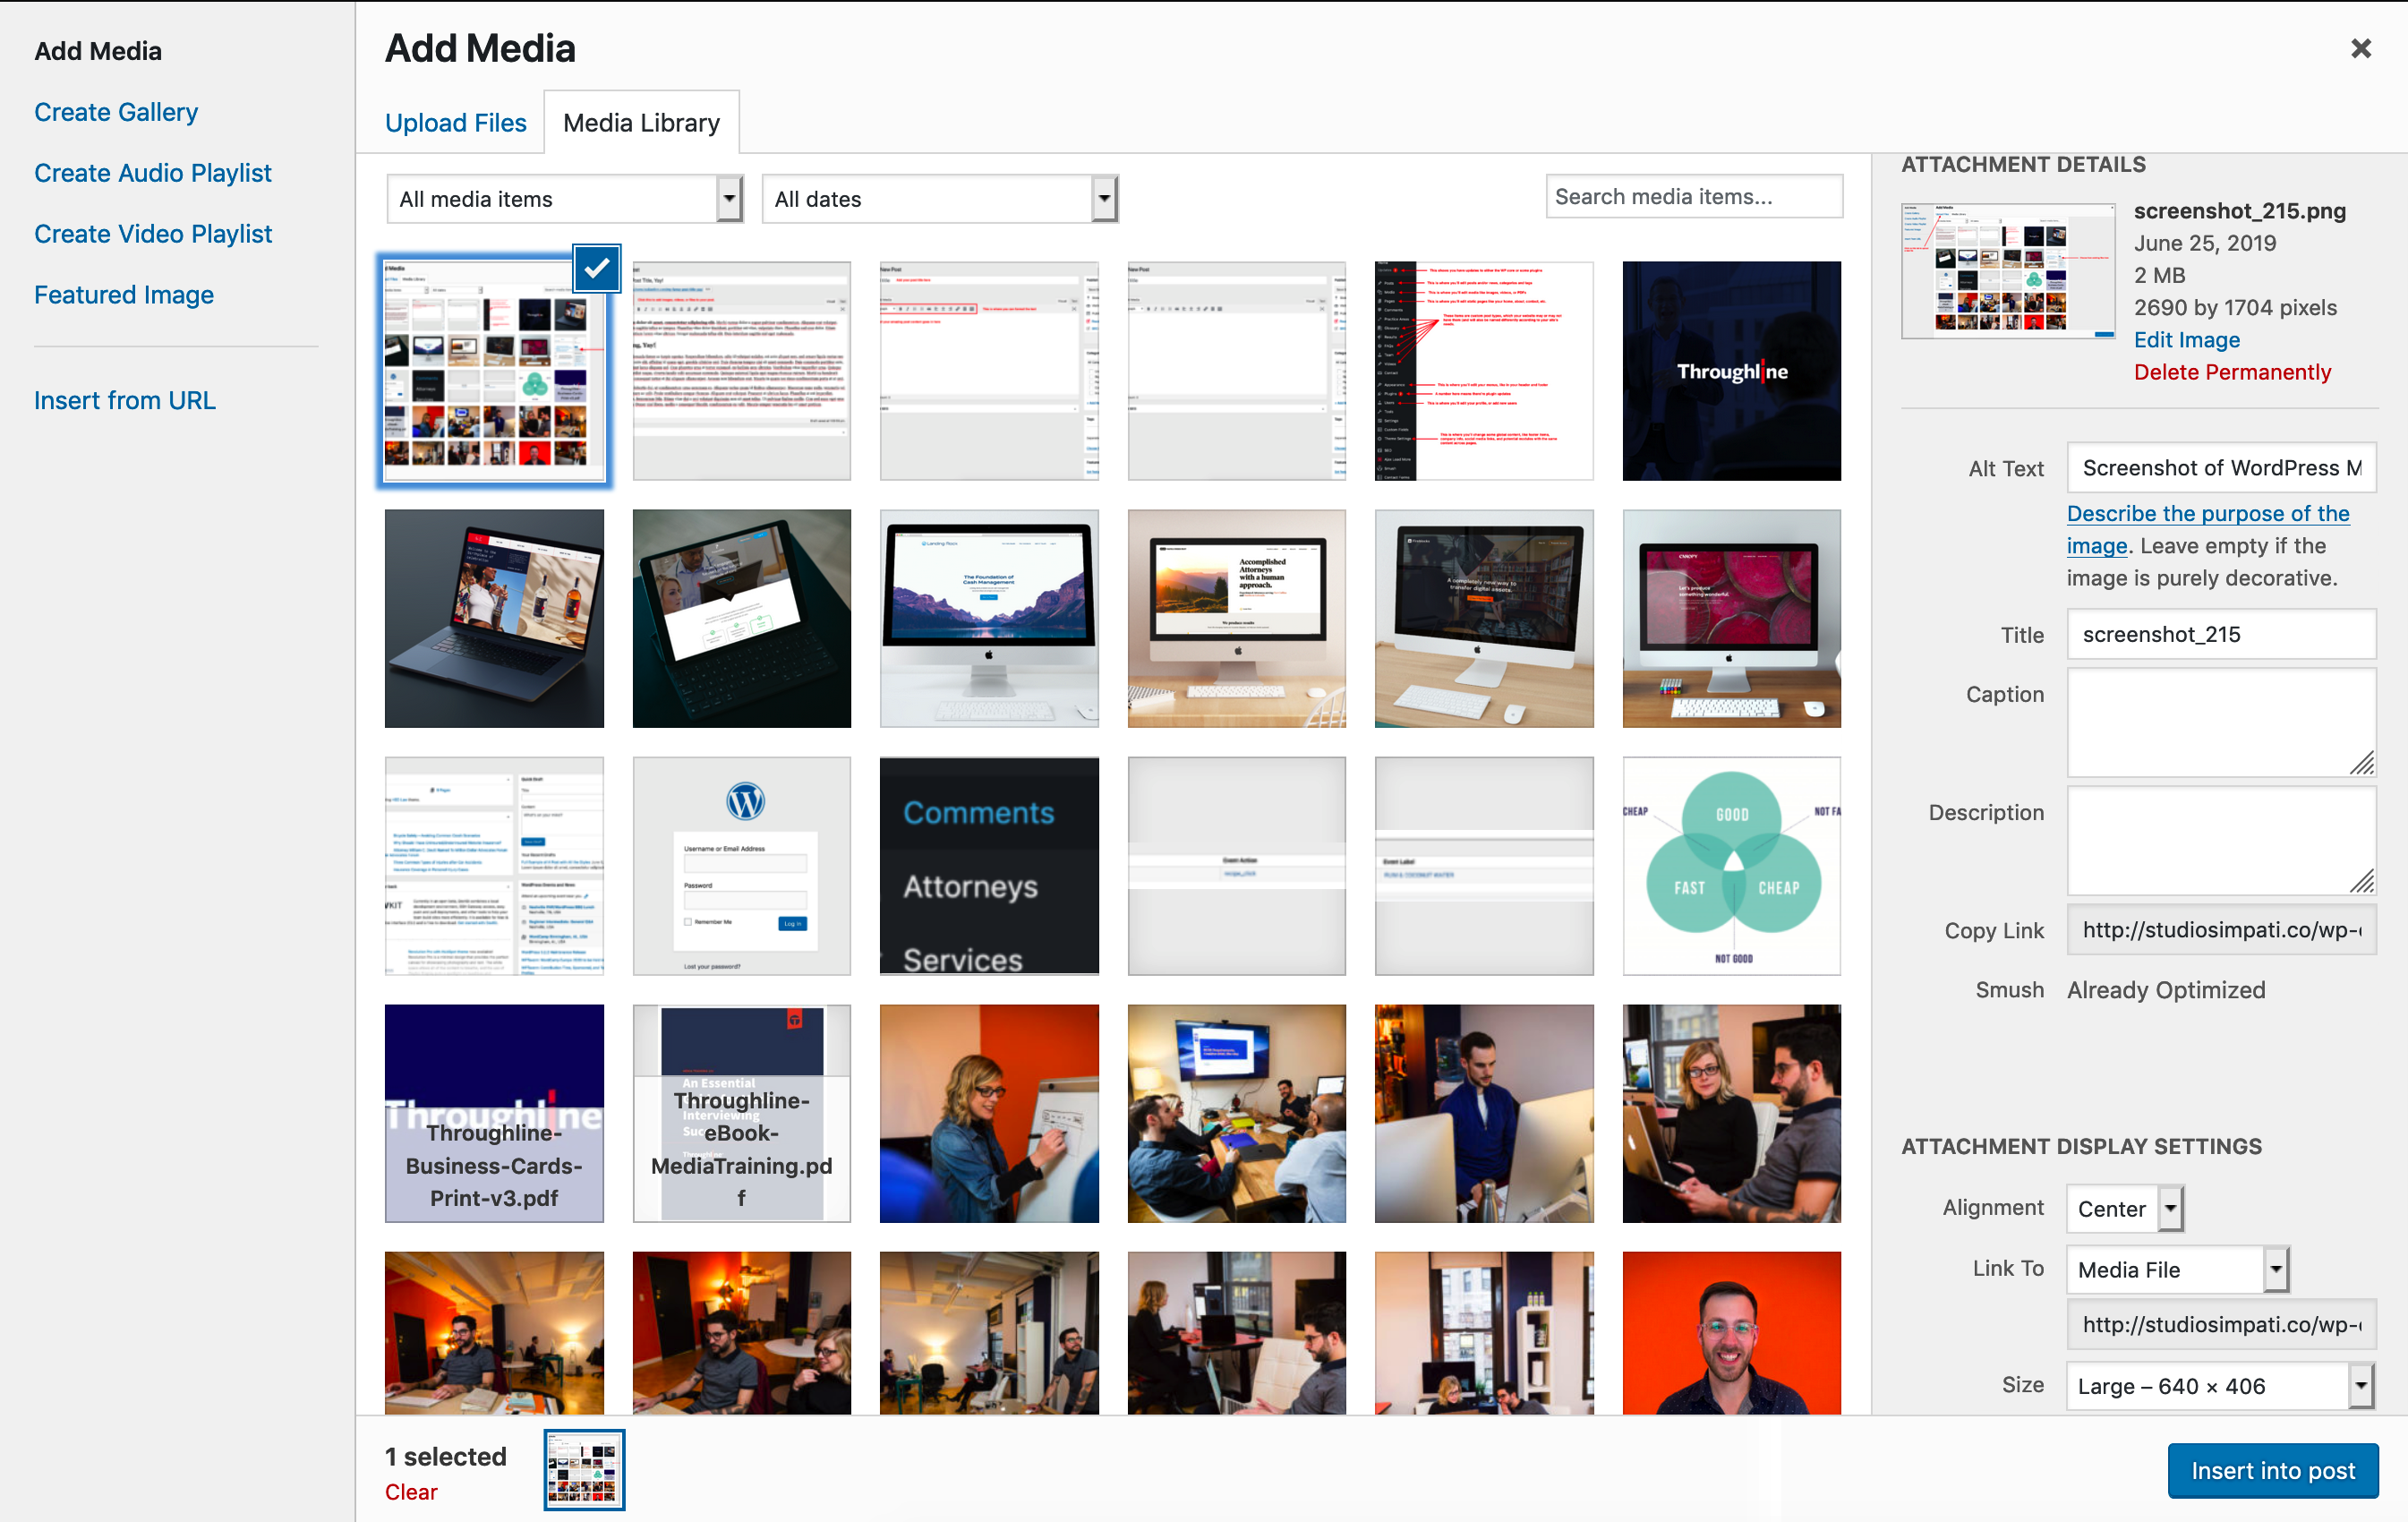
You should make sure to *always* add alt text to your image (the first field on the right column). This ensures people with accessibility needs like screen readers can describe the image to your user, as well as being a little boost for SEO.
You can then choose your image alignment (centered, left of text, right of text, or none), as well as the size and whether it should link somewhere or not. After clicking “Insert into post” you’ll see it right in your editor.
Once you’ve finished your content and are ready to either save it as a draft to come back to later, or to publish it live, you’ll need to take a look at the right hand menu’s options. Here you can add categories and tags and/or a featured image (if your website supports that). Usually featured images show on the archive page (which lists links or all your posts) or at the top of the post’s page as a background image.
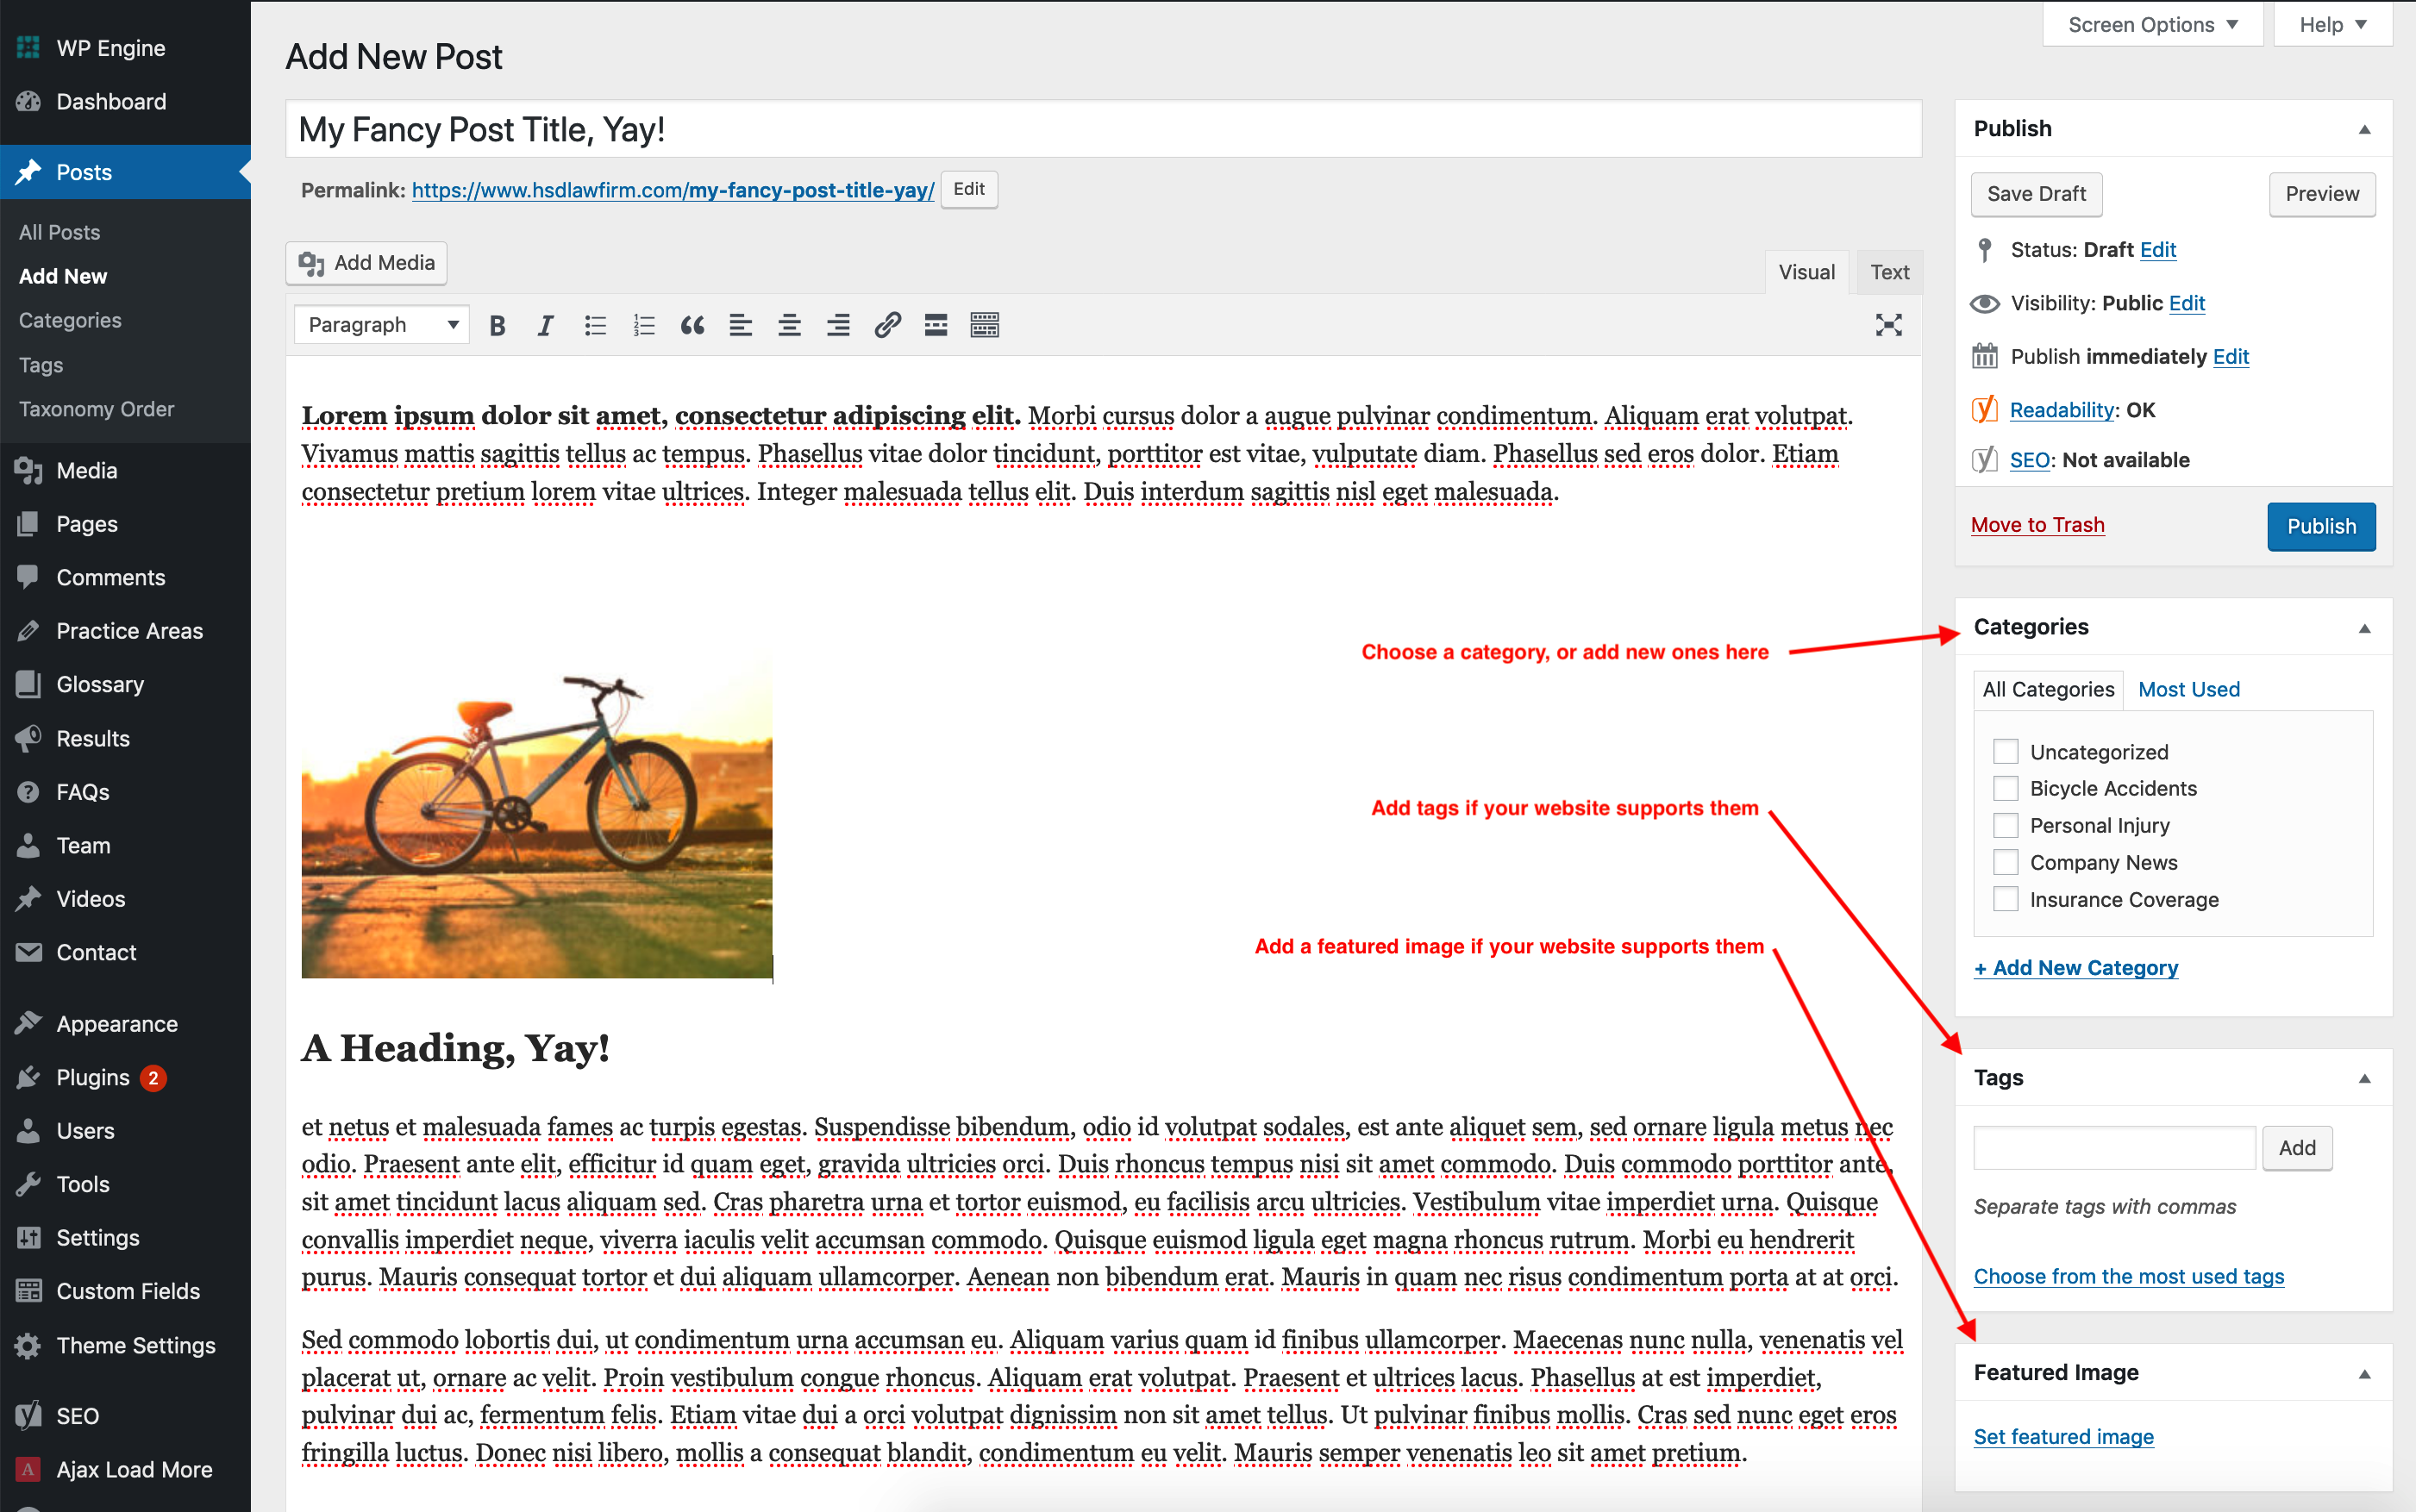
Once you’re ready, you can click “Save Draft” to save it, but not publish; “Publish” to set it live now; or “Preview” to view it on the website without publishing (only signed in users can access the URL).
Now you have your very own post!
Pages
The “Pages” section is where you’ll do most of your content editing and contains all the regular non-post pages. Most pages have their own template that will already be selected for you – but you can also create new pages and assign the same templates to those to get the layout and custom fields you’d like.
Let’s say you want to edit your homepage. Simply hover over “Pages” in the admin menu and click on “All Pages”. You’ll be taken to a list of pages that looks like this:
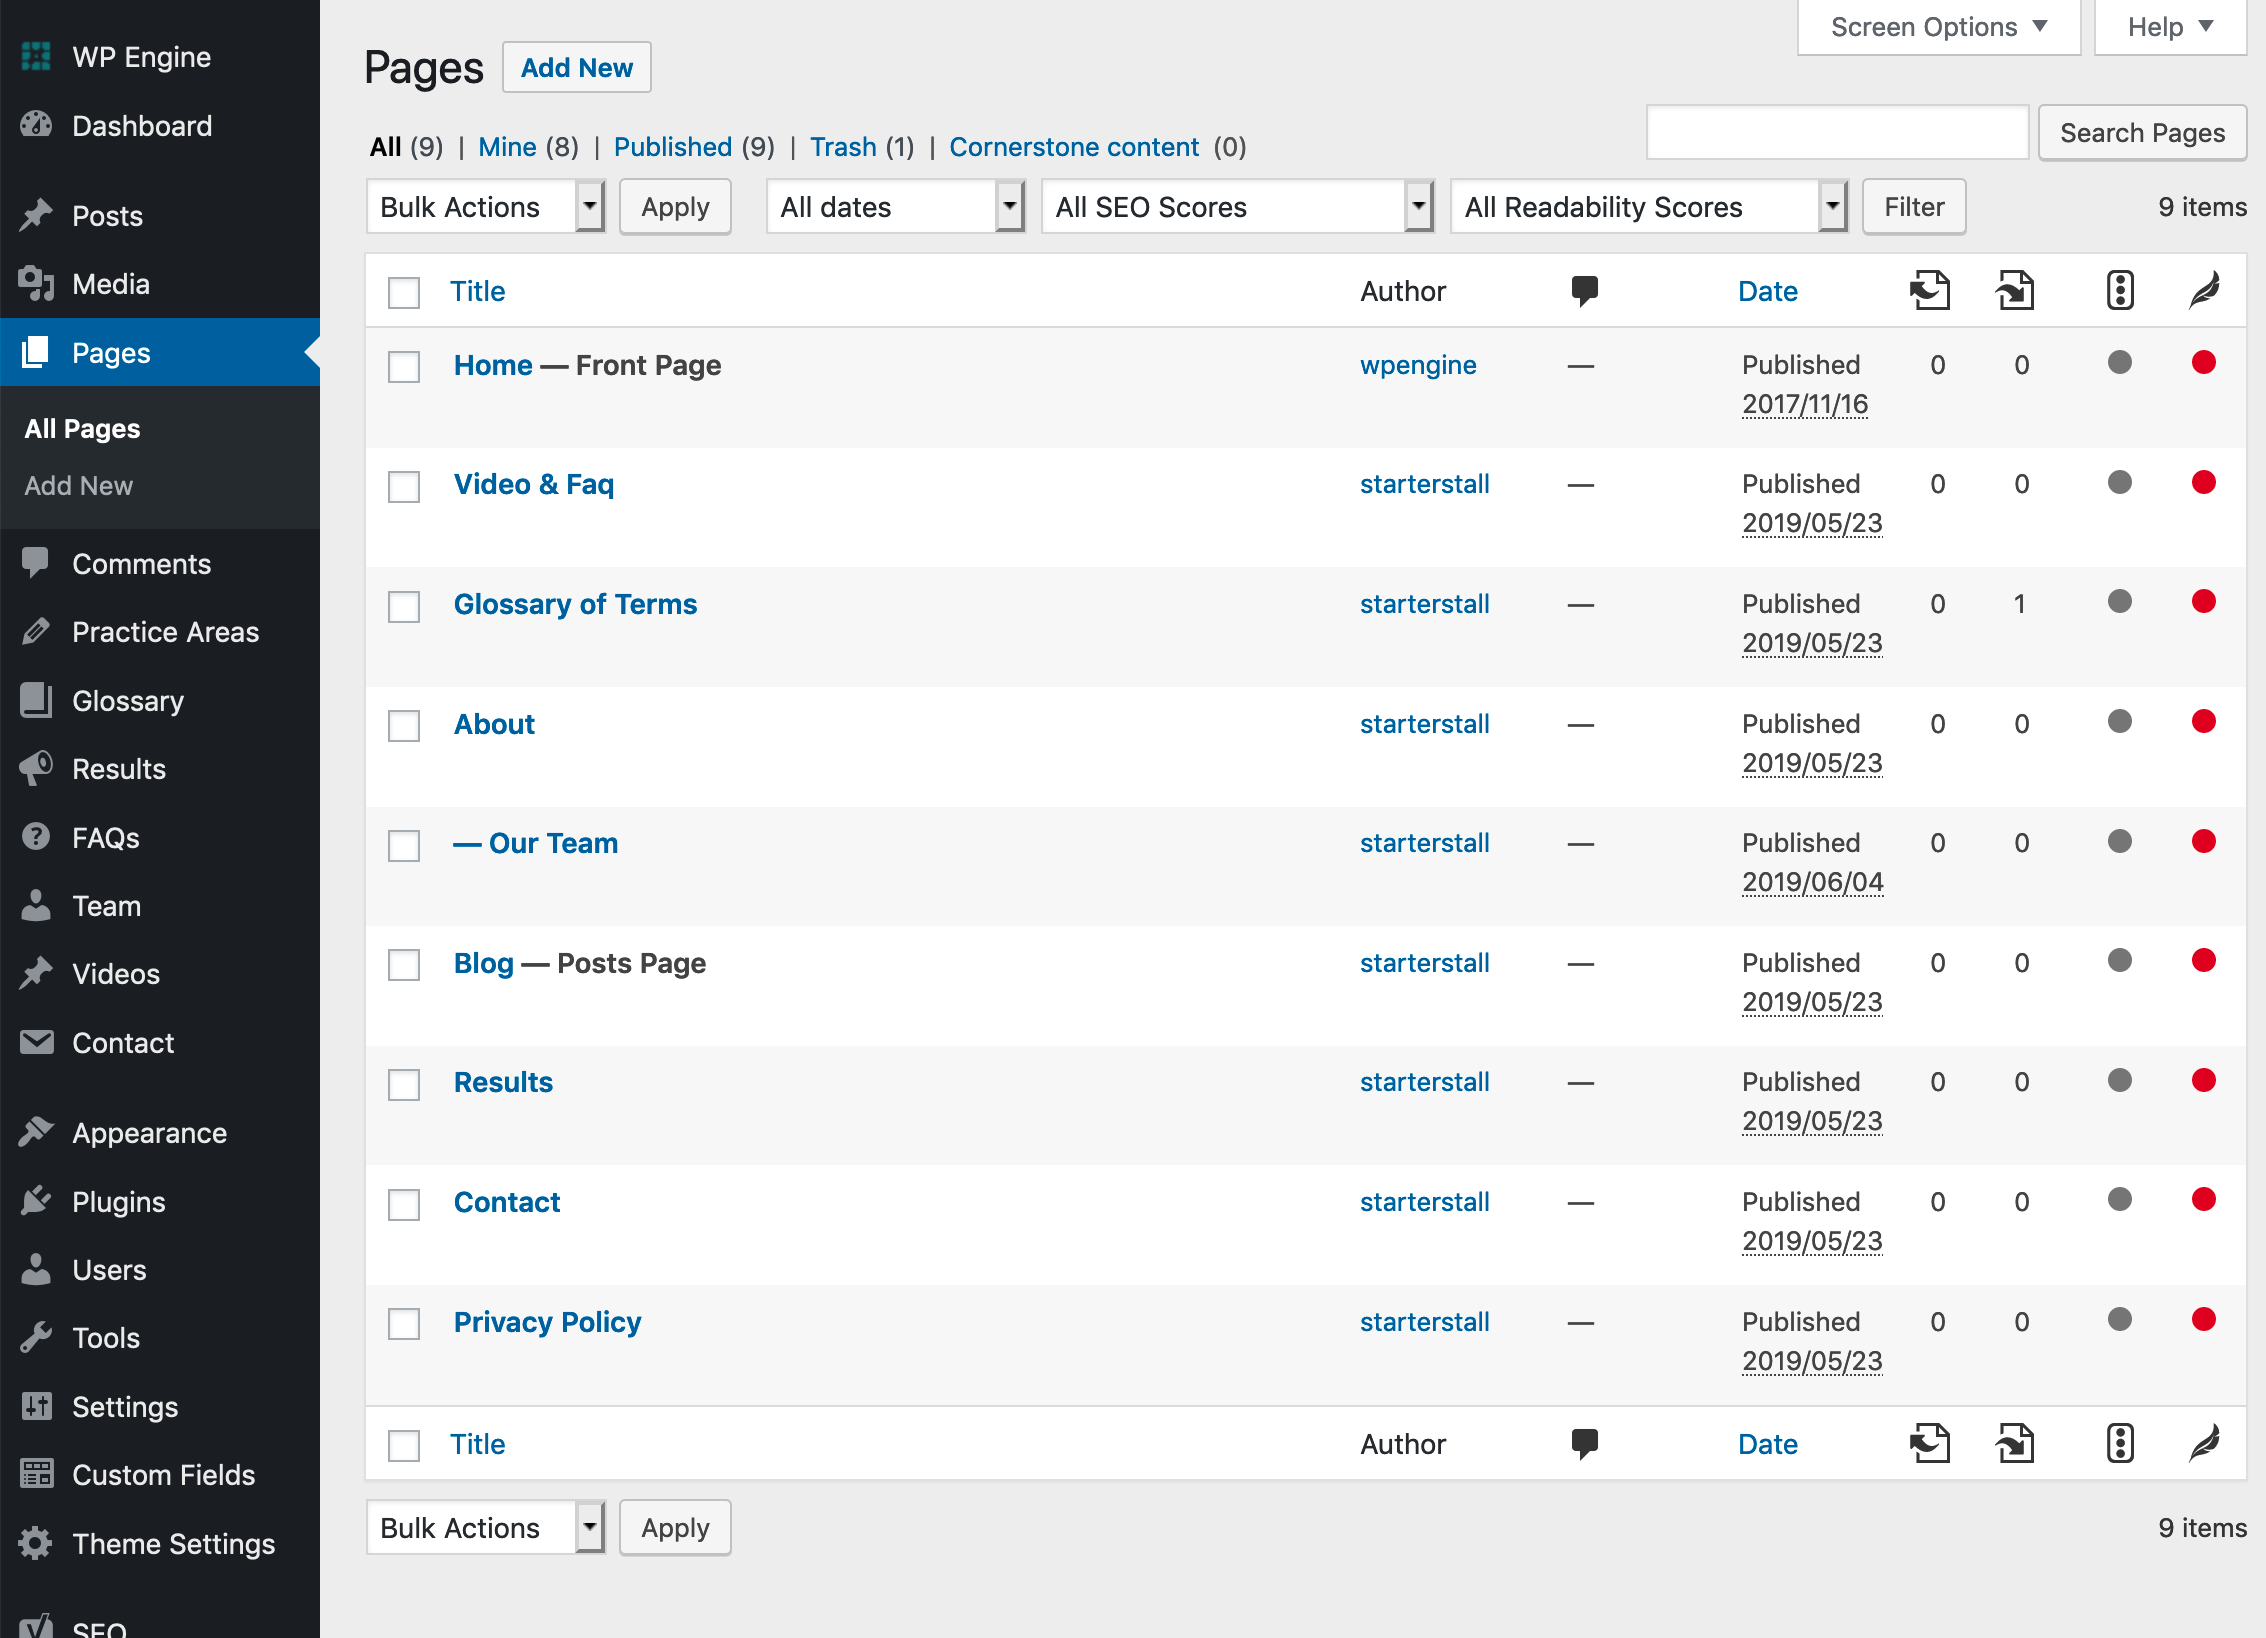
Clicking on the “Home” link will take us to the Page’s Edit screen.
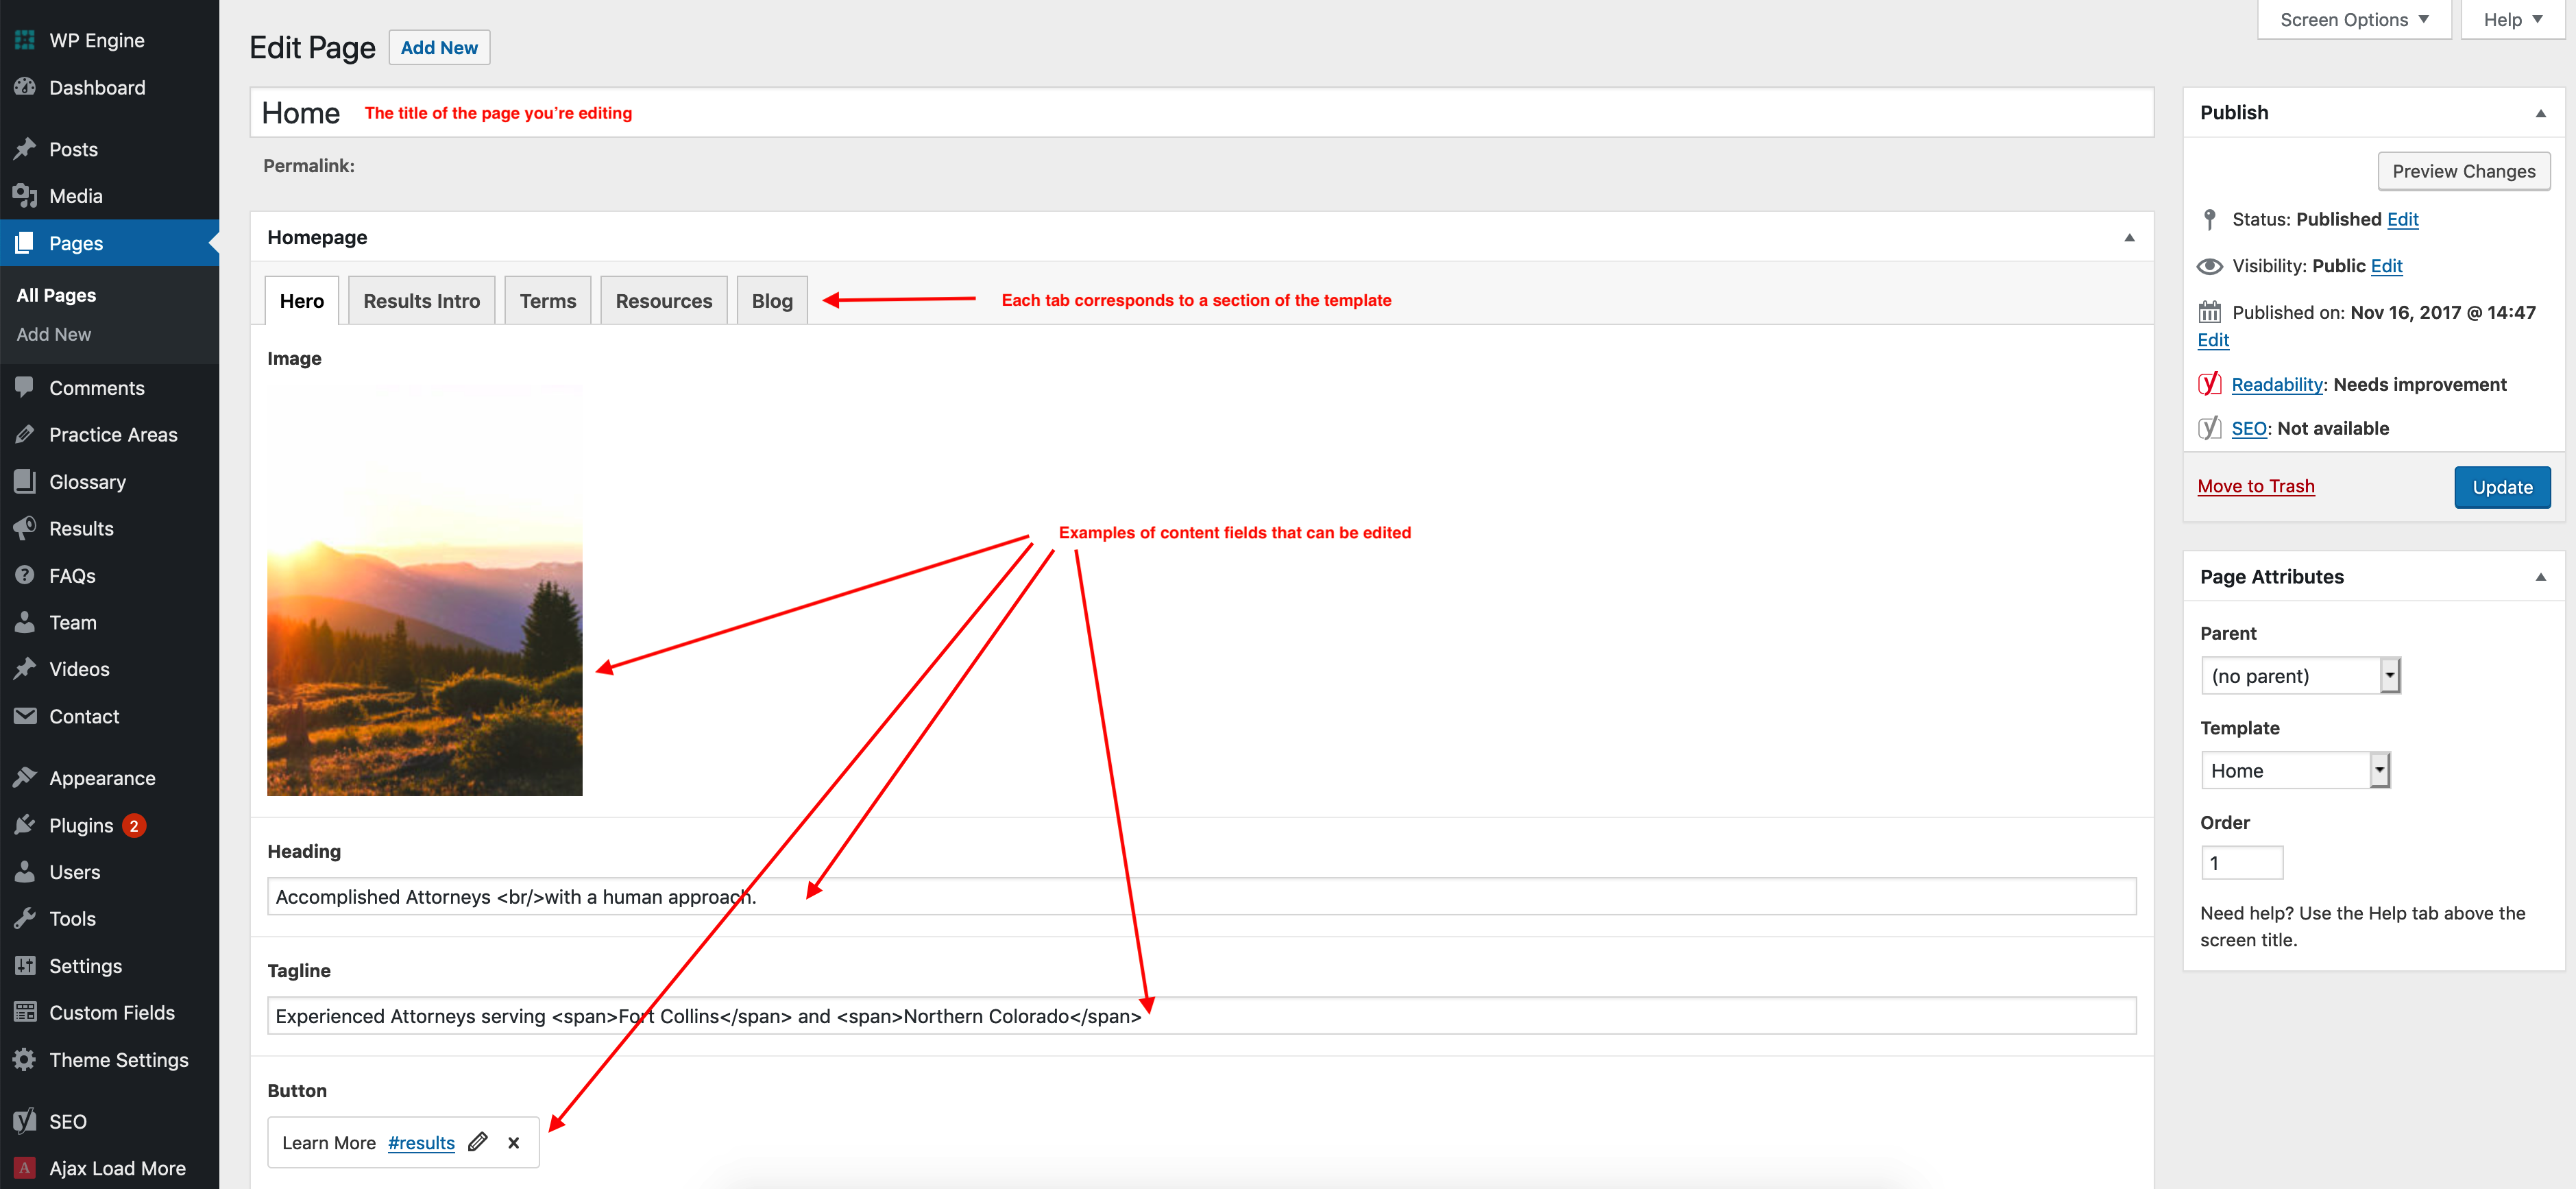
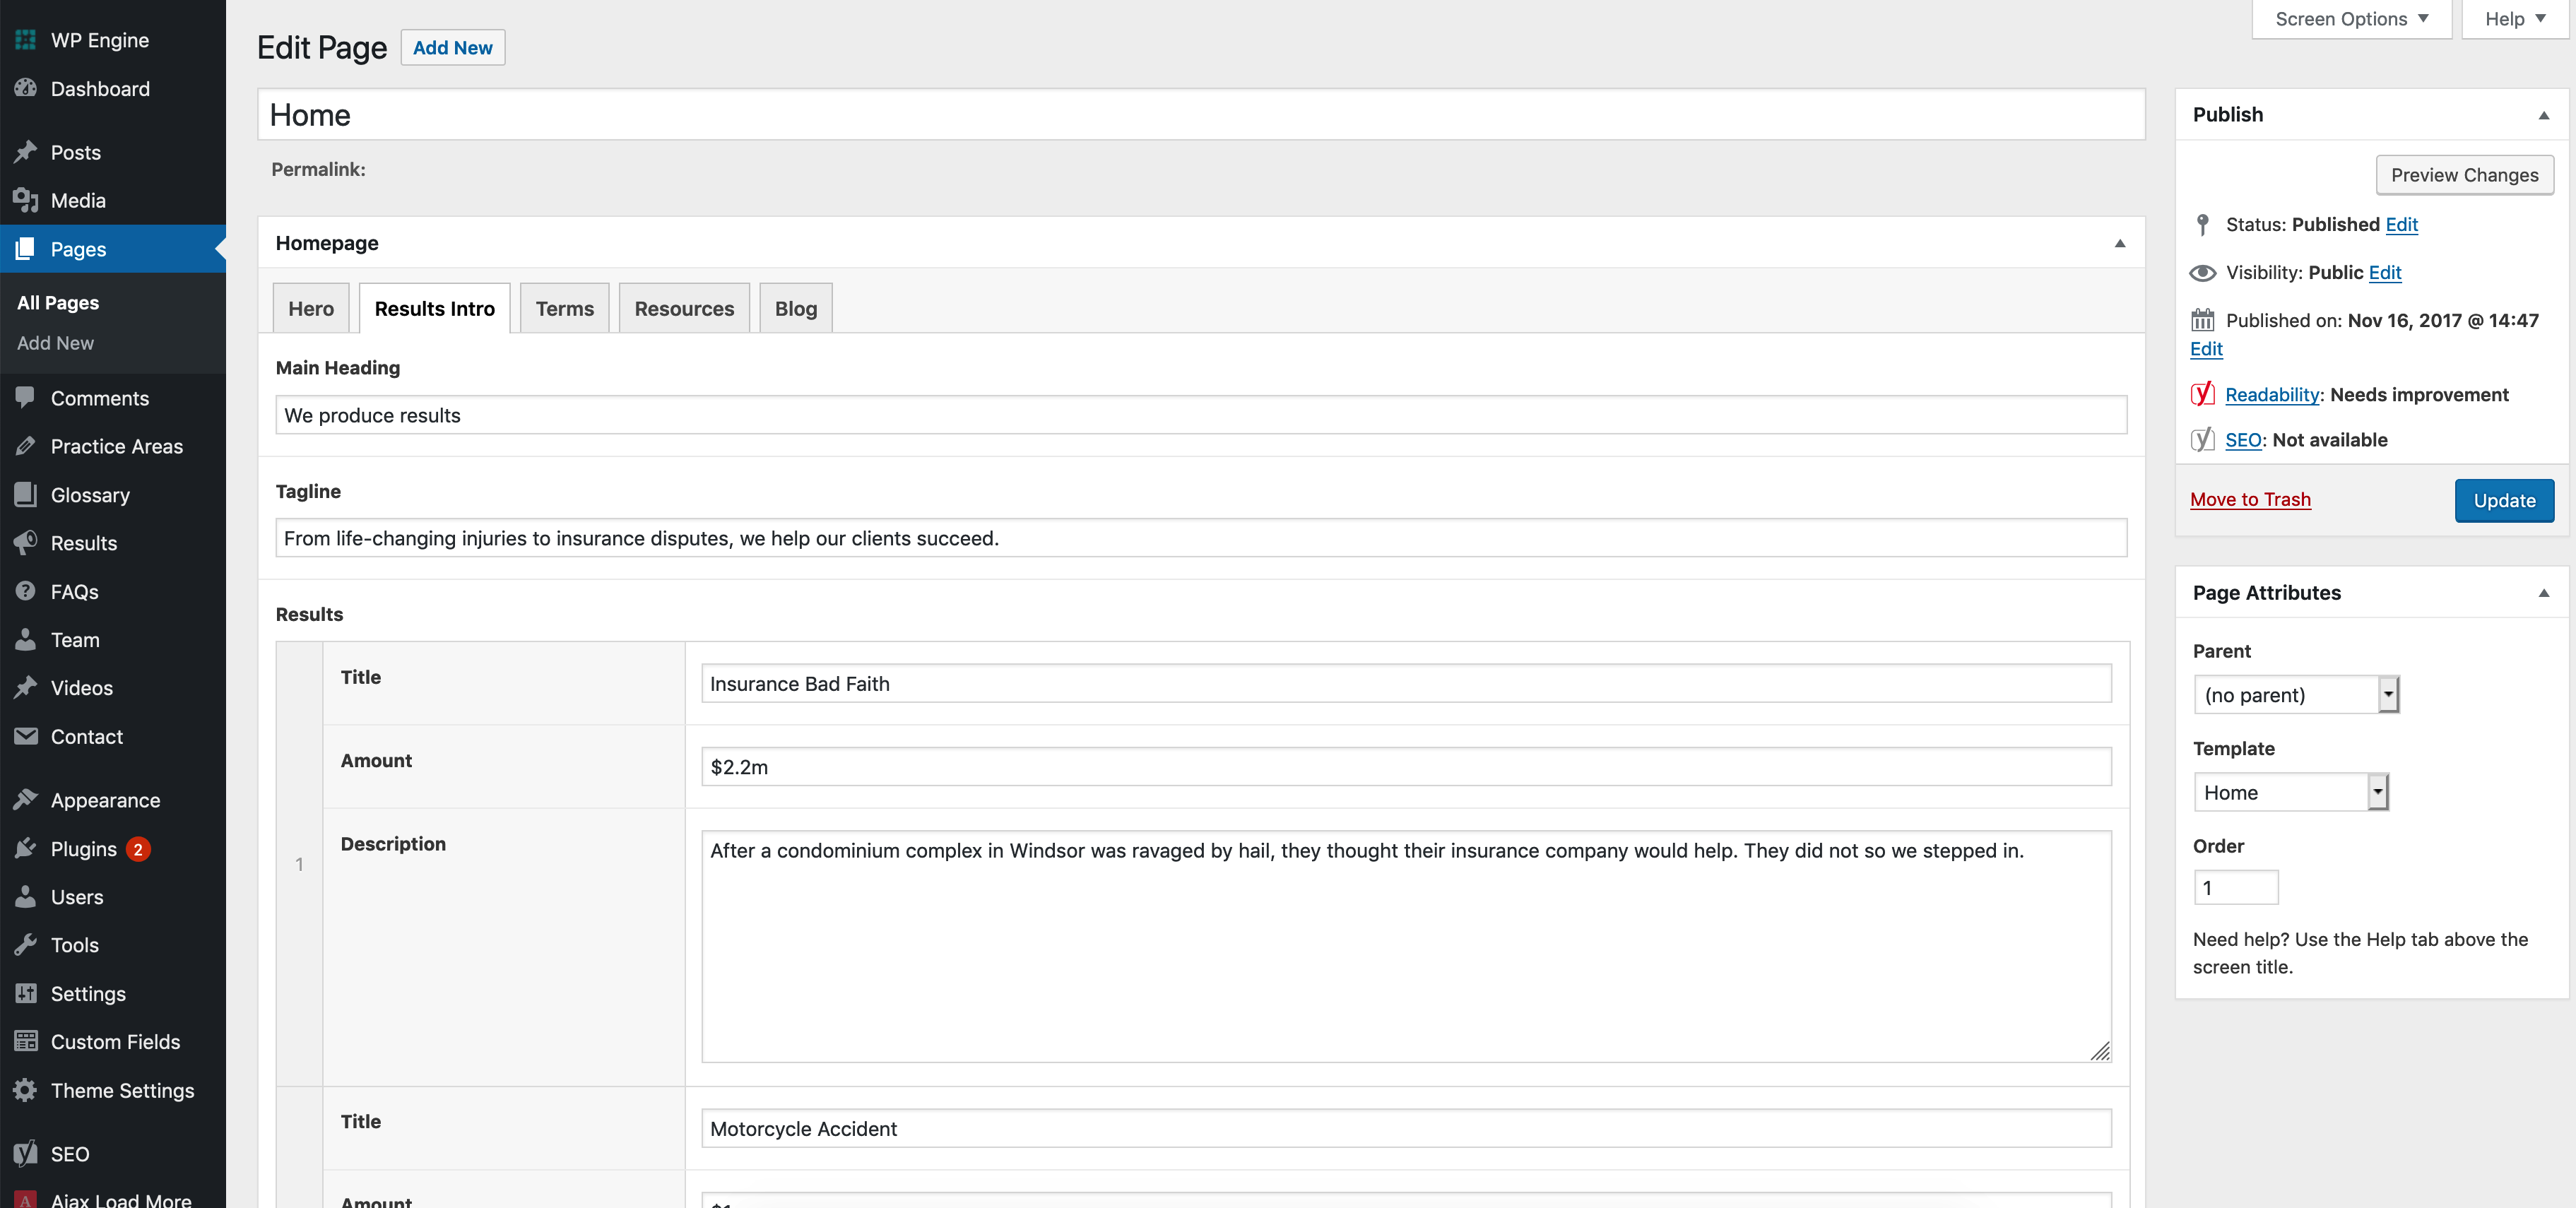
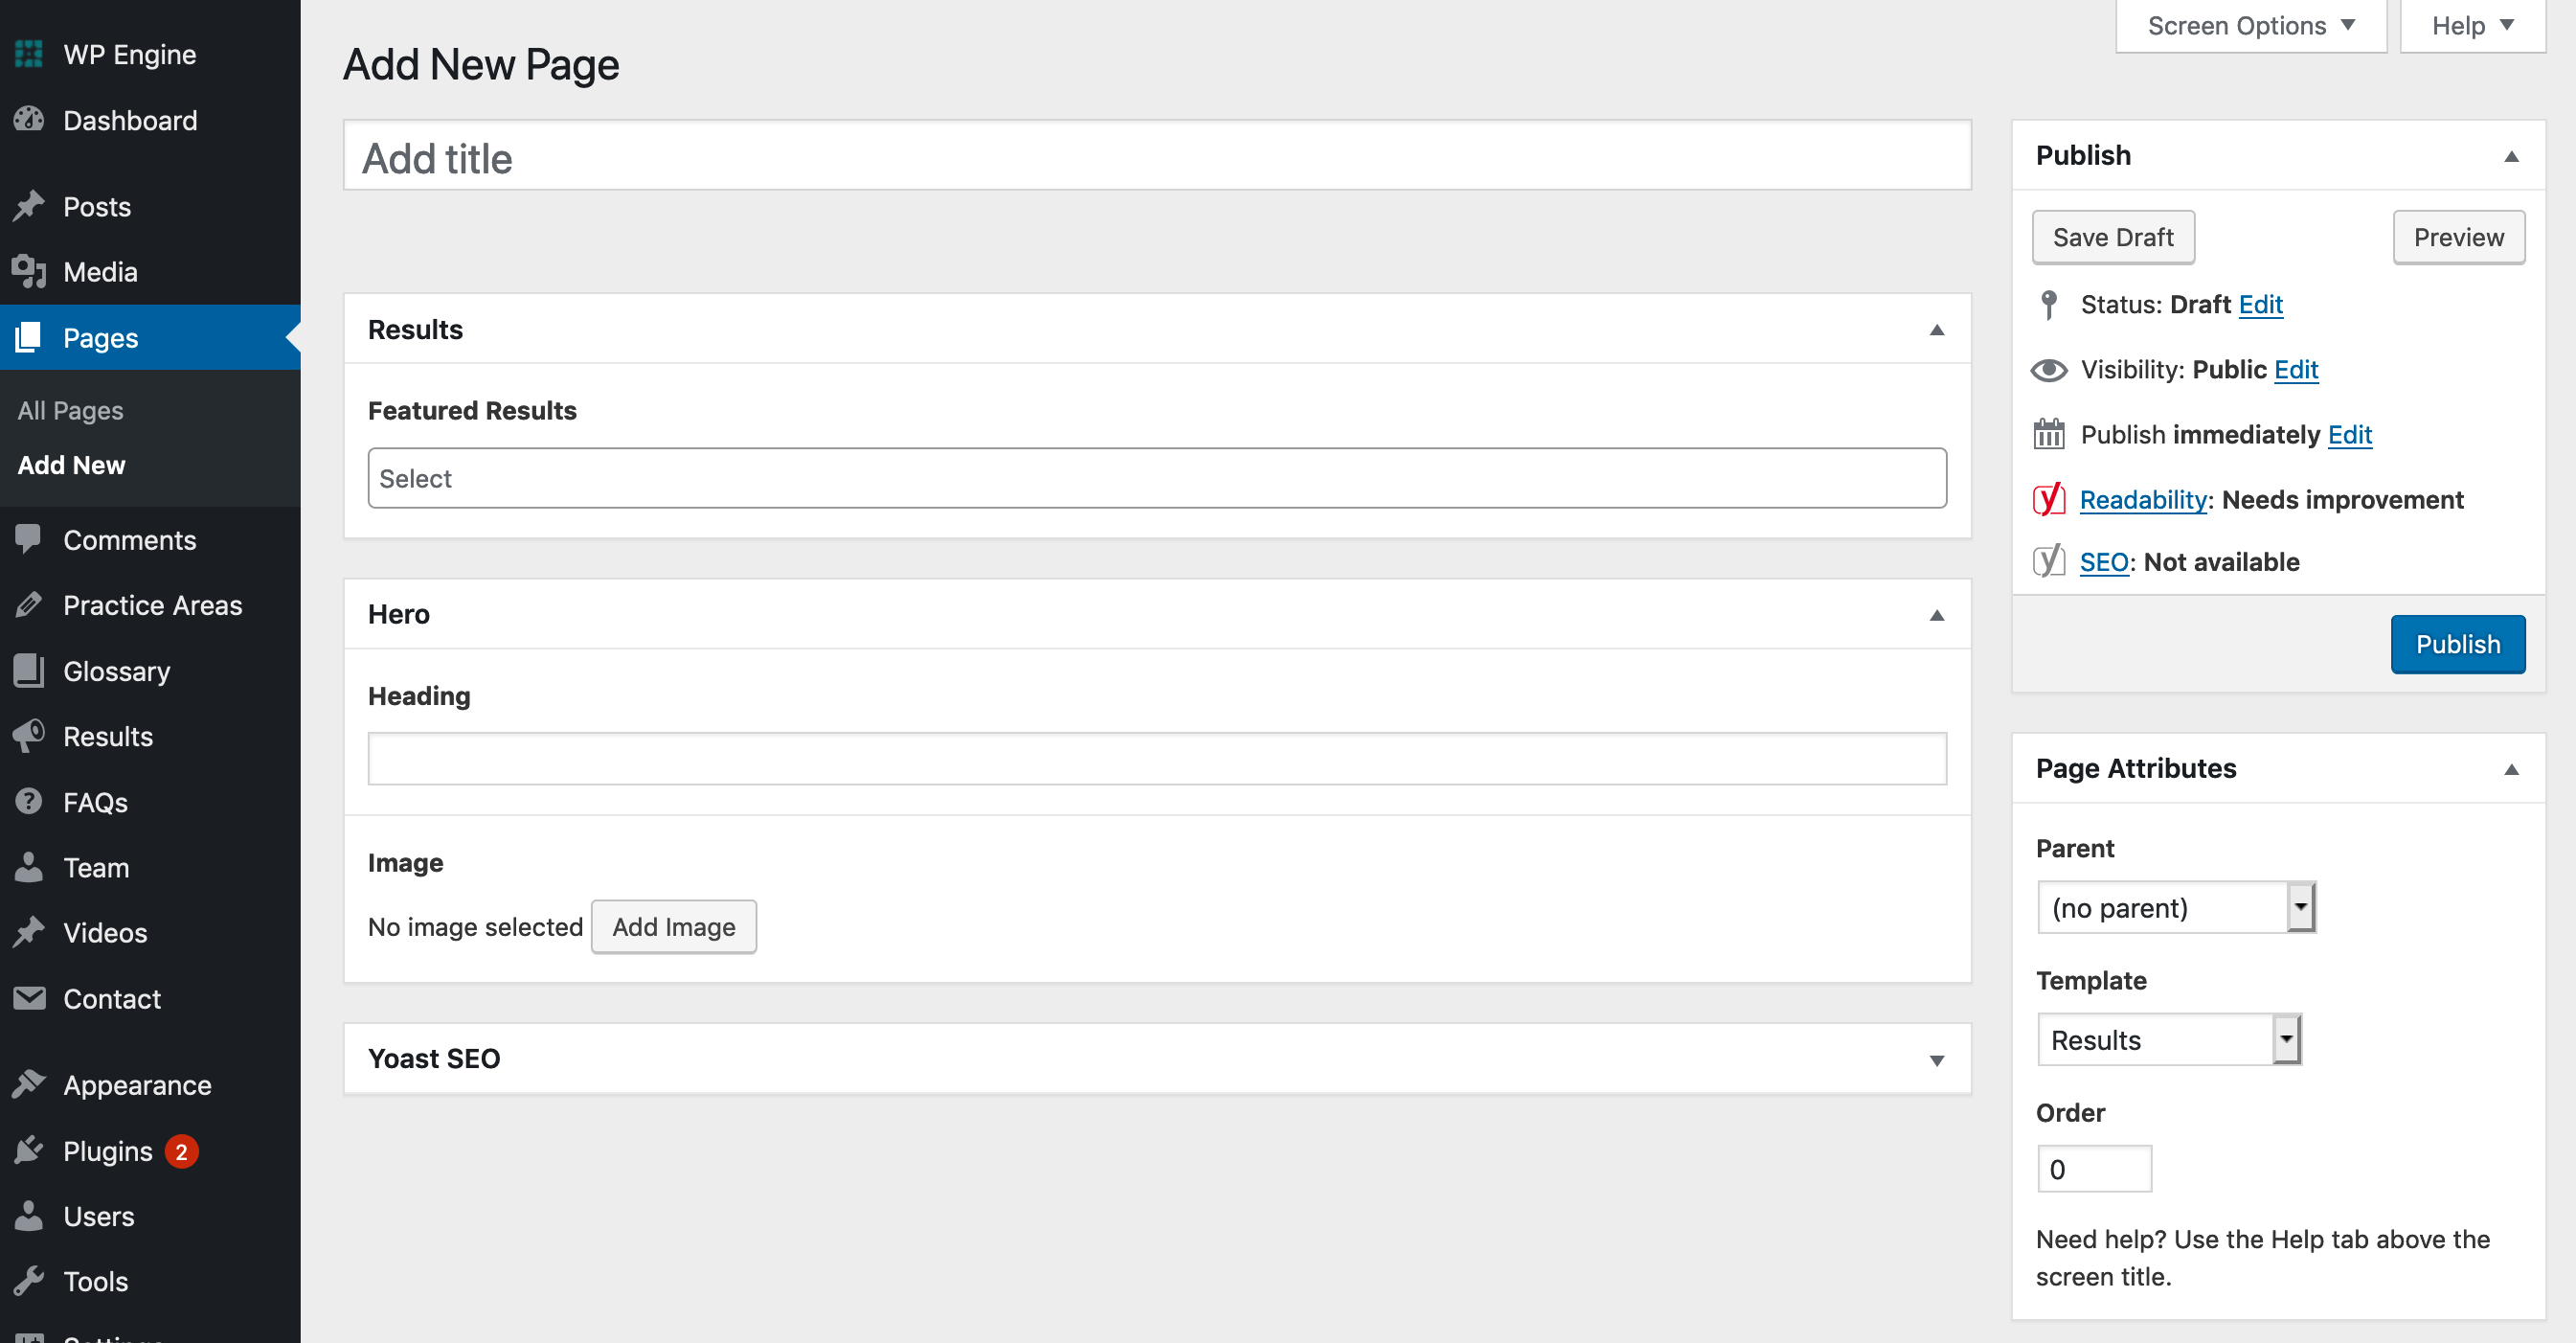
As you can see, the main column shows each section of your homepage, split into tabs. Each tab contains fields for changing the content and images. Remember, your tabs will be named differently, according to your design’s needs.
Clicking on another tab makes the next section’s fields visible for editing.
Once you’ve finished editing your page, click on the blue “Update” button to save and make live.
If you want to create a new page, that’s easy too! Simply choose “Add New” from the Pages section in the menu, and you’ll be taken to a blank page.
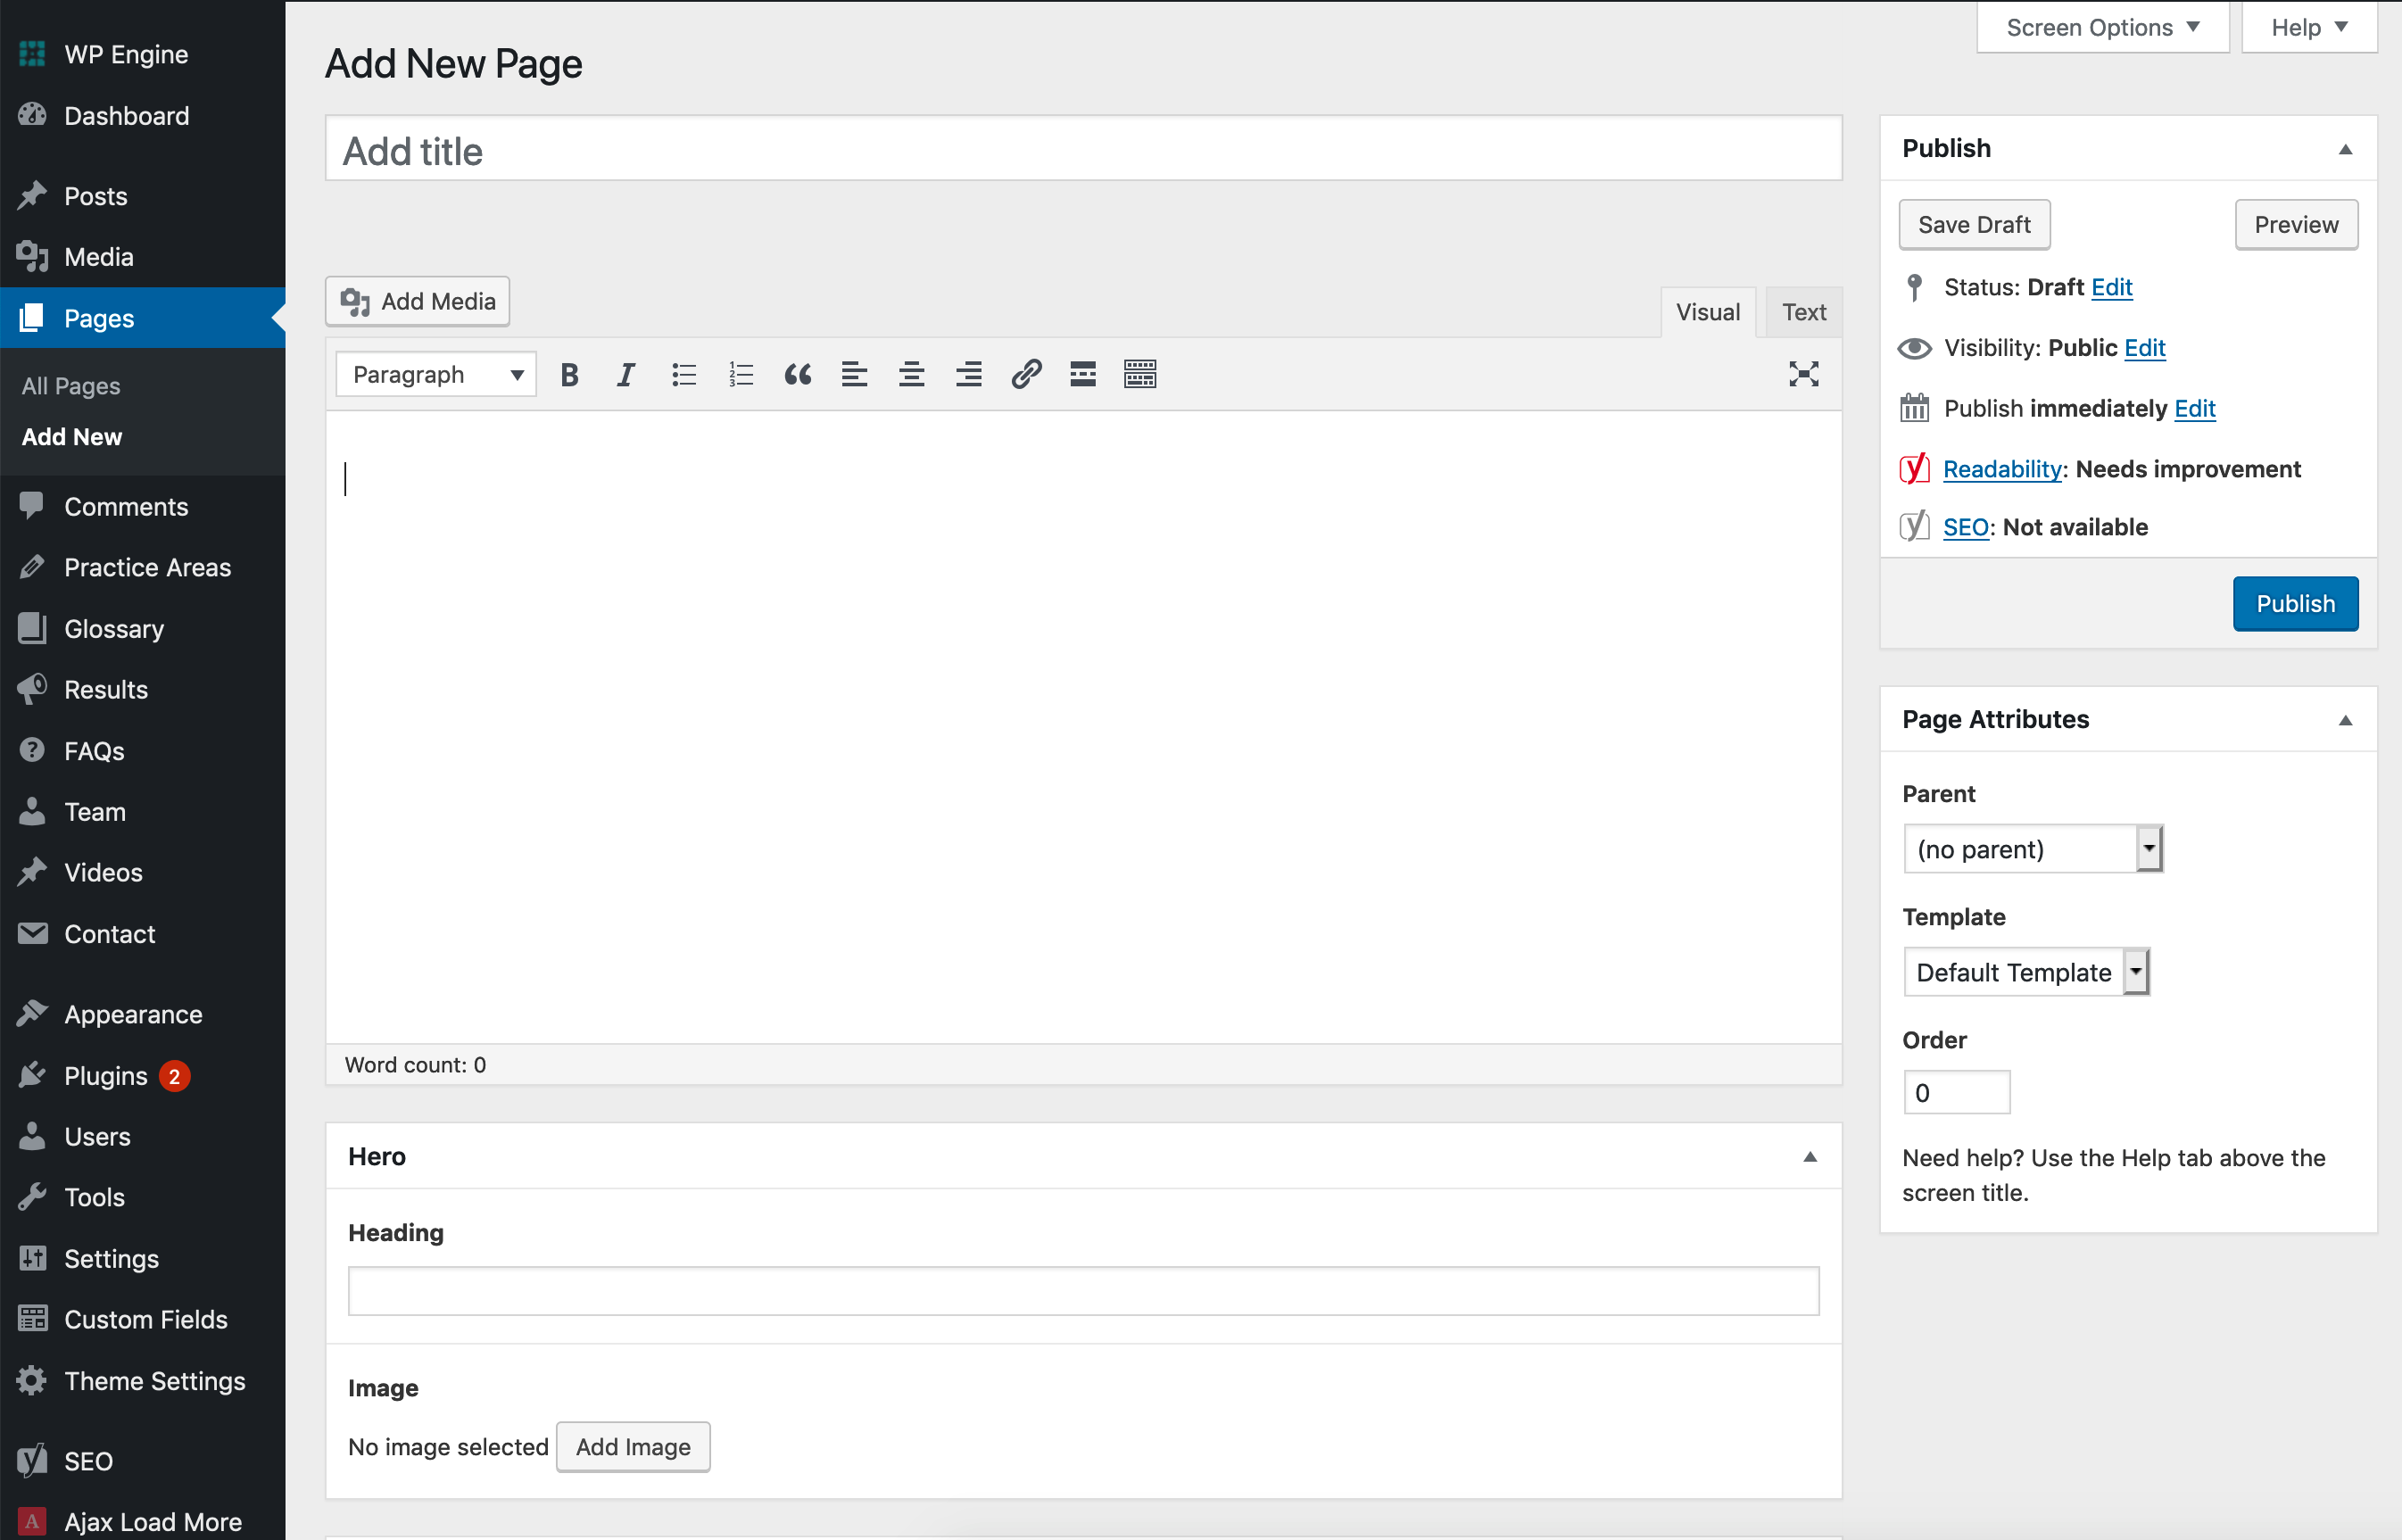
The “Default Template” is what is chosen for you when creating a new page, but if you want to change the template (which change’s the page’s design), you can choose from different templates in Page Attributes in the right sidebar.
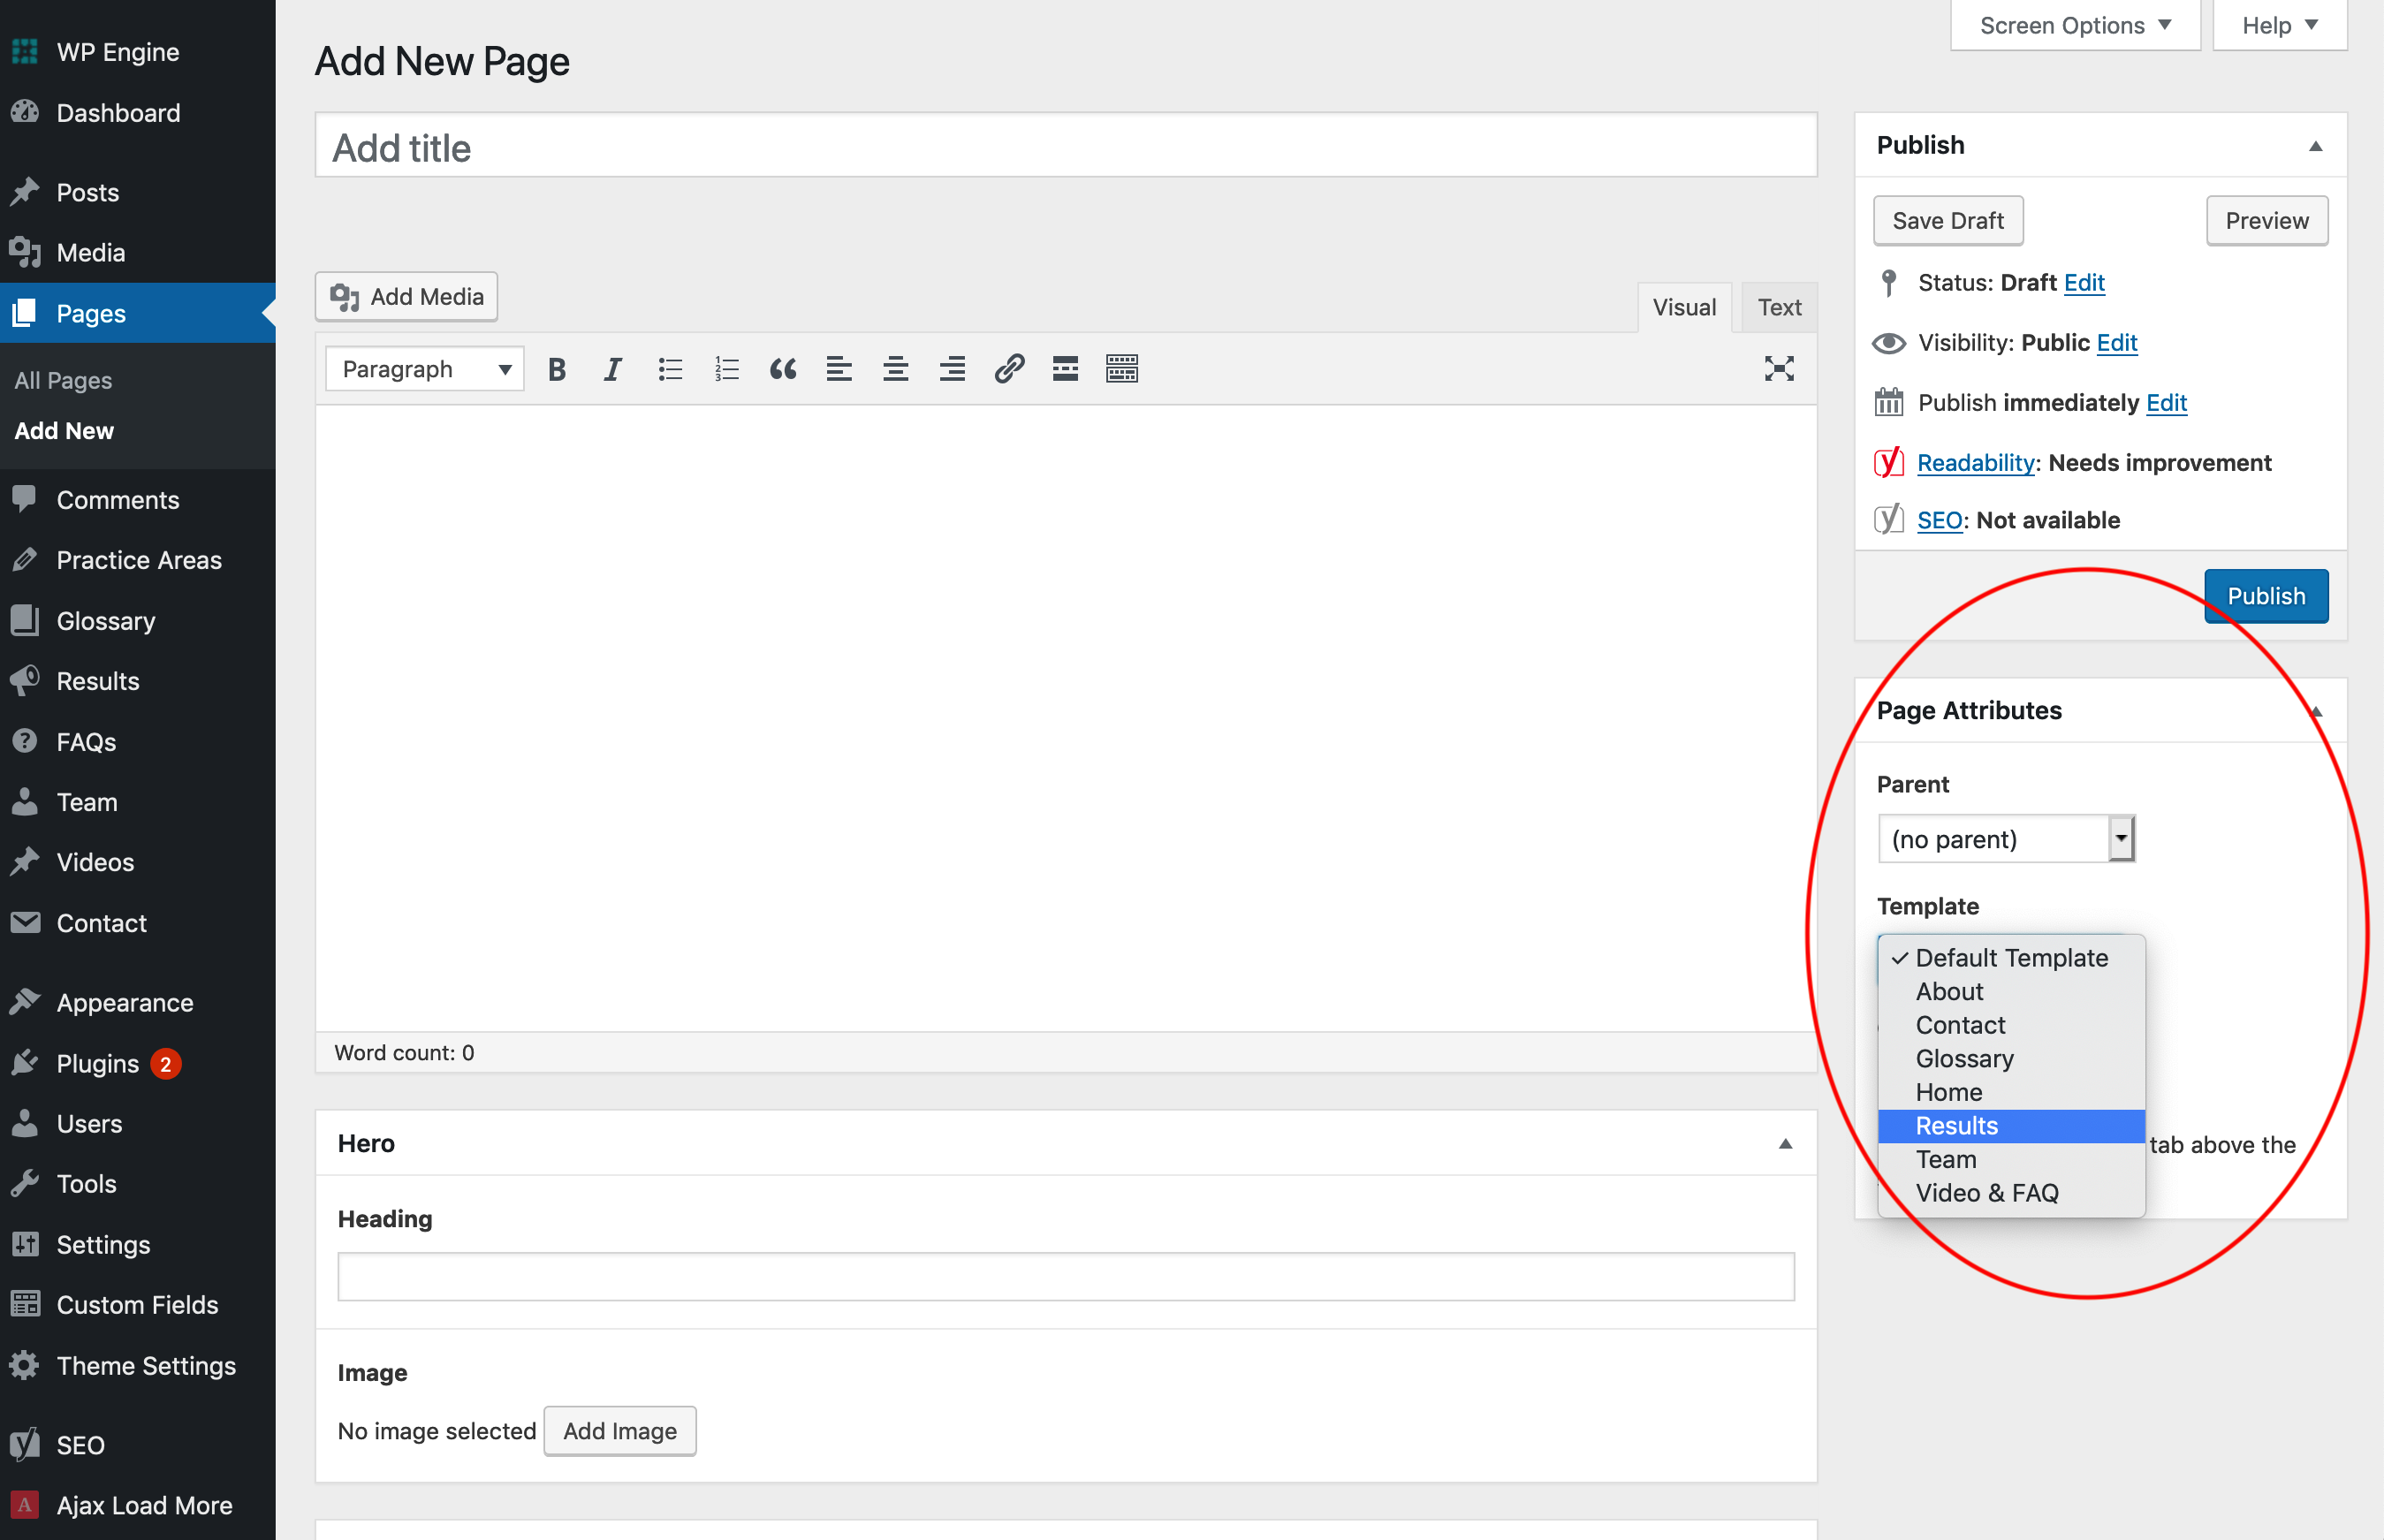
Changing this setting will also load the appropriate custom fields for that template.
And once you’ve added your content, you can either click “Save Draft” to save it but not make it live, or “Publish” to make it live, same as in Posts.
Post Types
Post types work exactly the same as regular posts – but they’re used for different sections of the site. For example, if you have an about page with links to bios of all your team members, you’ll probably have a “Team” post type with a post for each member, or you may have a “Projects” section with a post for each project if your website is a portfolio. Here’s Studio Simpatico’s “Projects” custom post type screen:
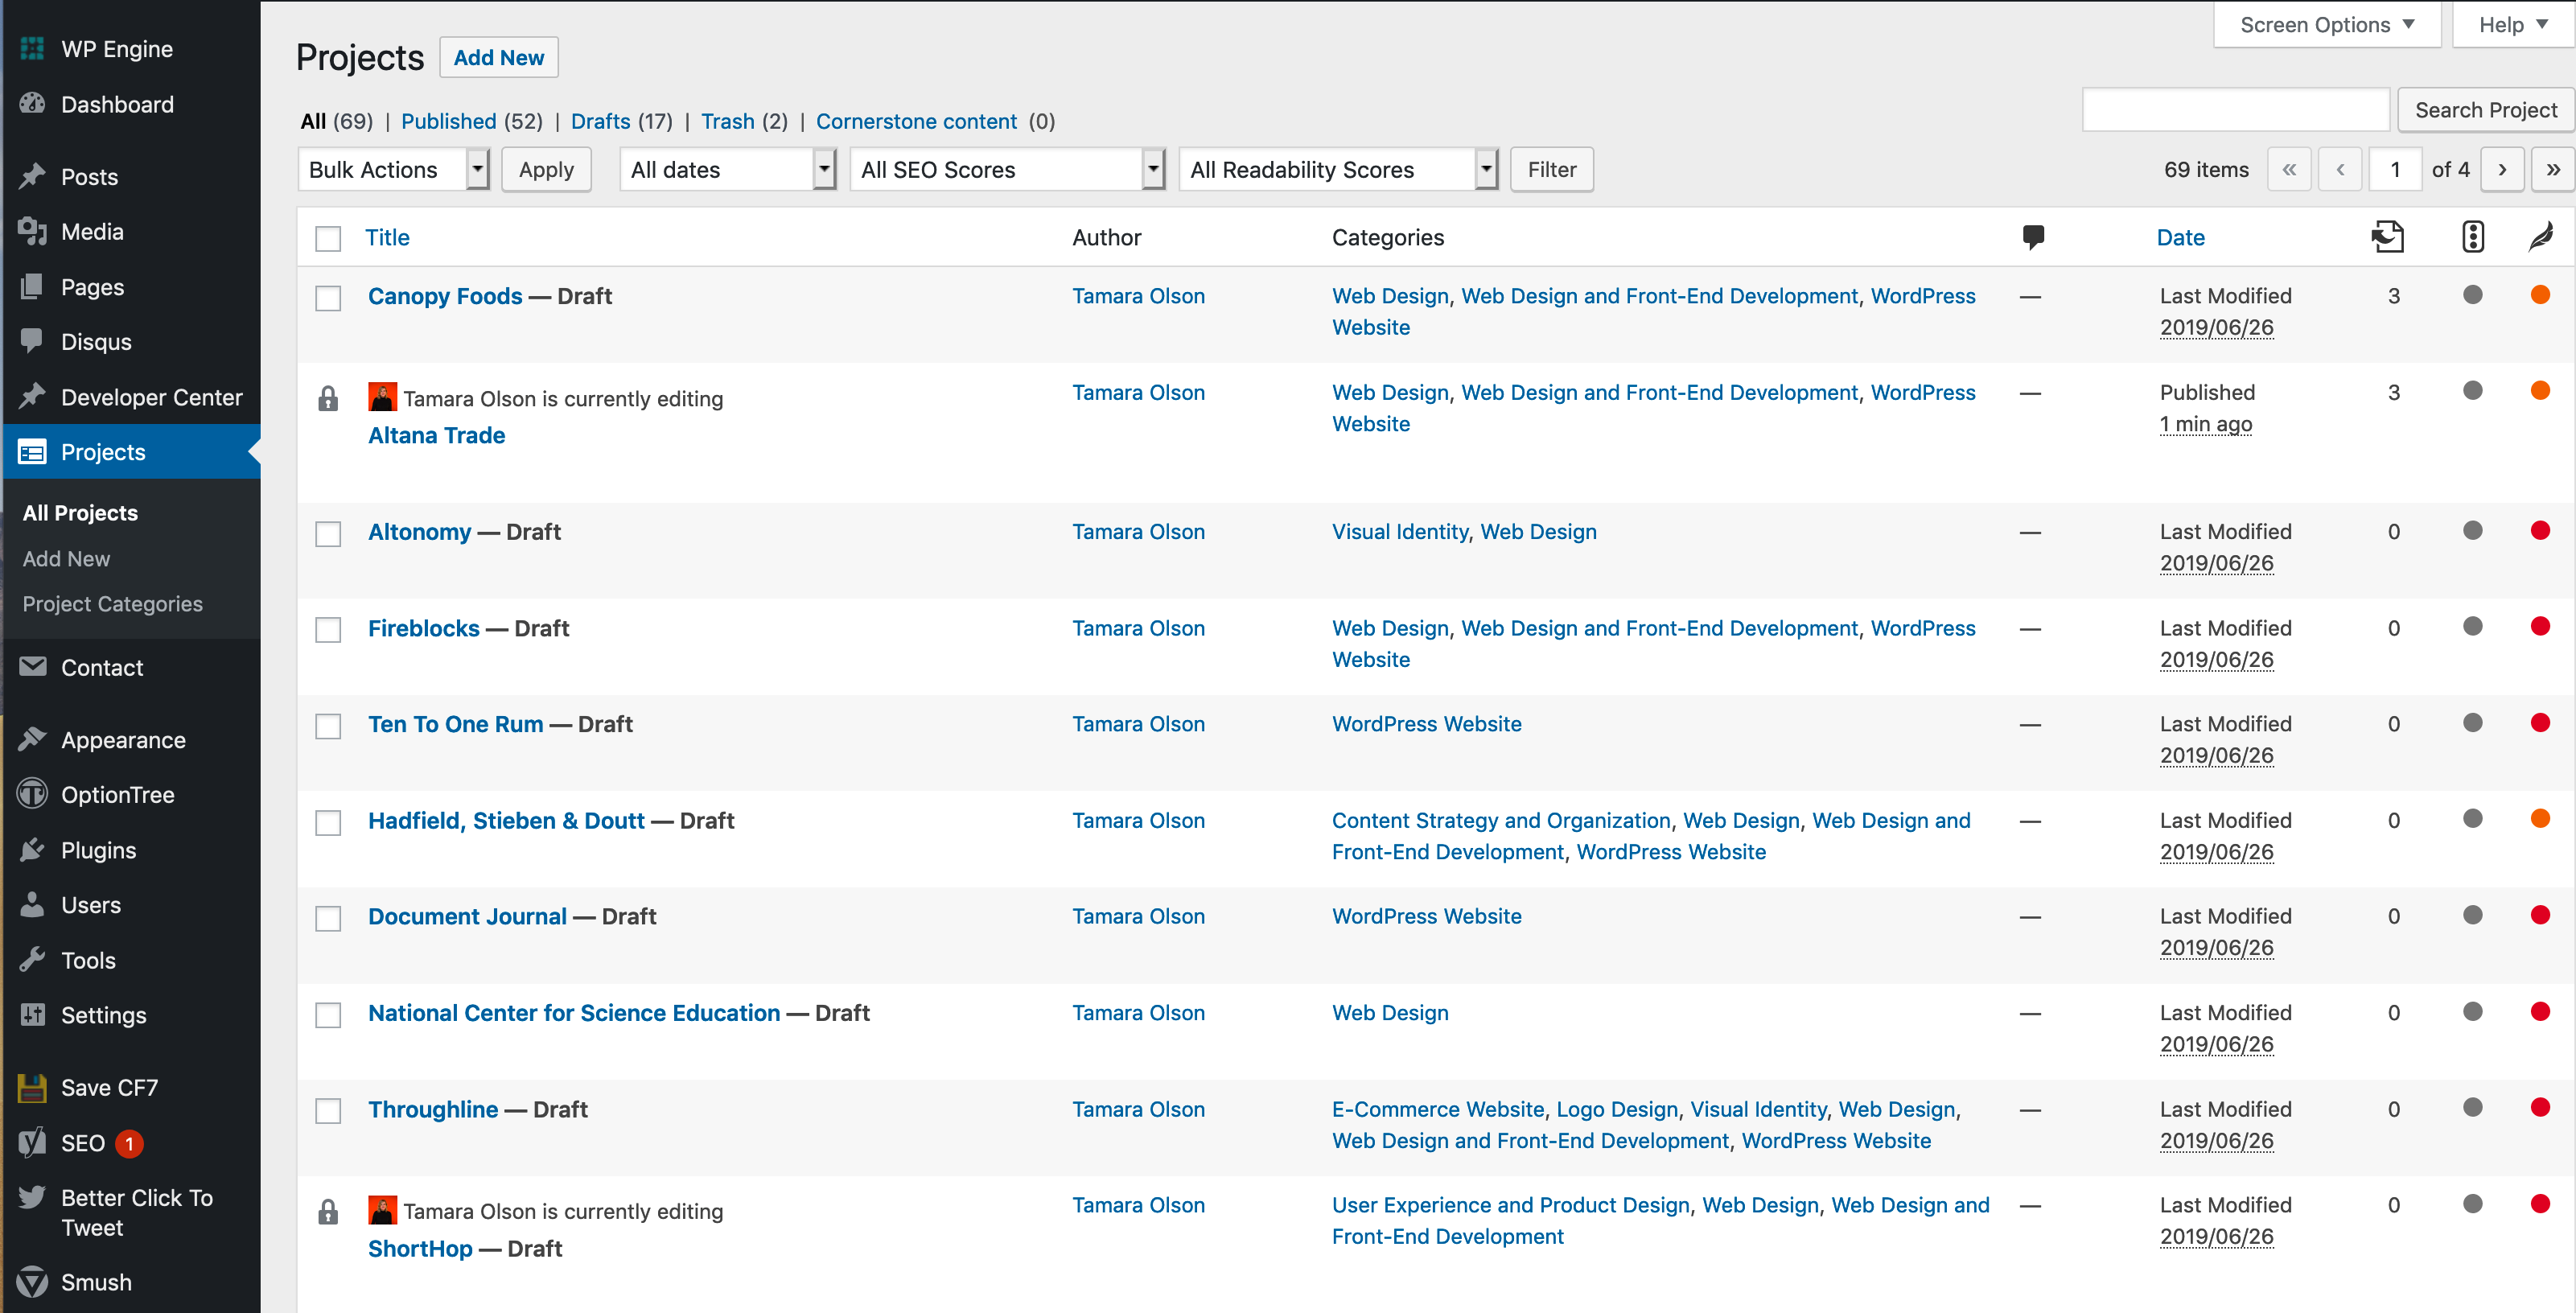
To edit a post, follow the same directions as a regular posts, except you’ll navigate to the custom post type in the admin screen.
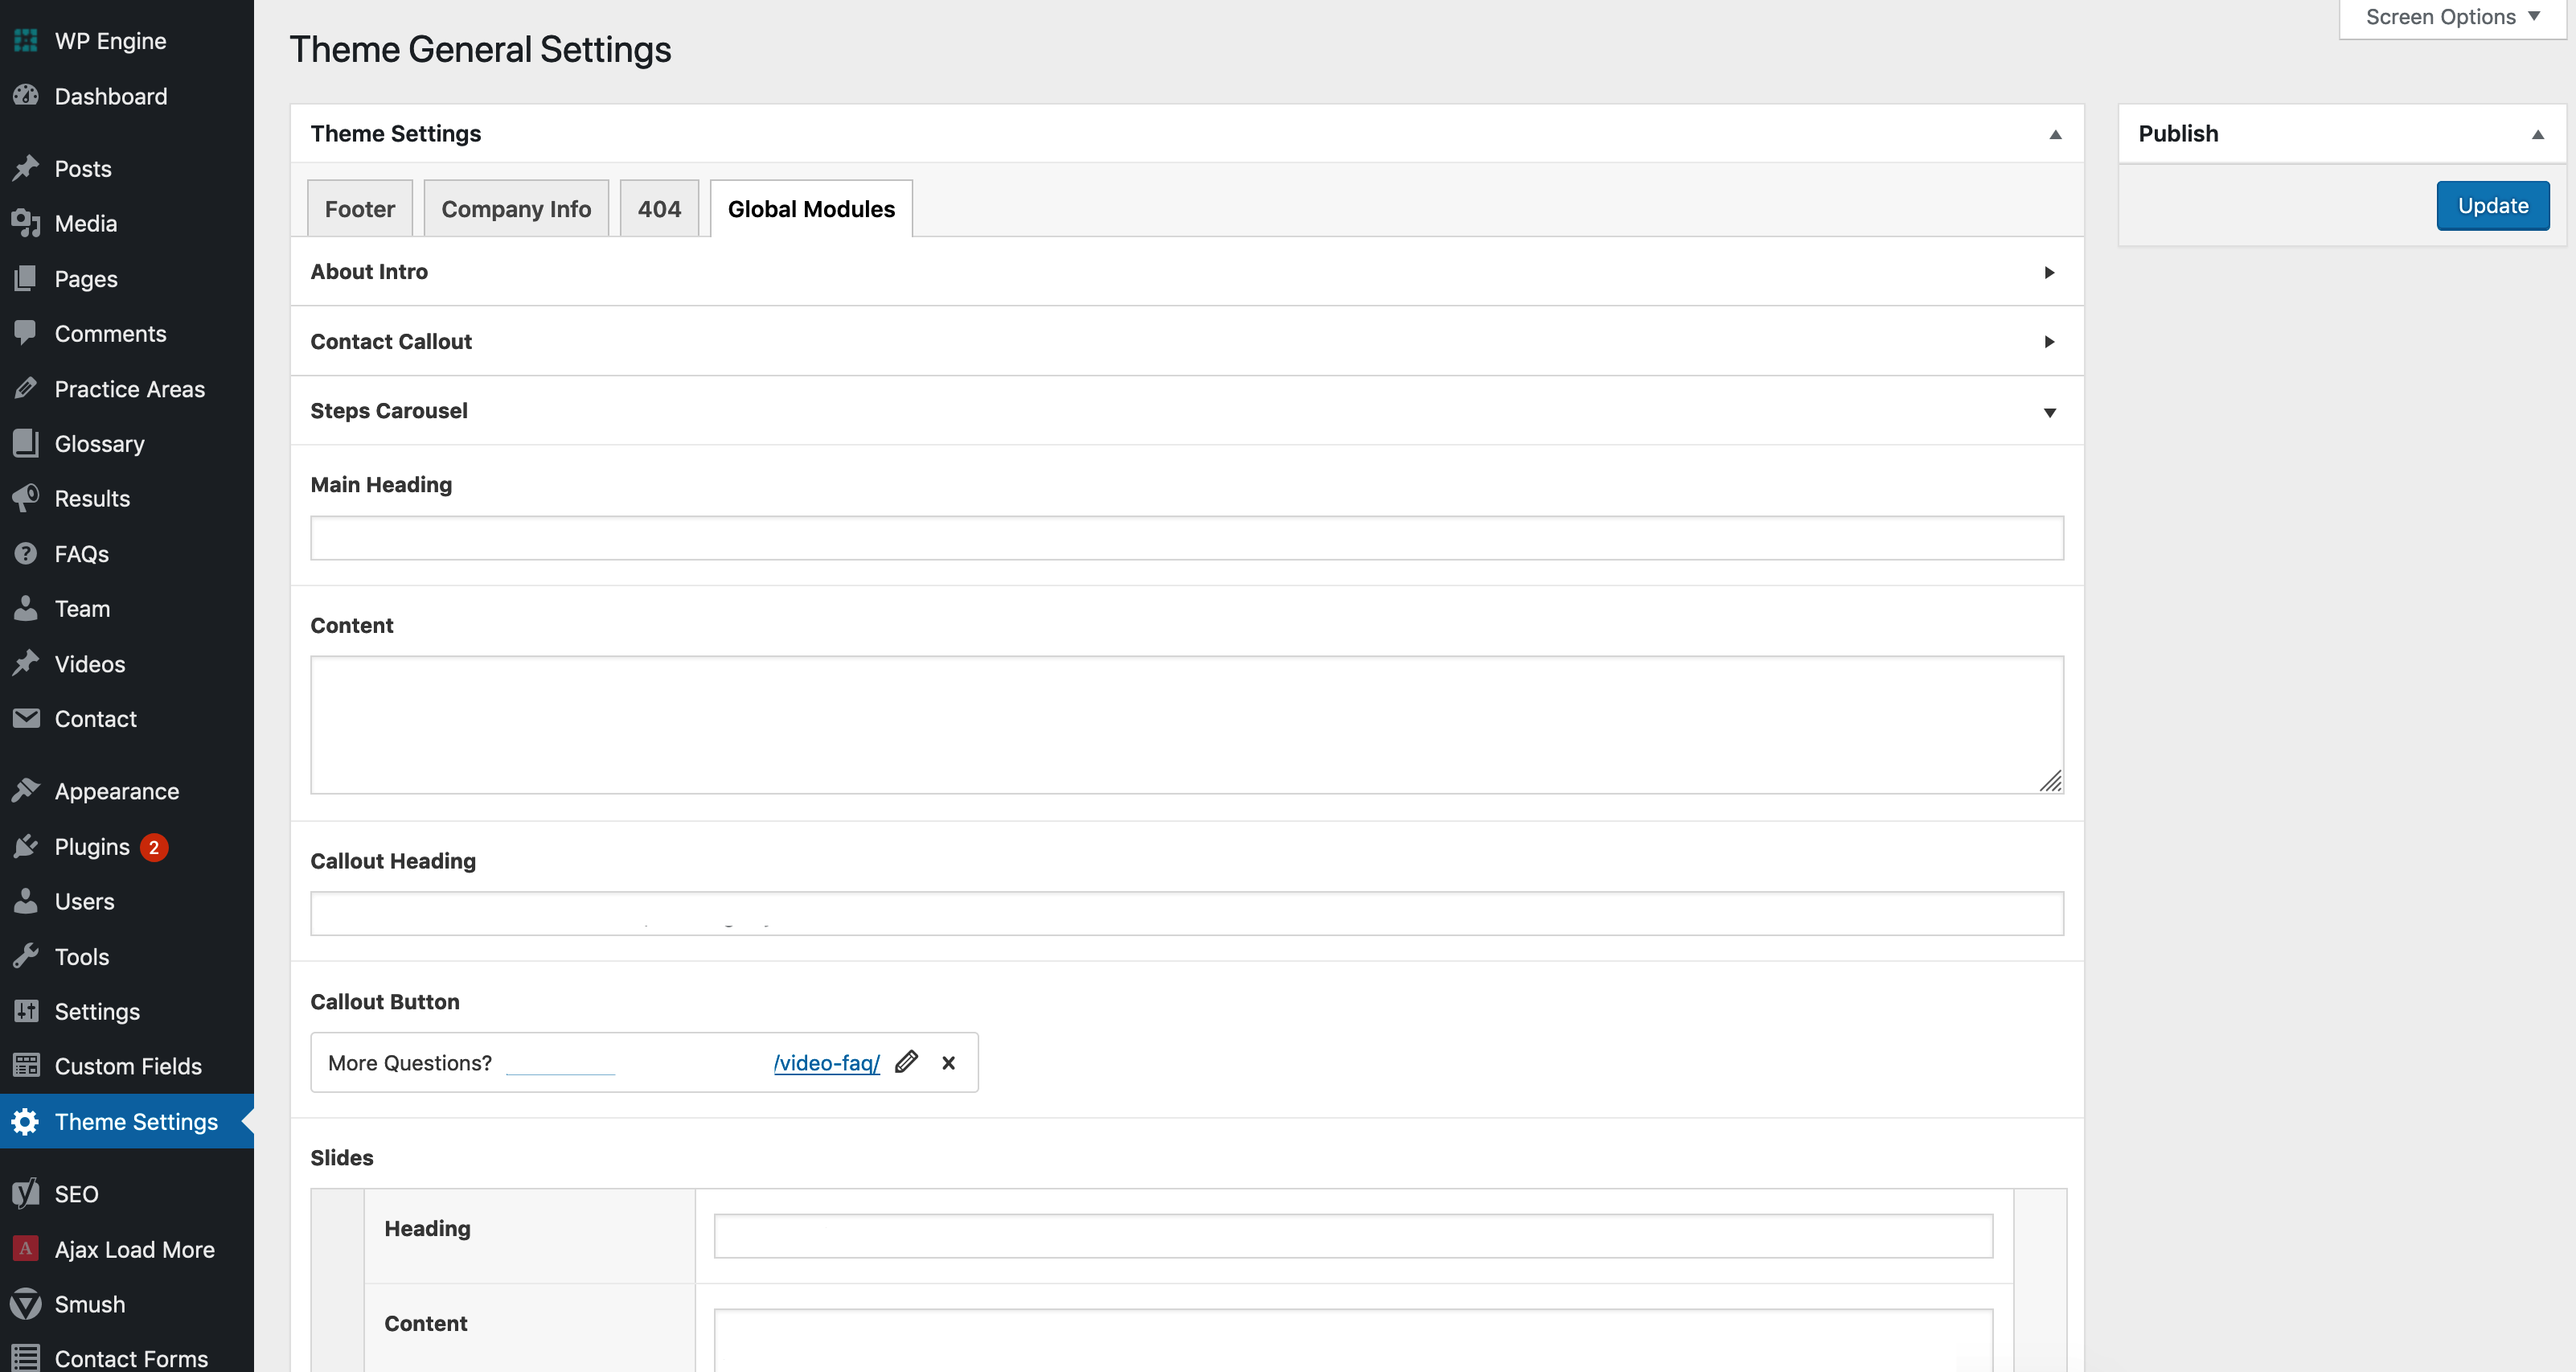
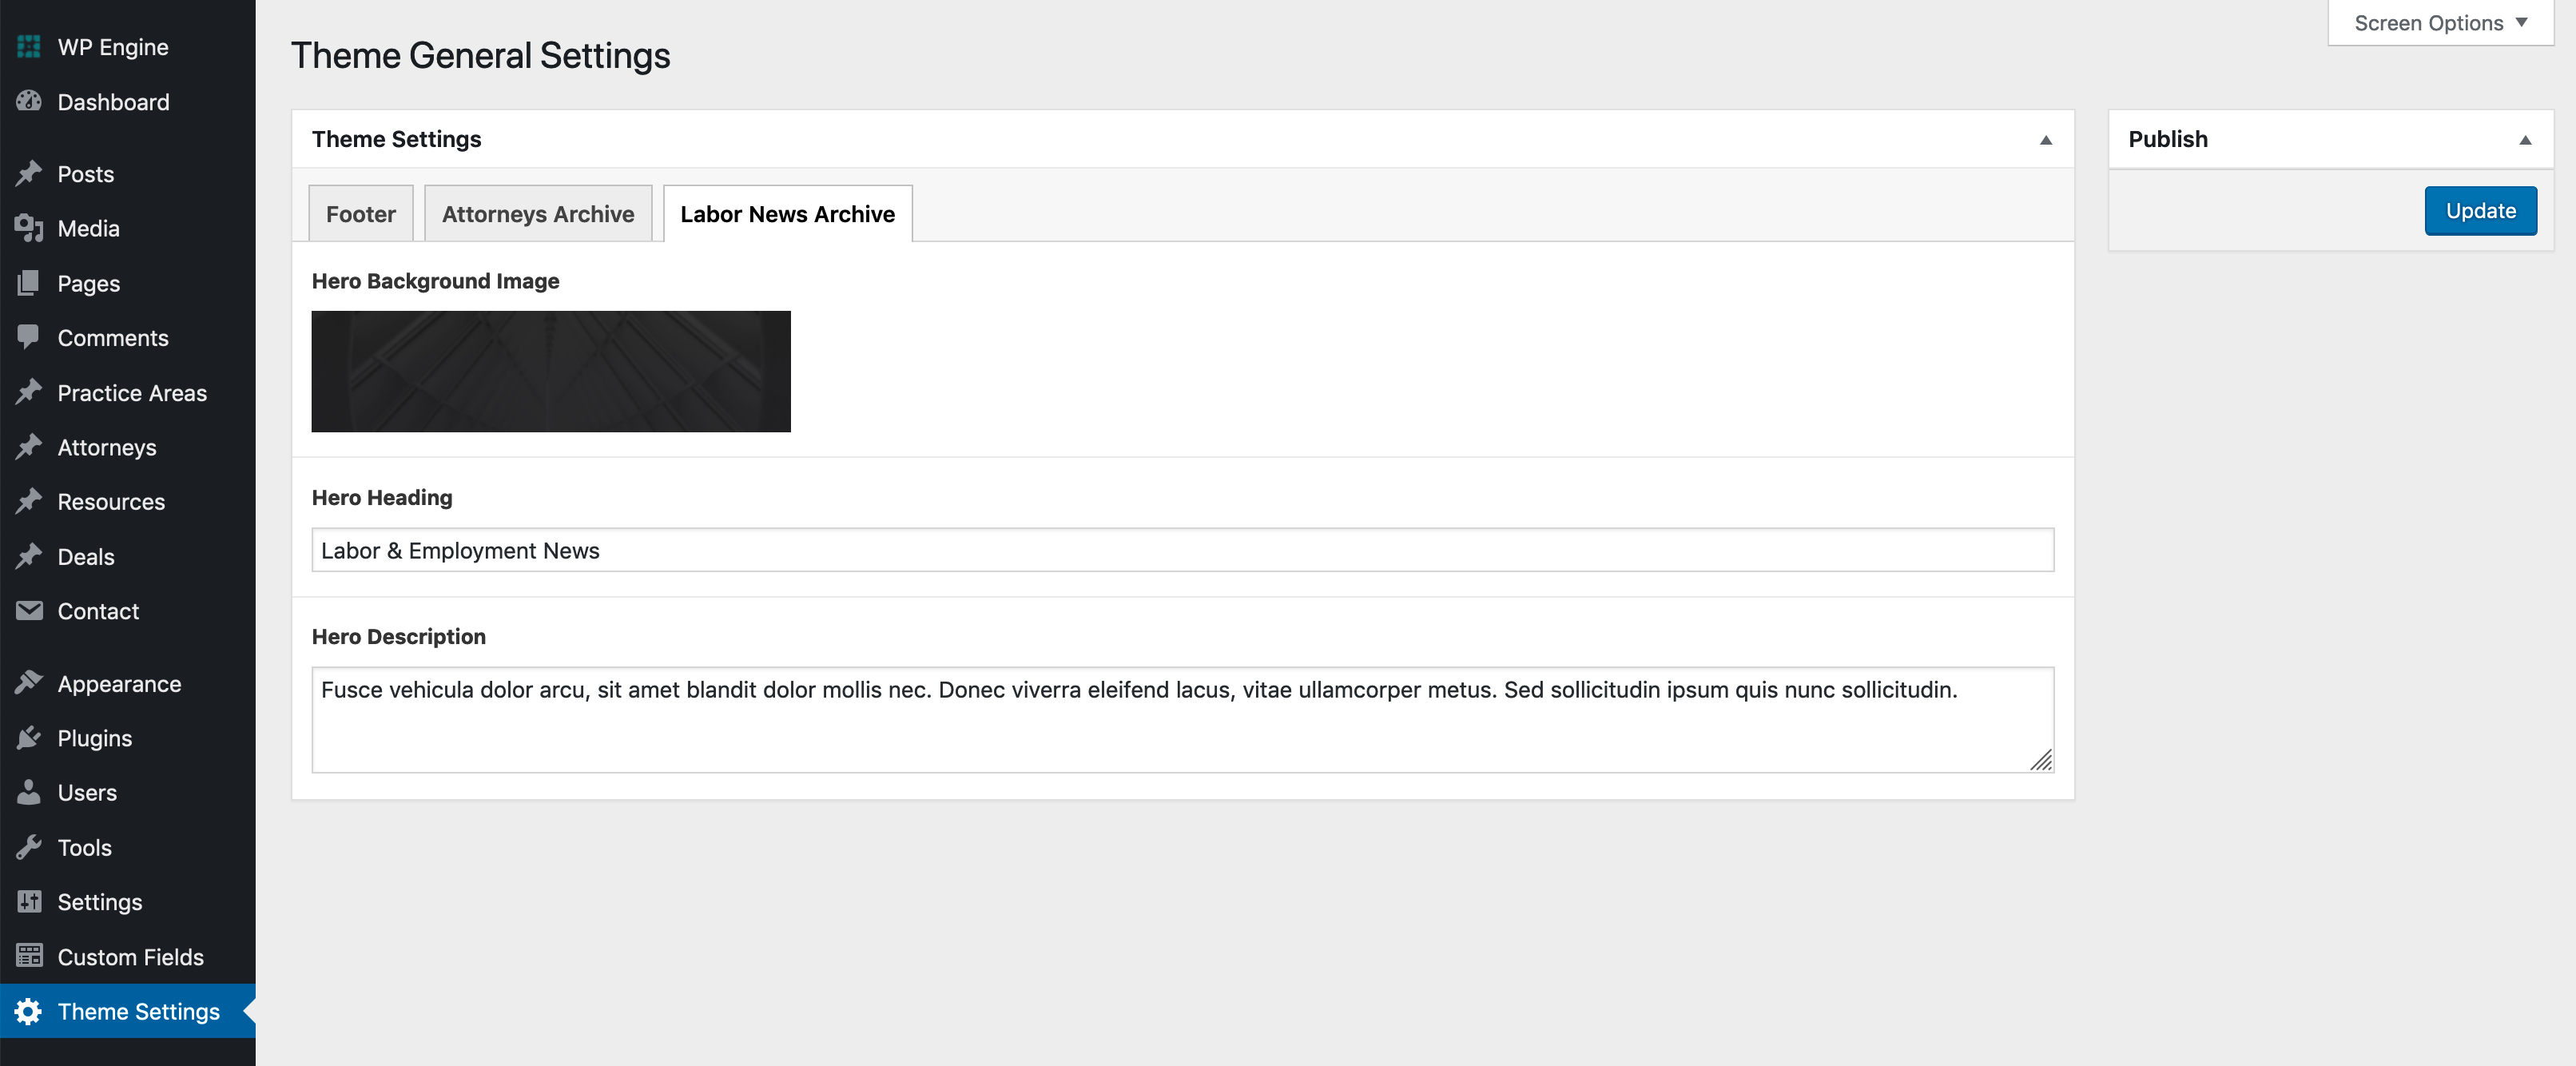
Theme Settings
Each admin has it’s own “Theme Settings” section that houses global modules, like footer content, company info, and/or social media links. You can find this in the admin menu, usually towards the bottom, and is arranged similarly to pages, with tabs for each section.
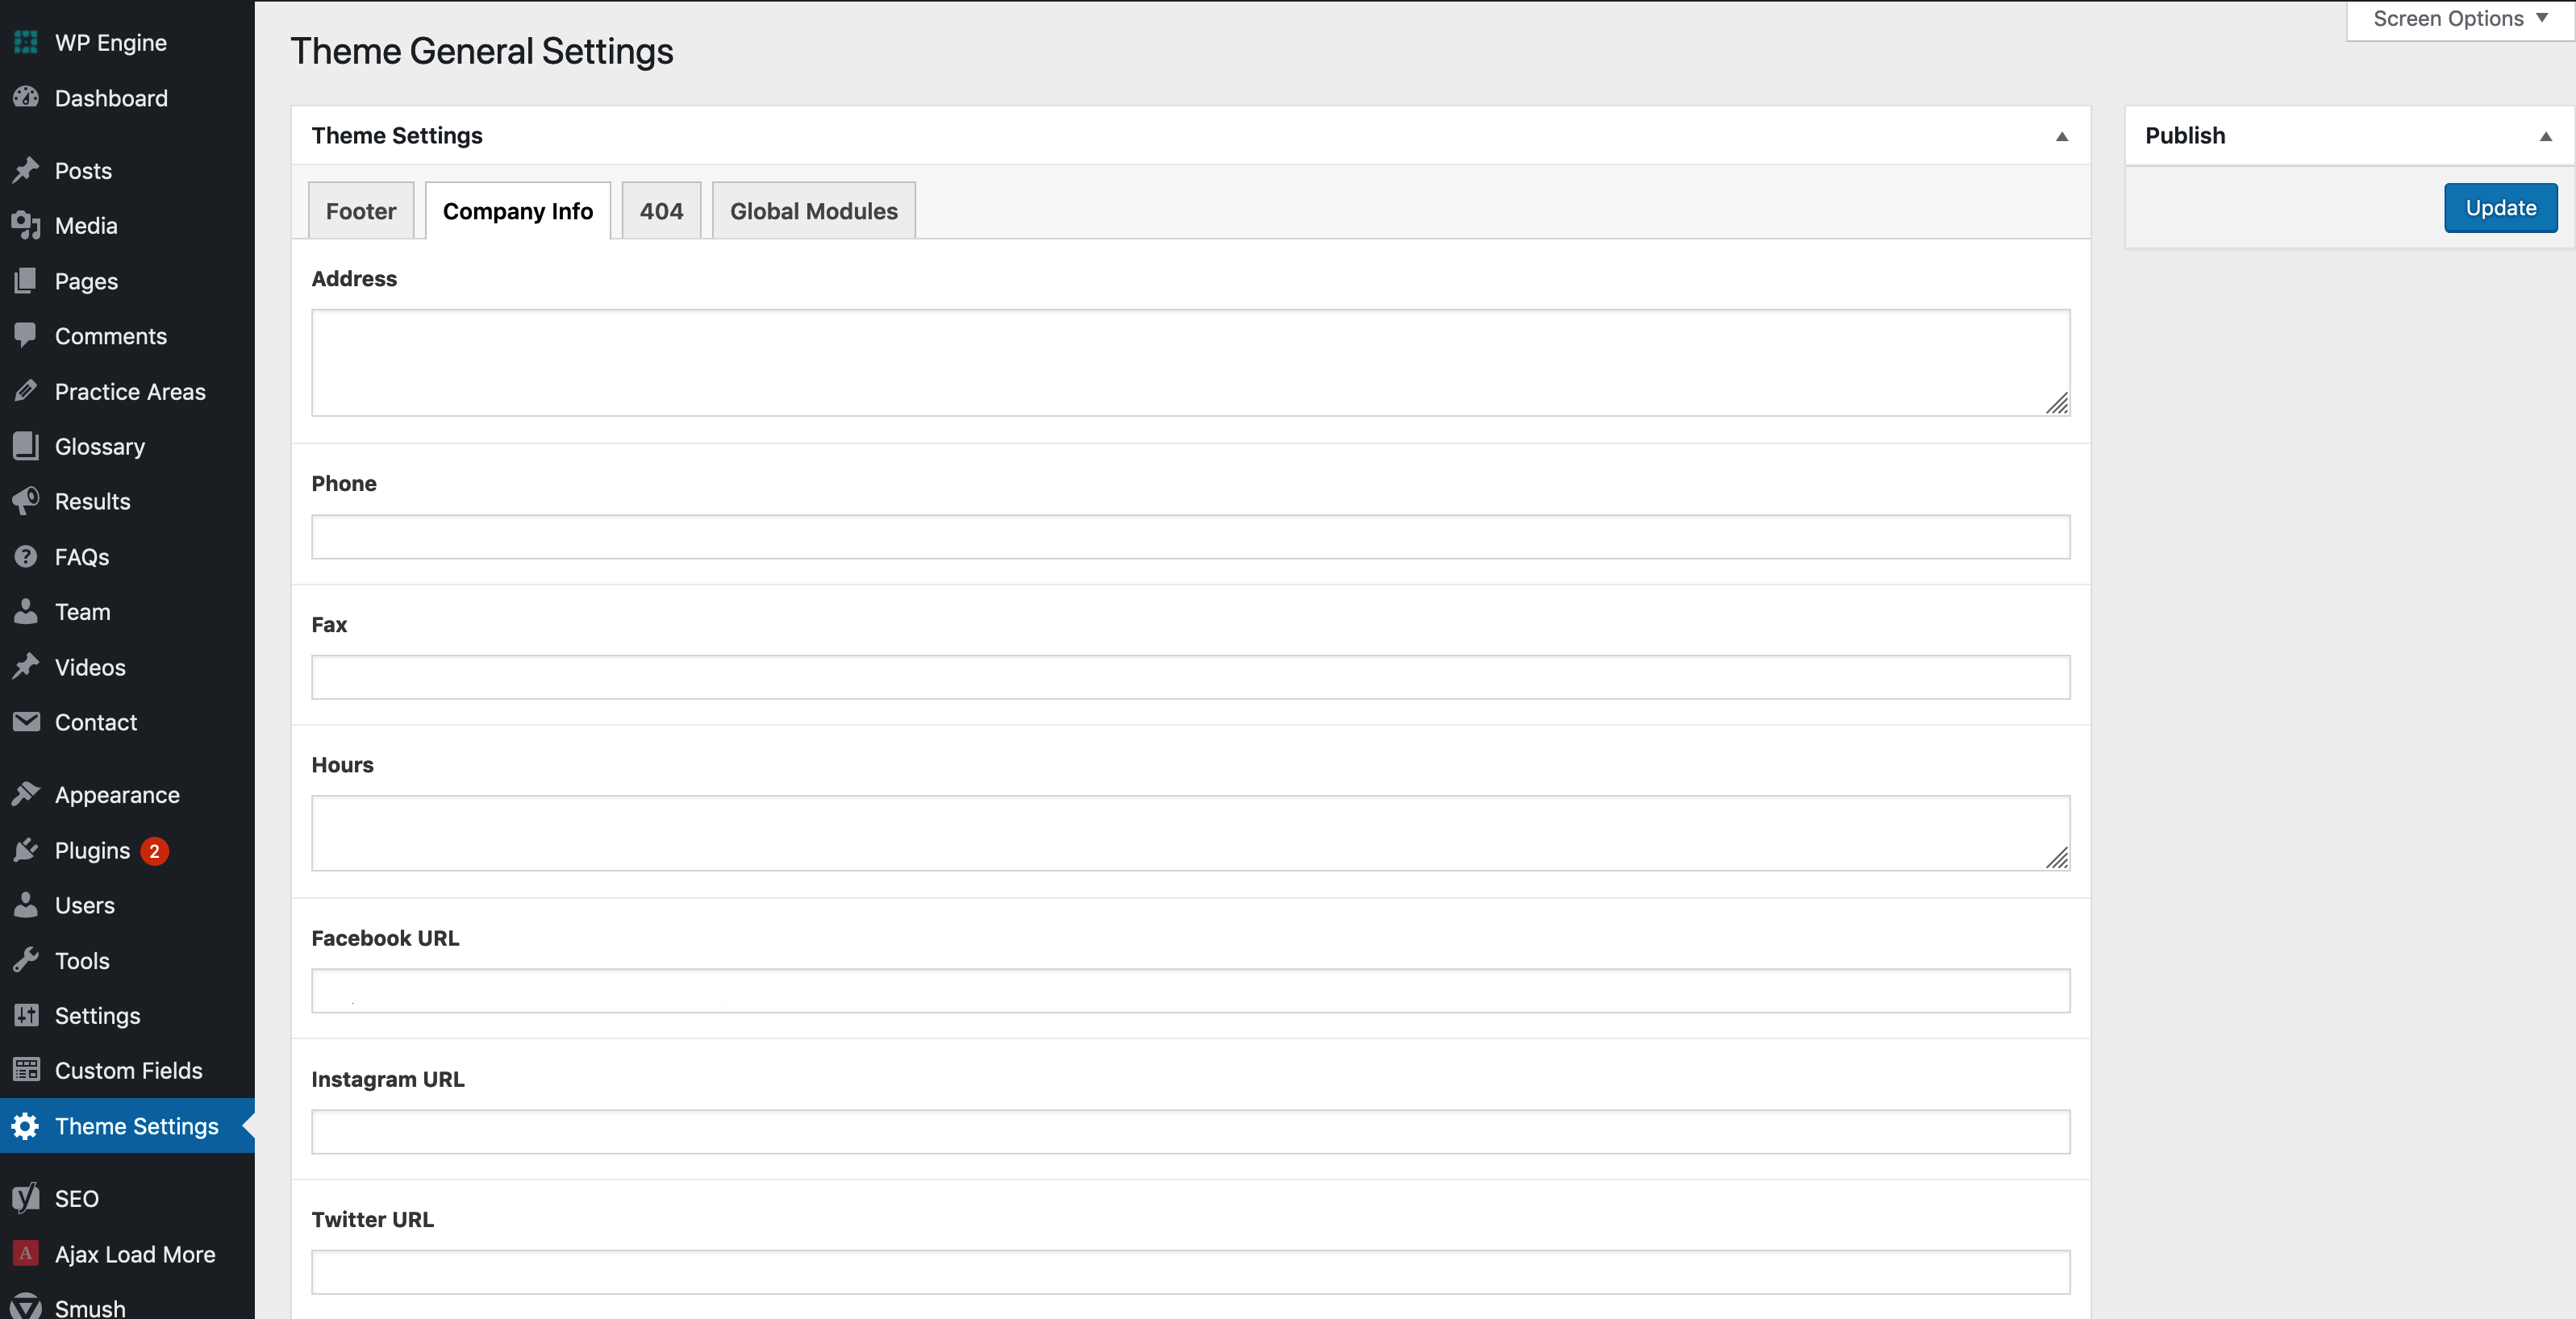
Some sites will also show global modules that can be edited in one place and updated automatically across several pages.
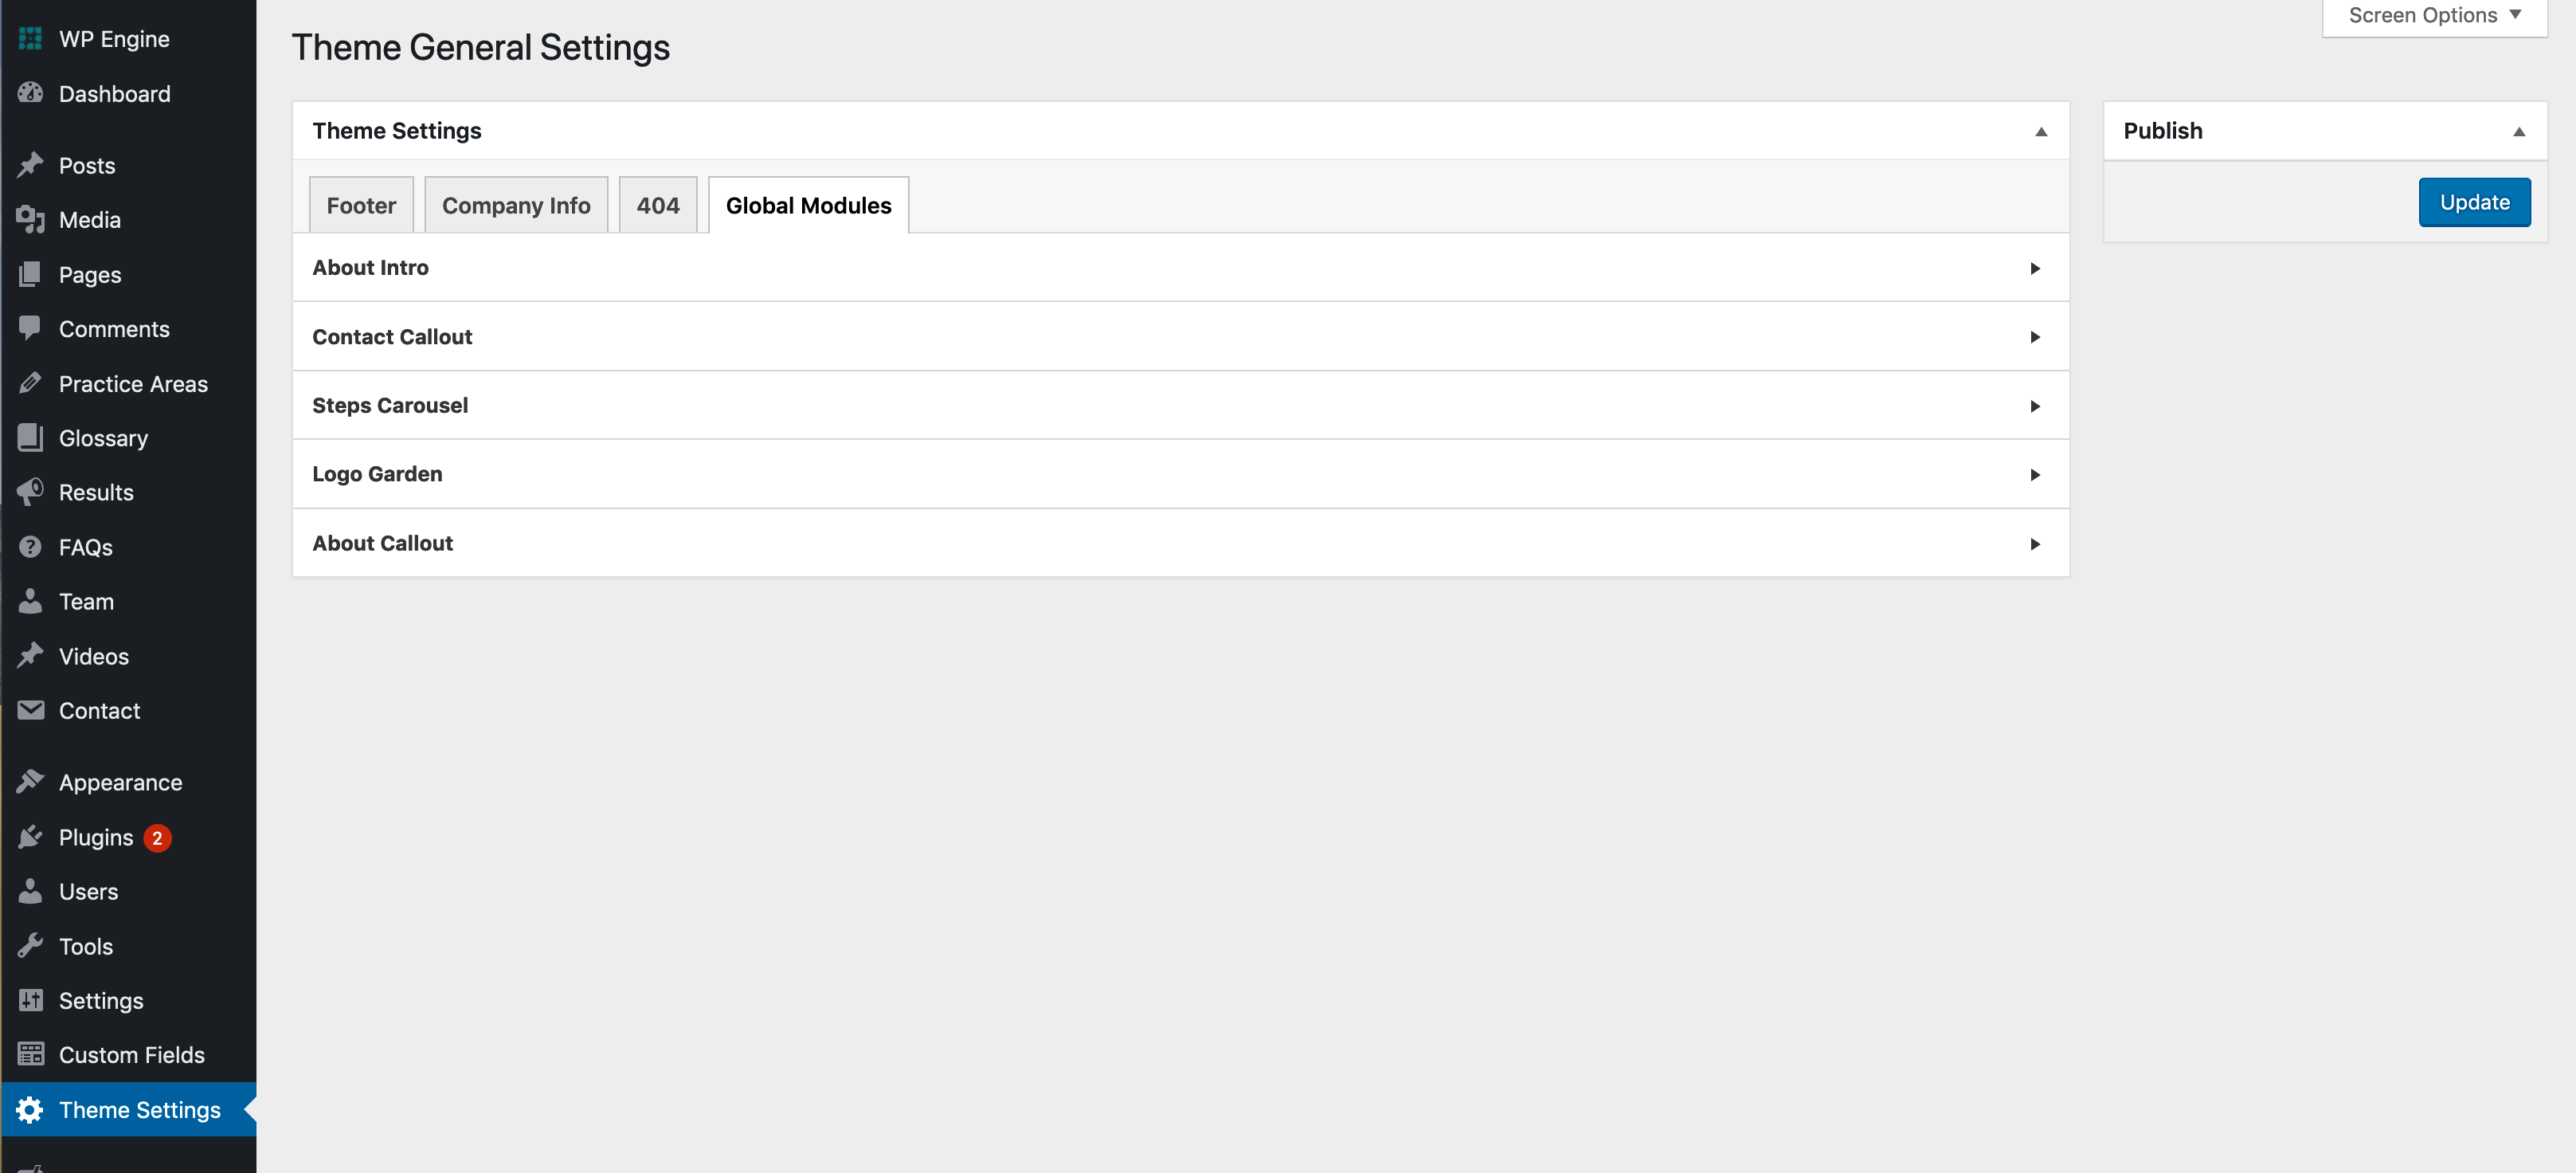
Click on an item to expand it in an accordion-style.
If your site has custom post types, Theme Settings will also be the place to edit the post type’s archive if applicable.
Menus
We use WordPress menus for your header and footer links, which allows you to edit and add to them as well. To see your menus, go to “Appearance” in the admin menu and click on the “Menus” link.
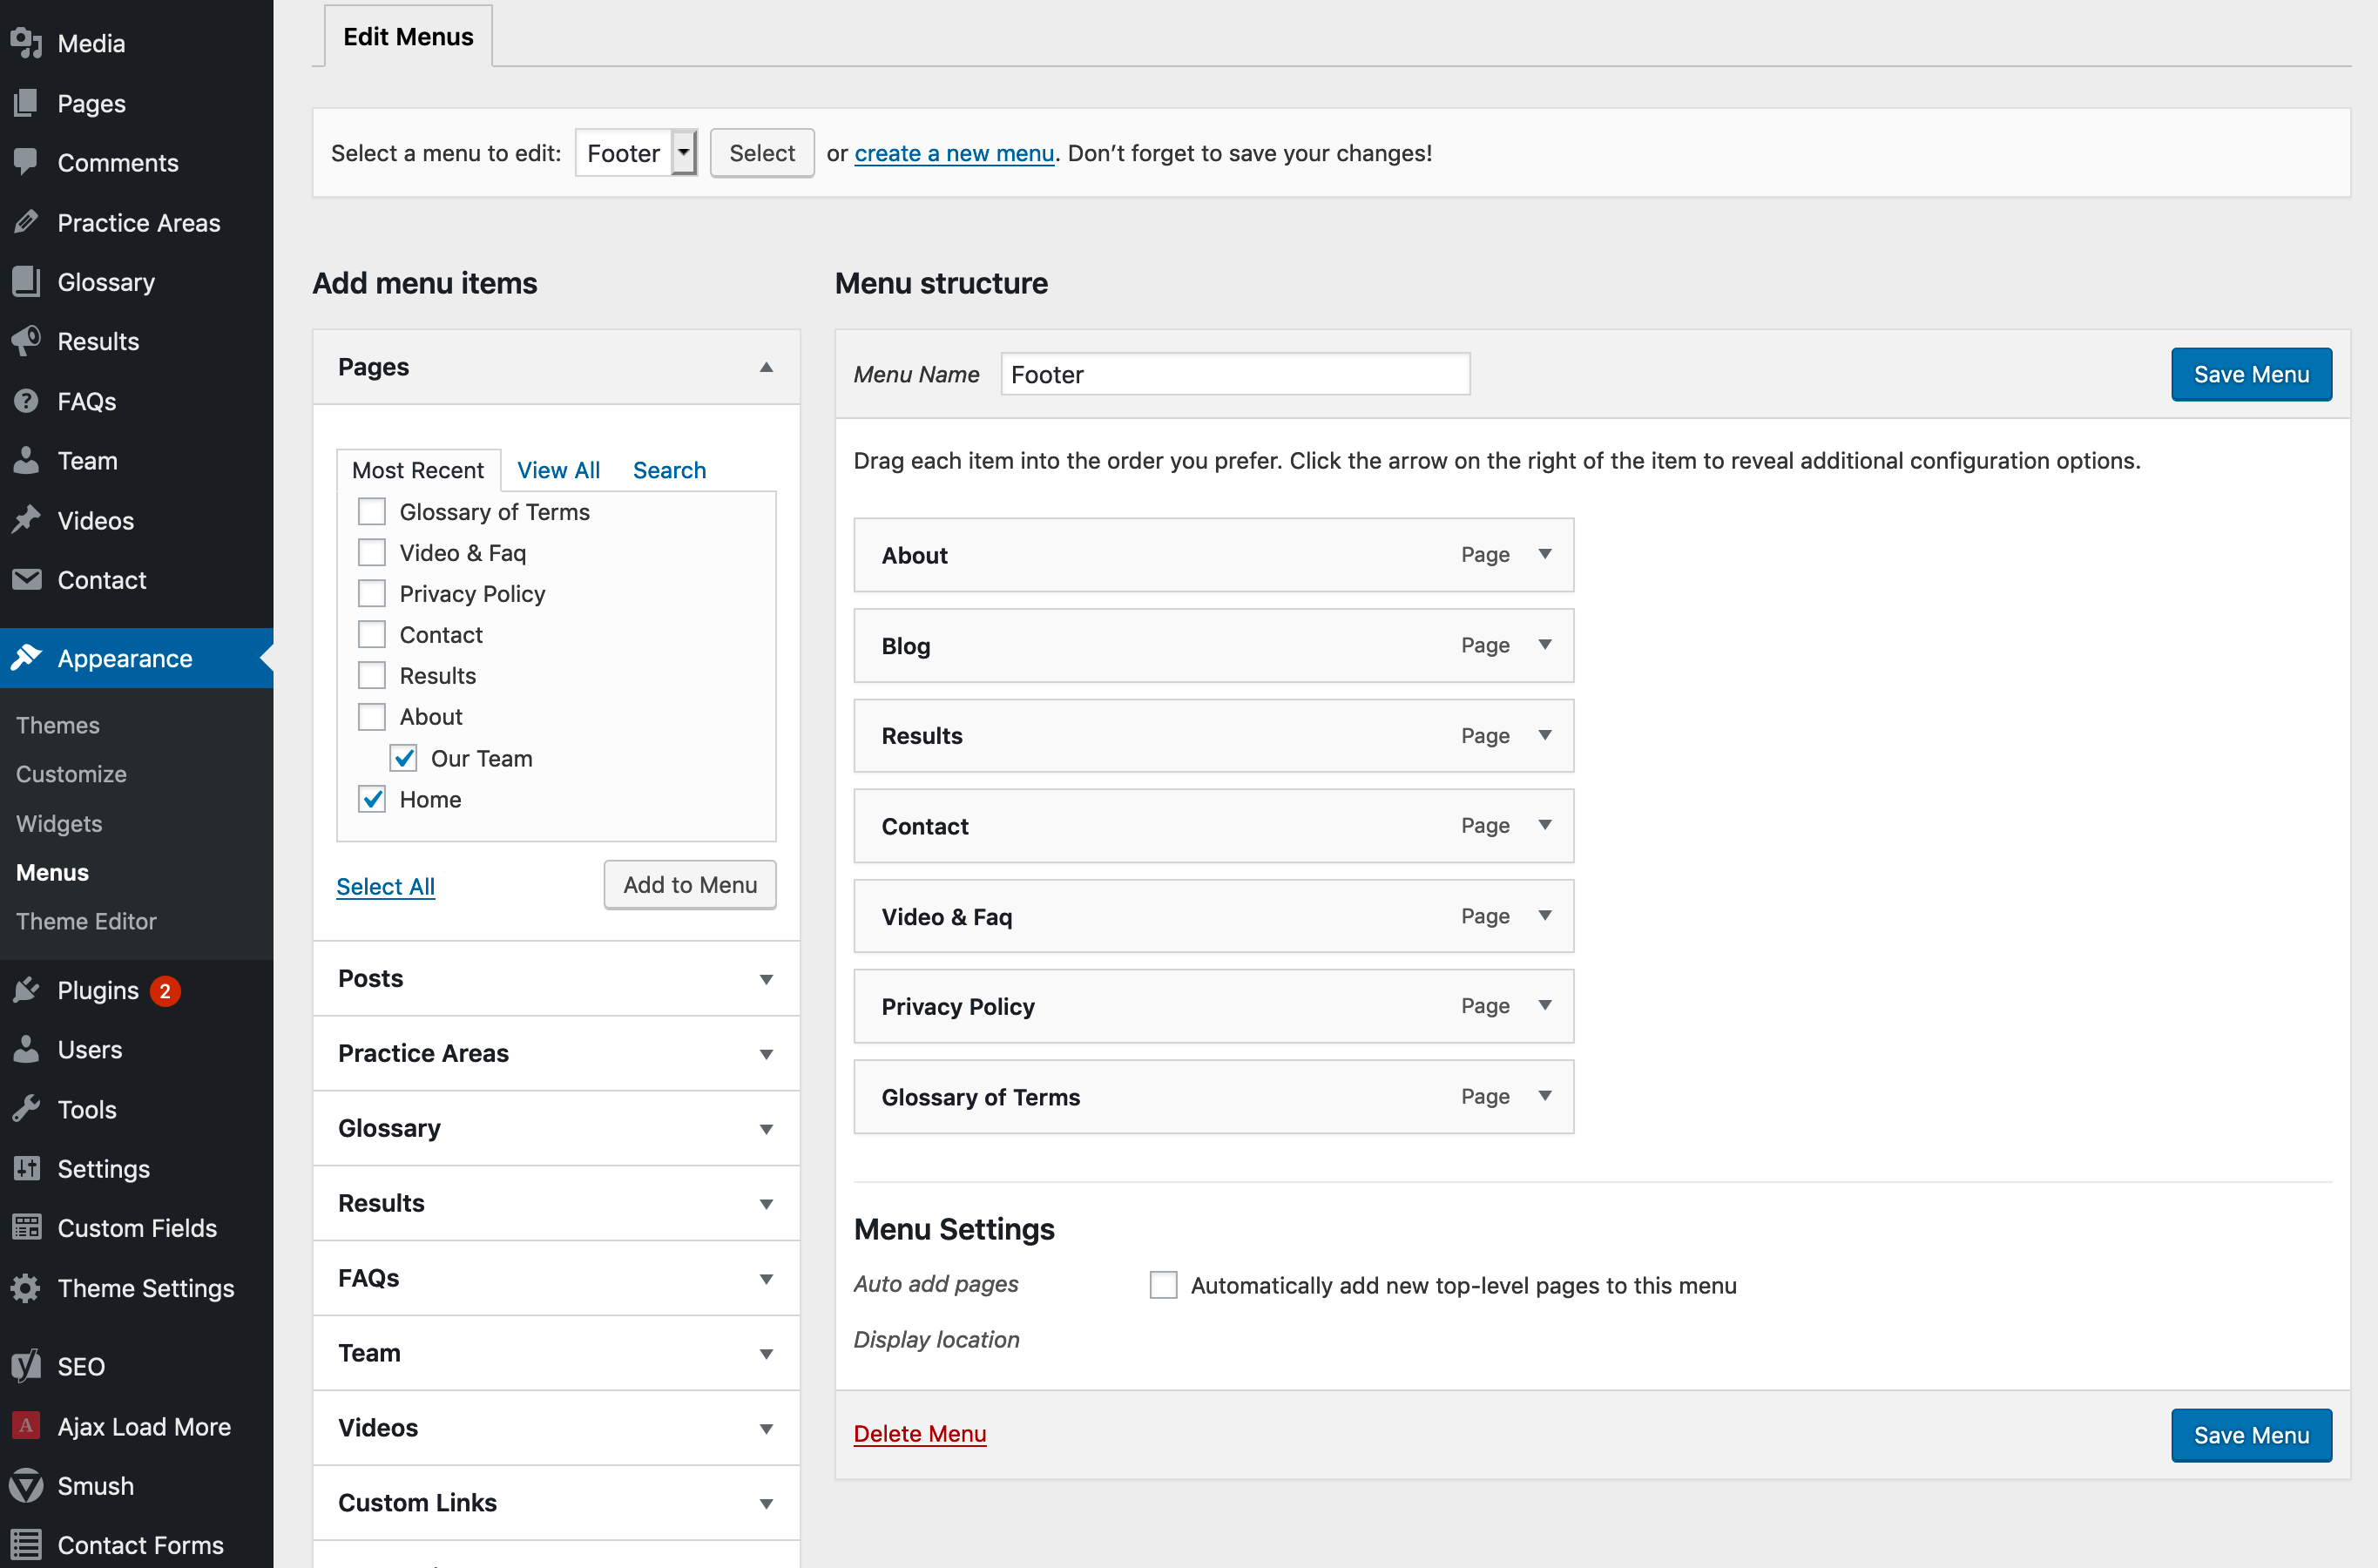
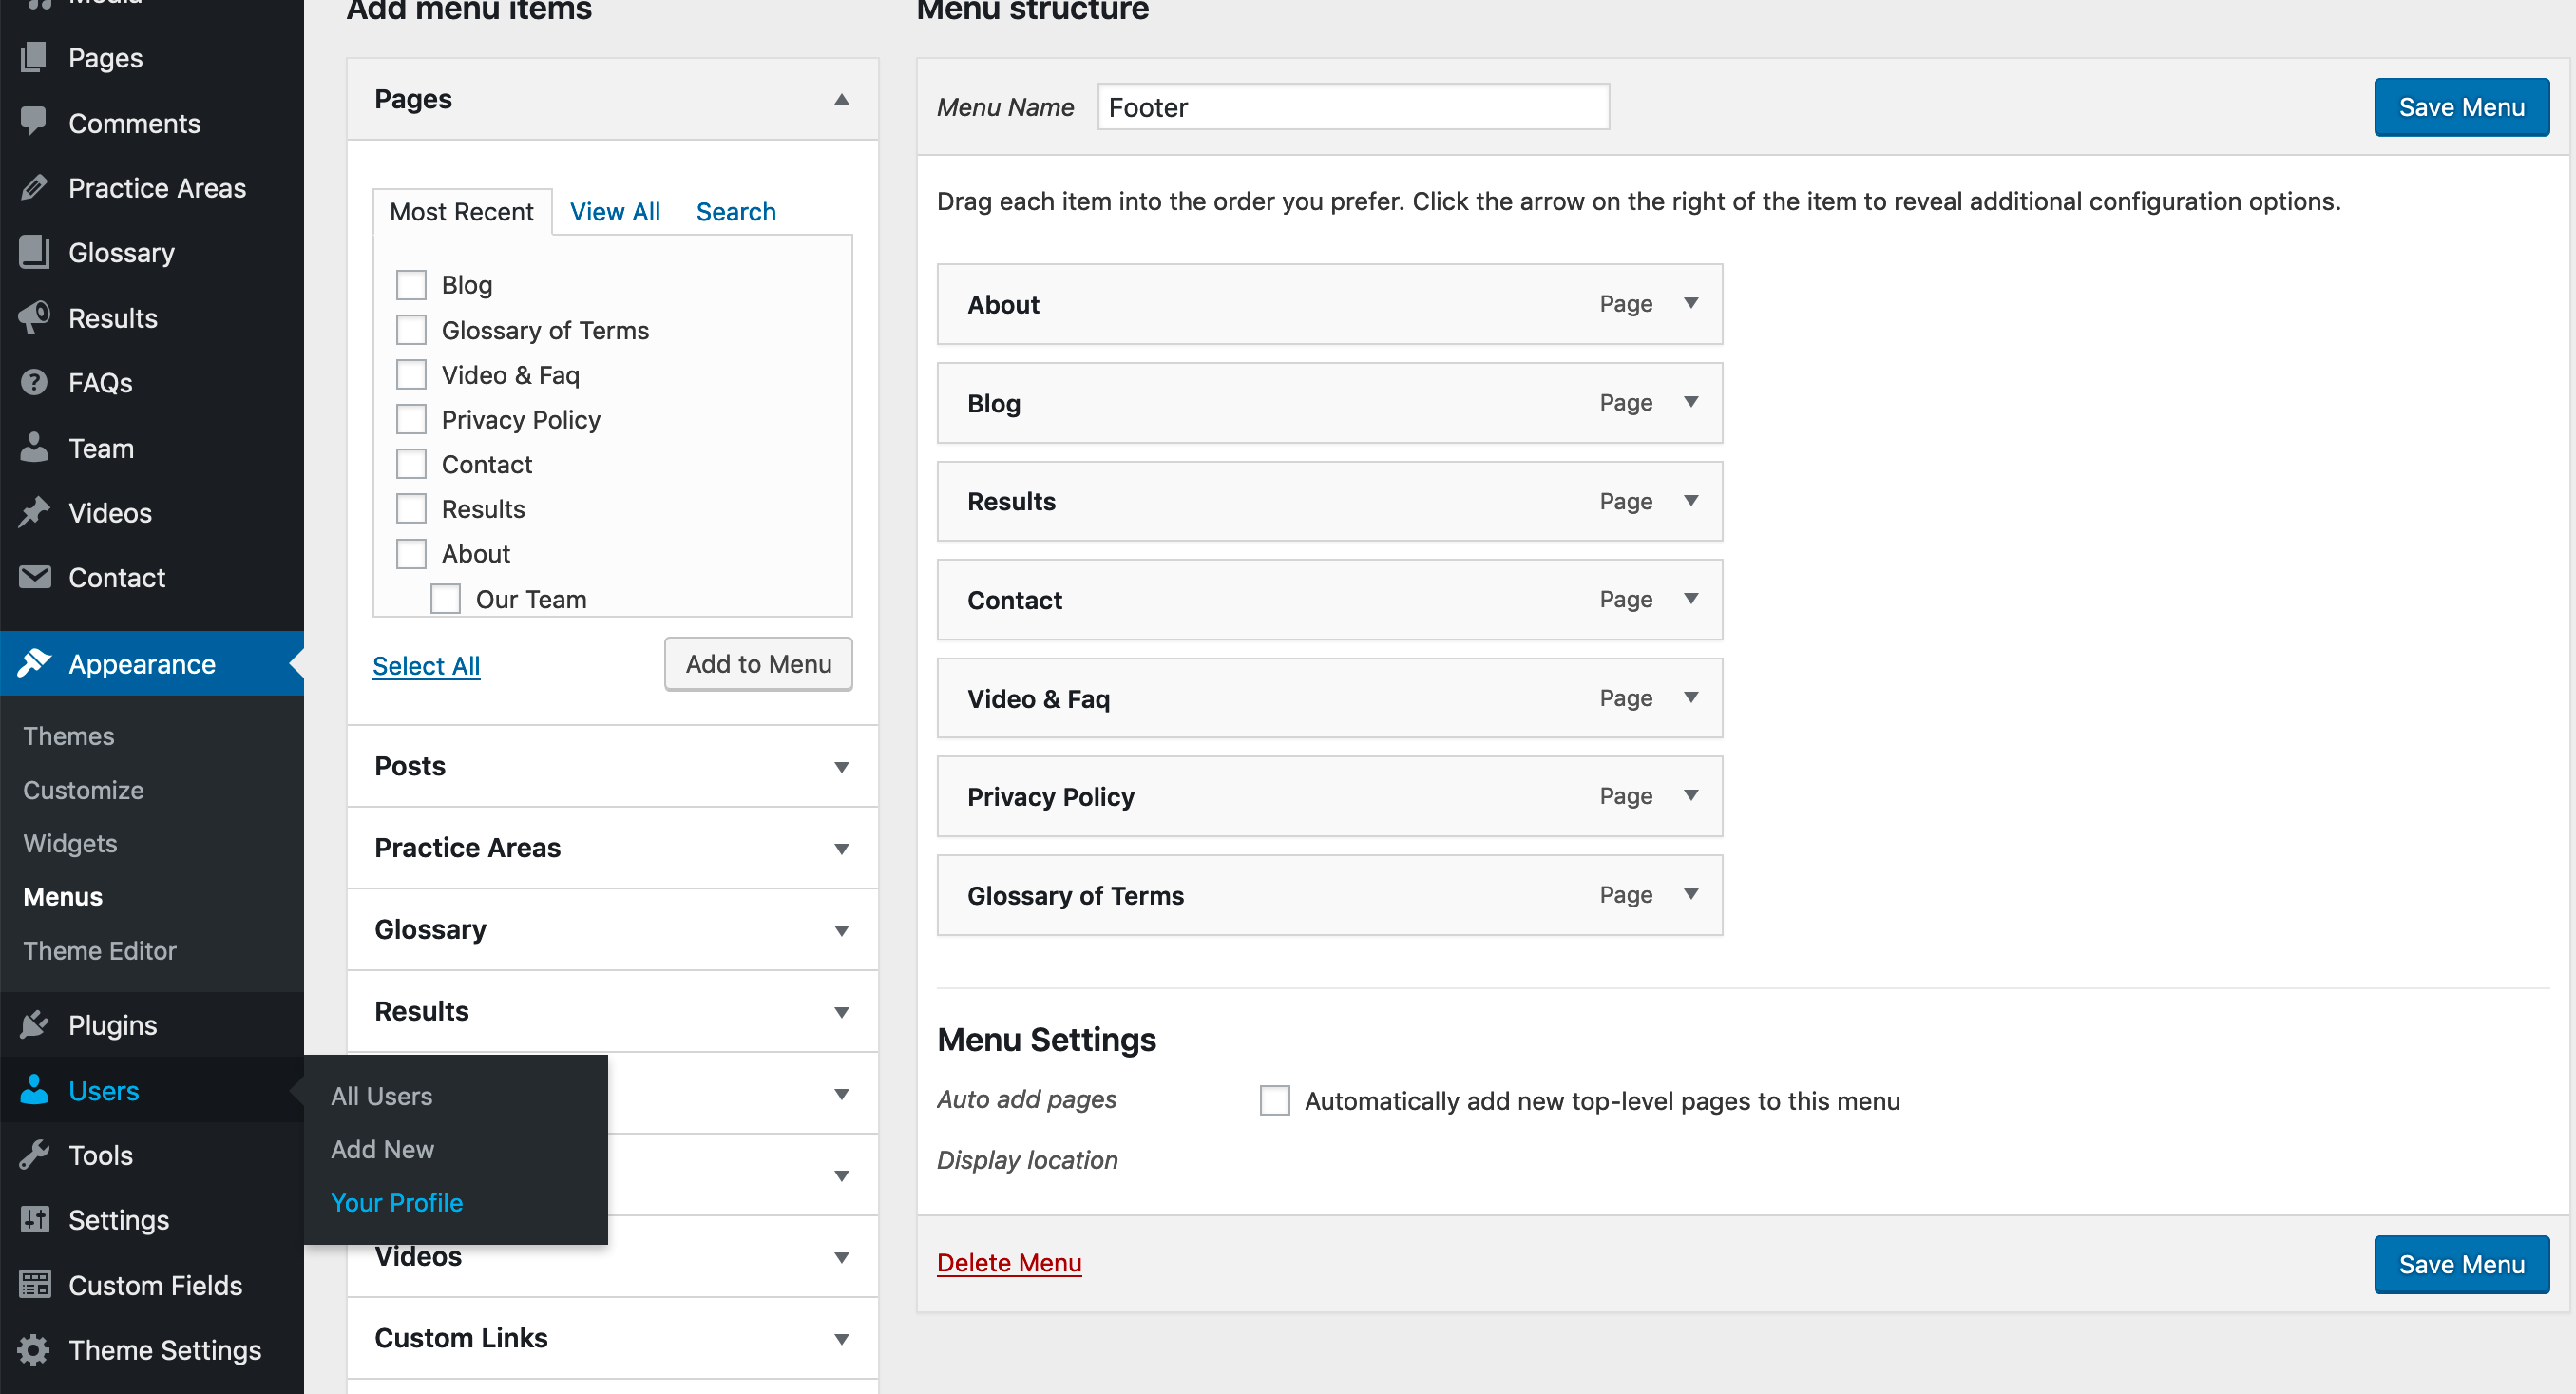
On the menu screen, you’ll see one of the menu structure pre-selected for you. On the left hand column are links you can choose from grouped by post types and taxonomies, along with a custom link option, and on the right column is a drag and drop interface allowing you to edit and reordering the menu.
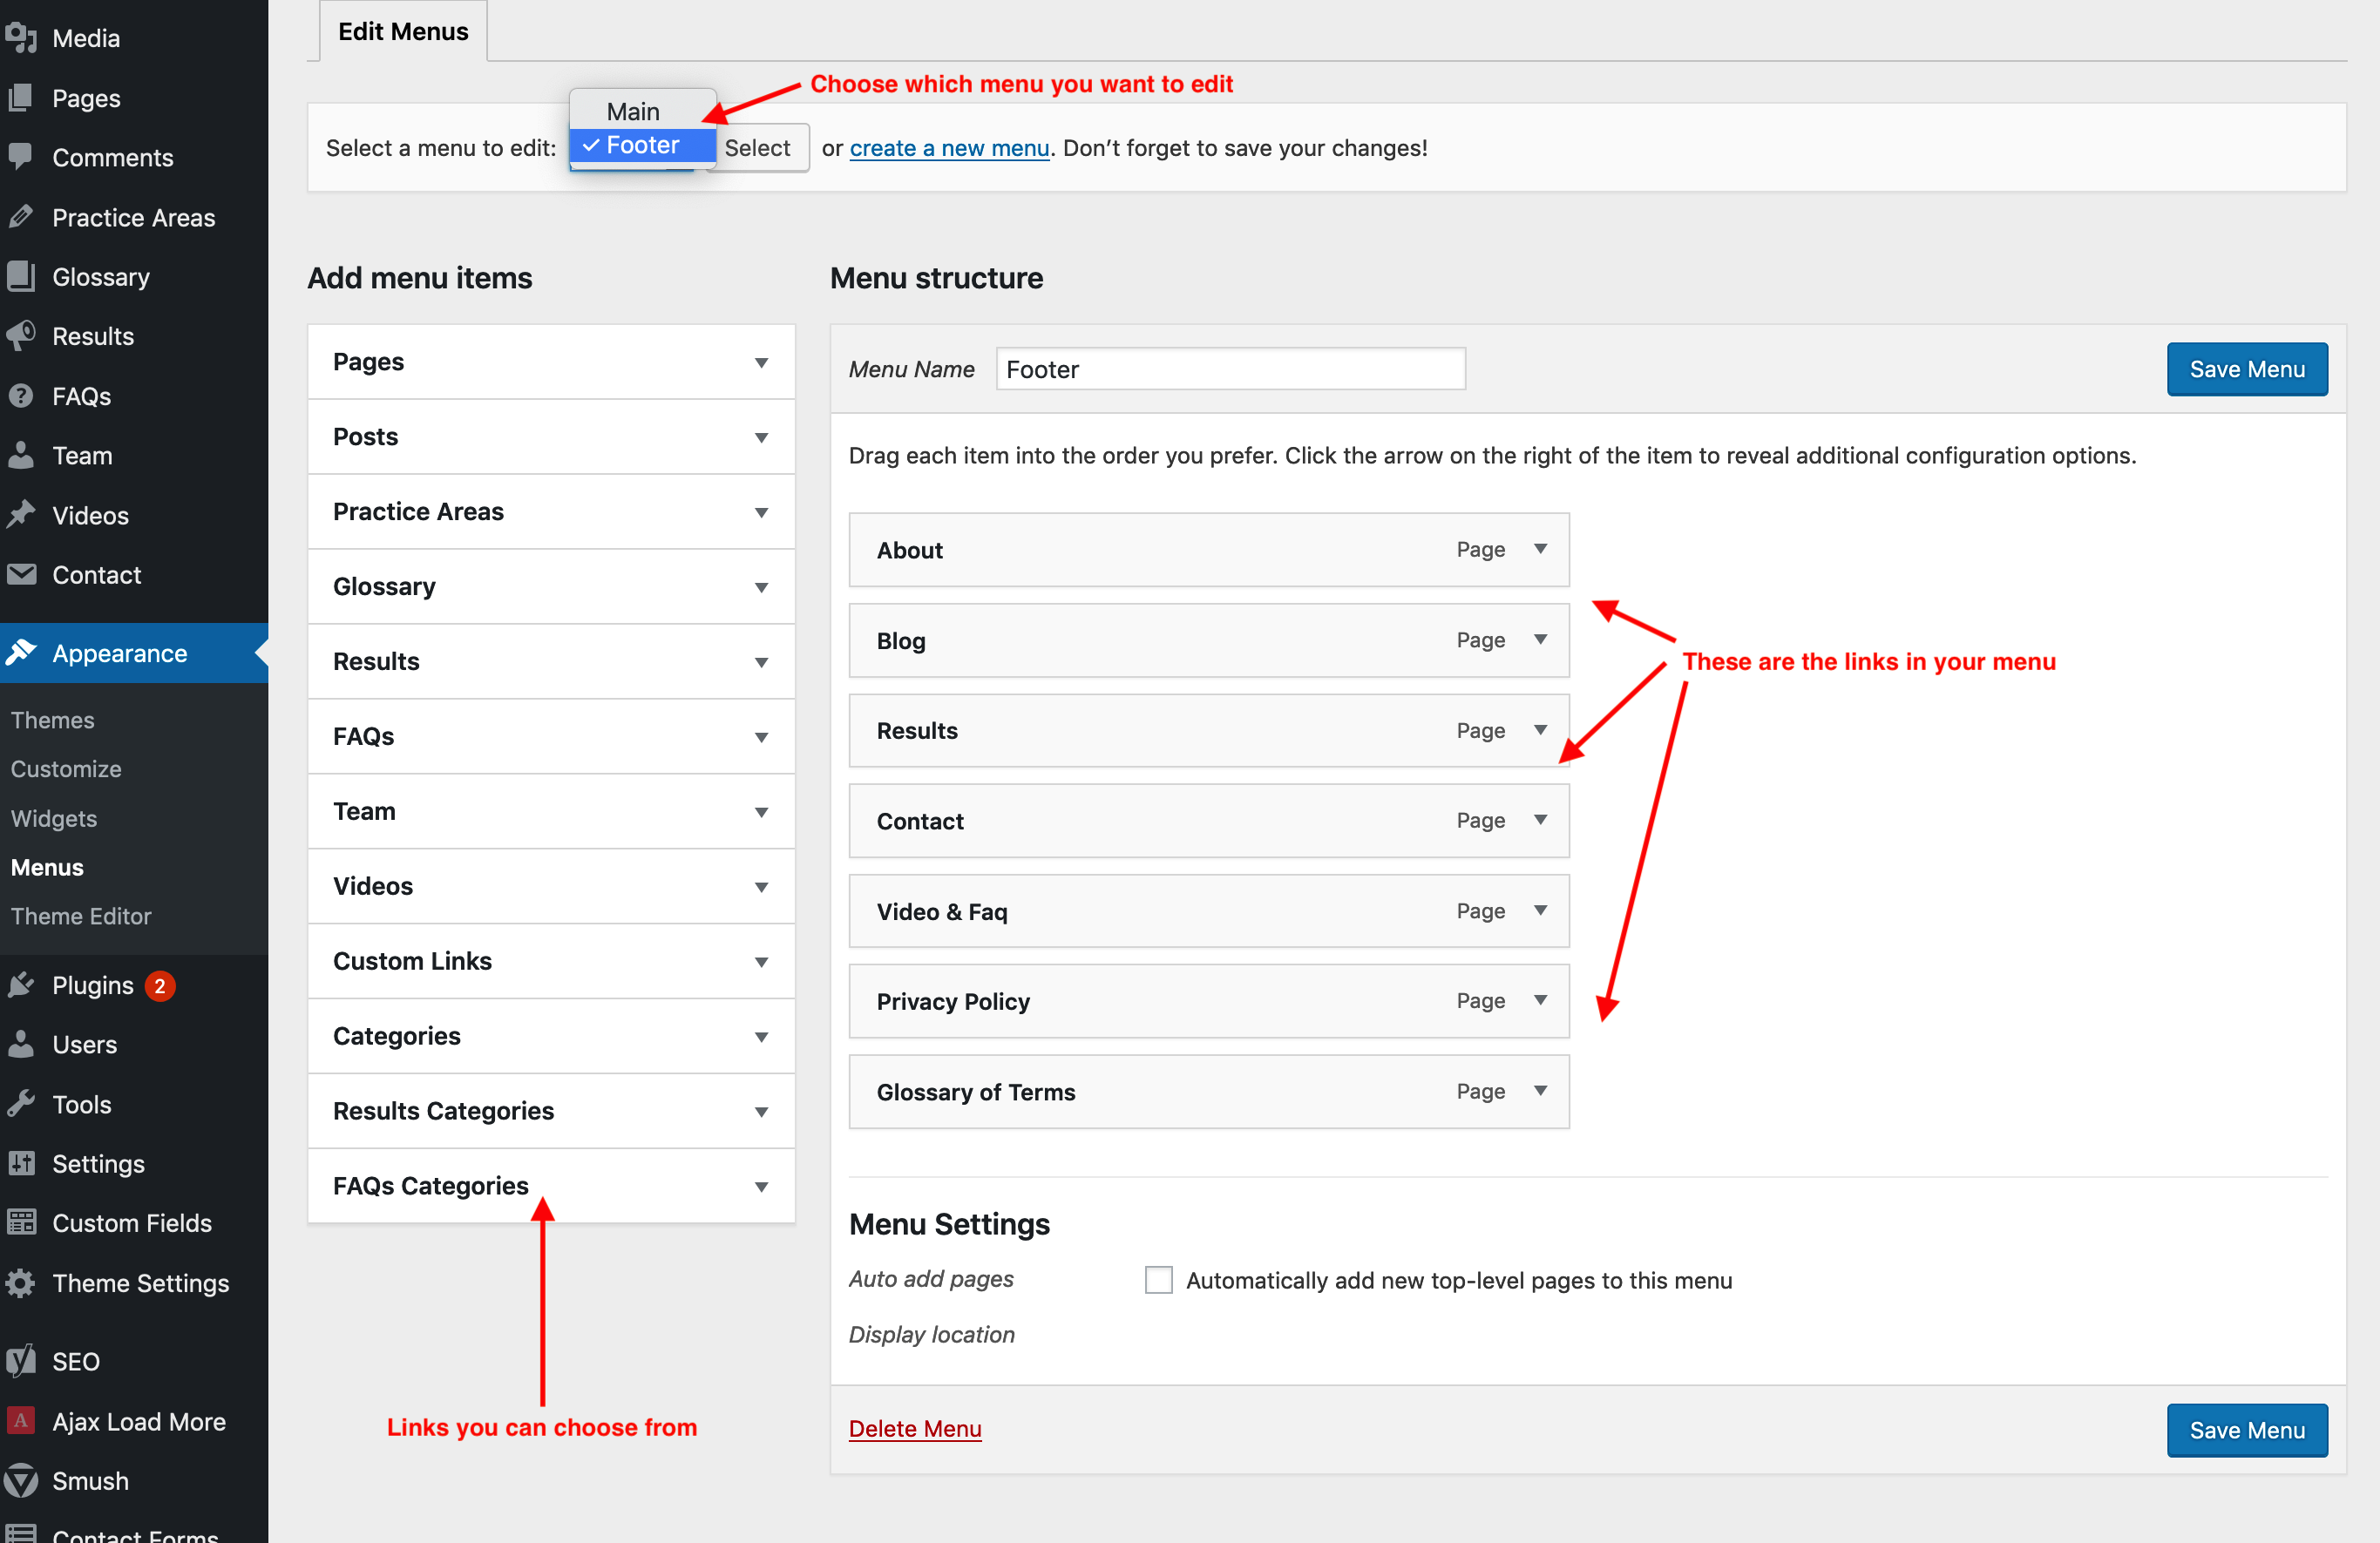
To add a link, you’ll dropdown the relevant section on the left, choose your pages, and then click “Add to Menu” to see them in the right column.
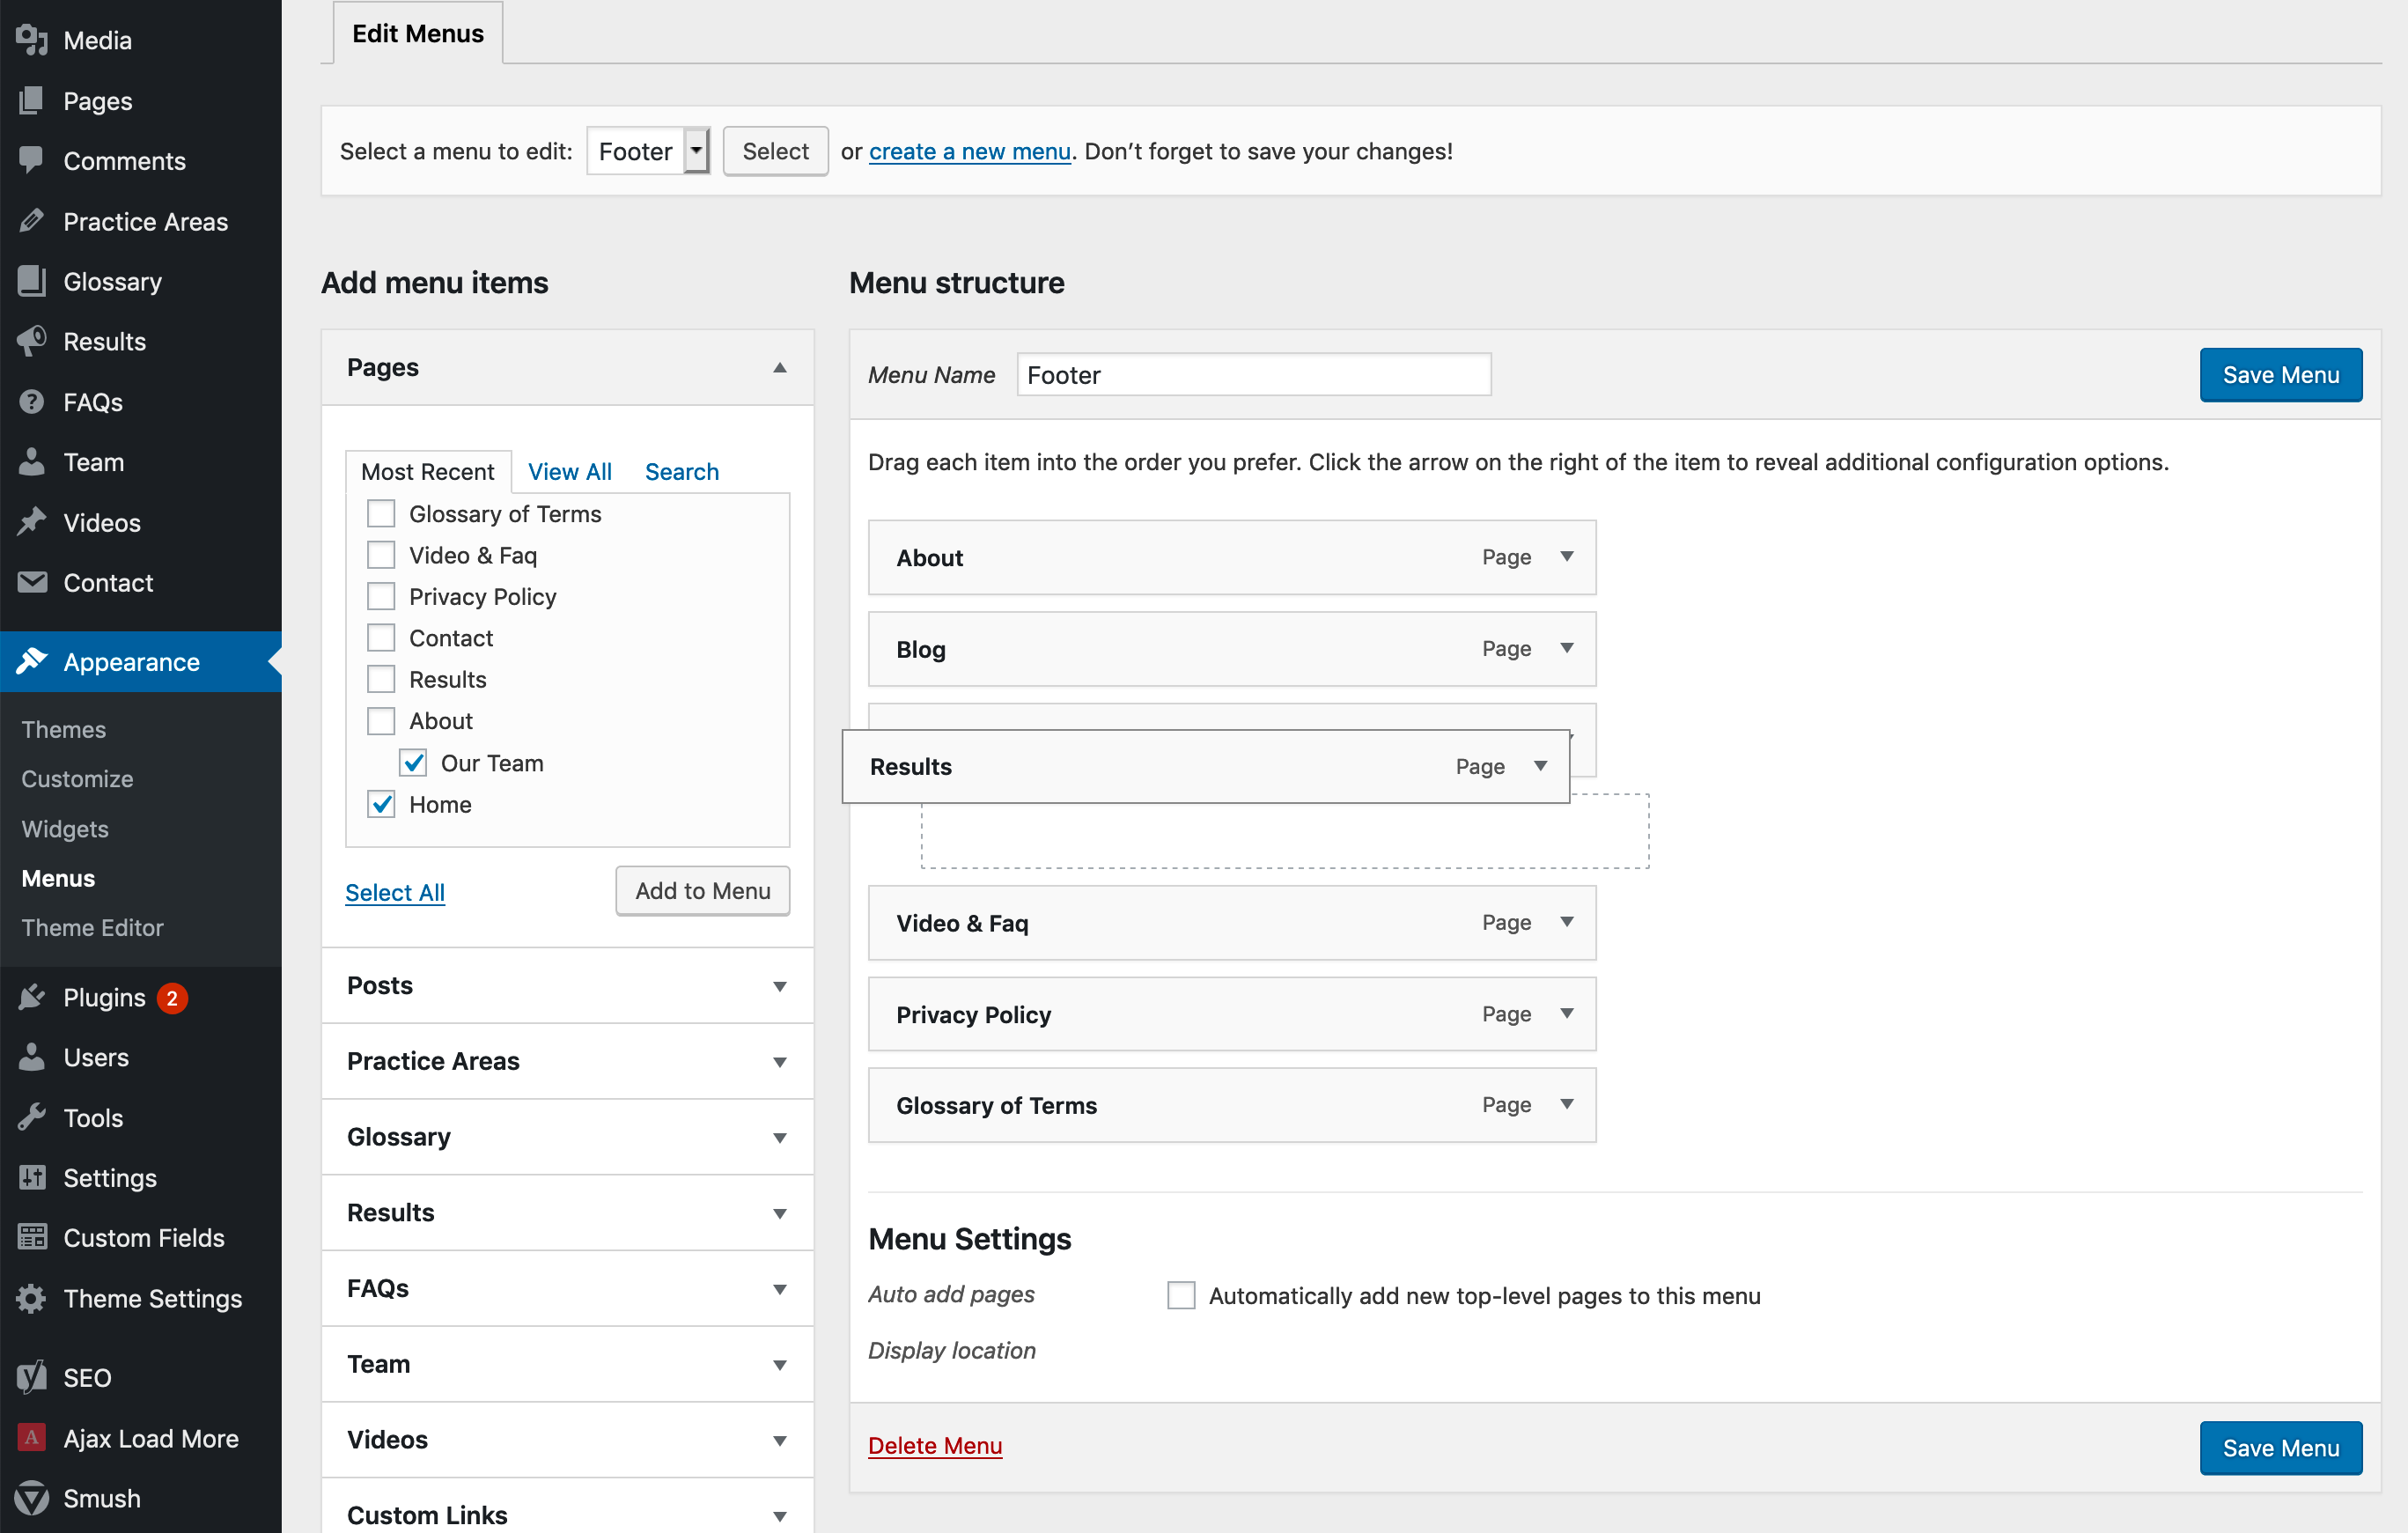
To reorder the links, you can drag and drop by click-holding on the link box and moving it around.
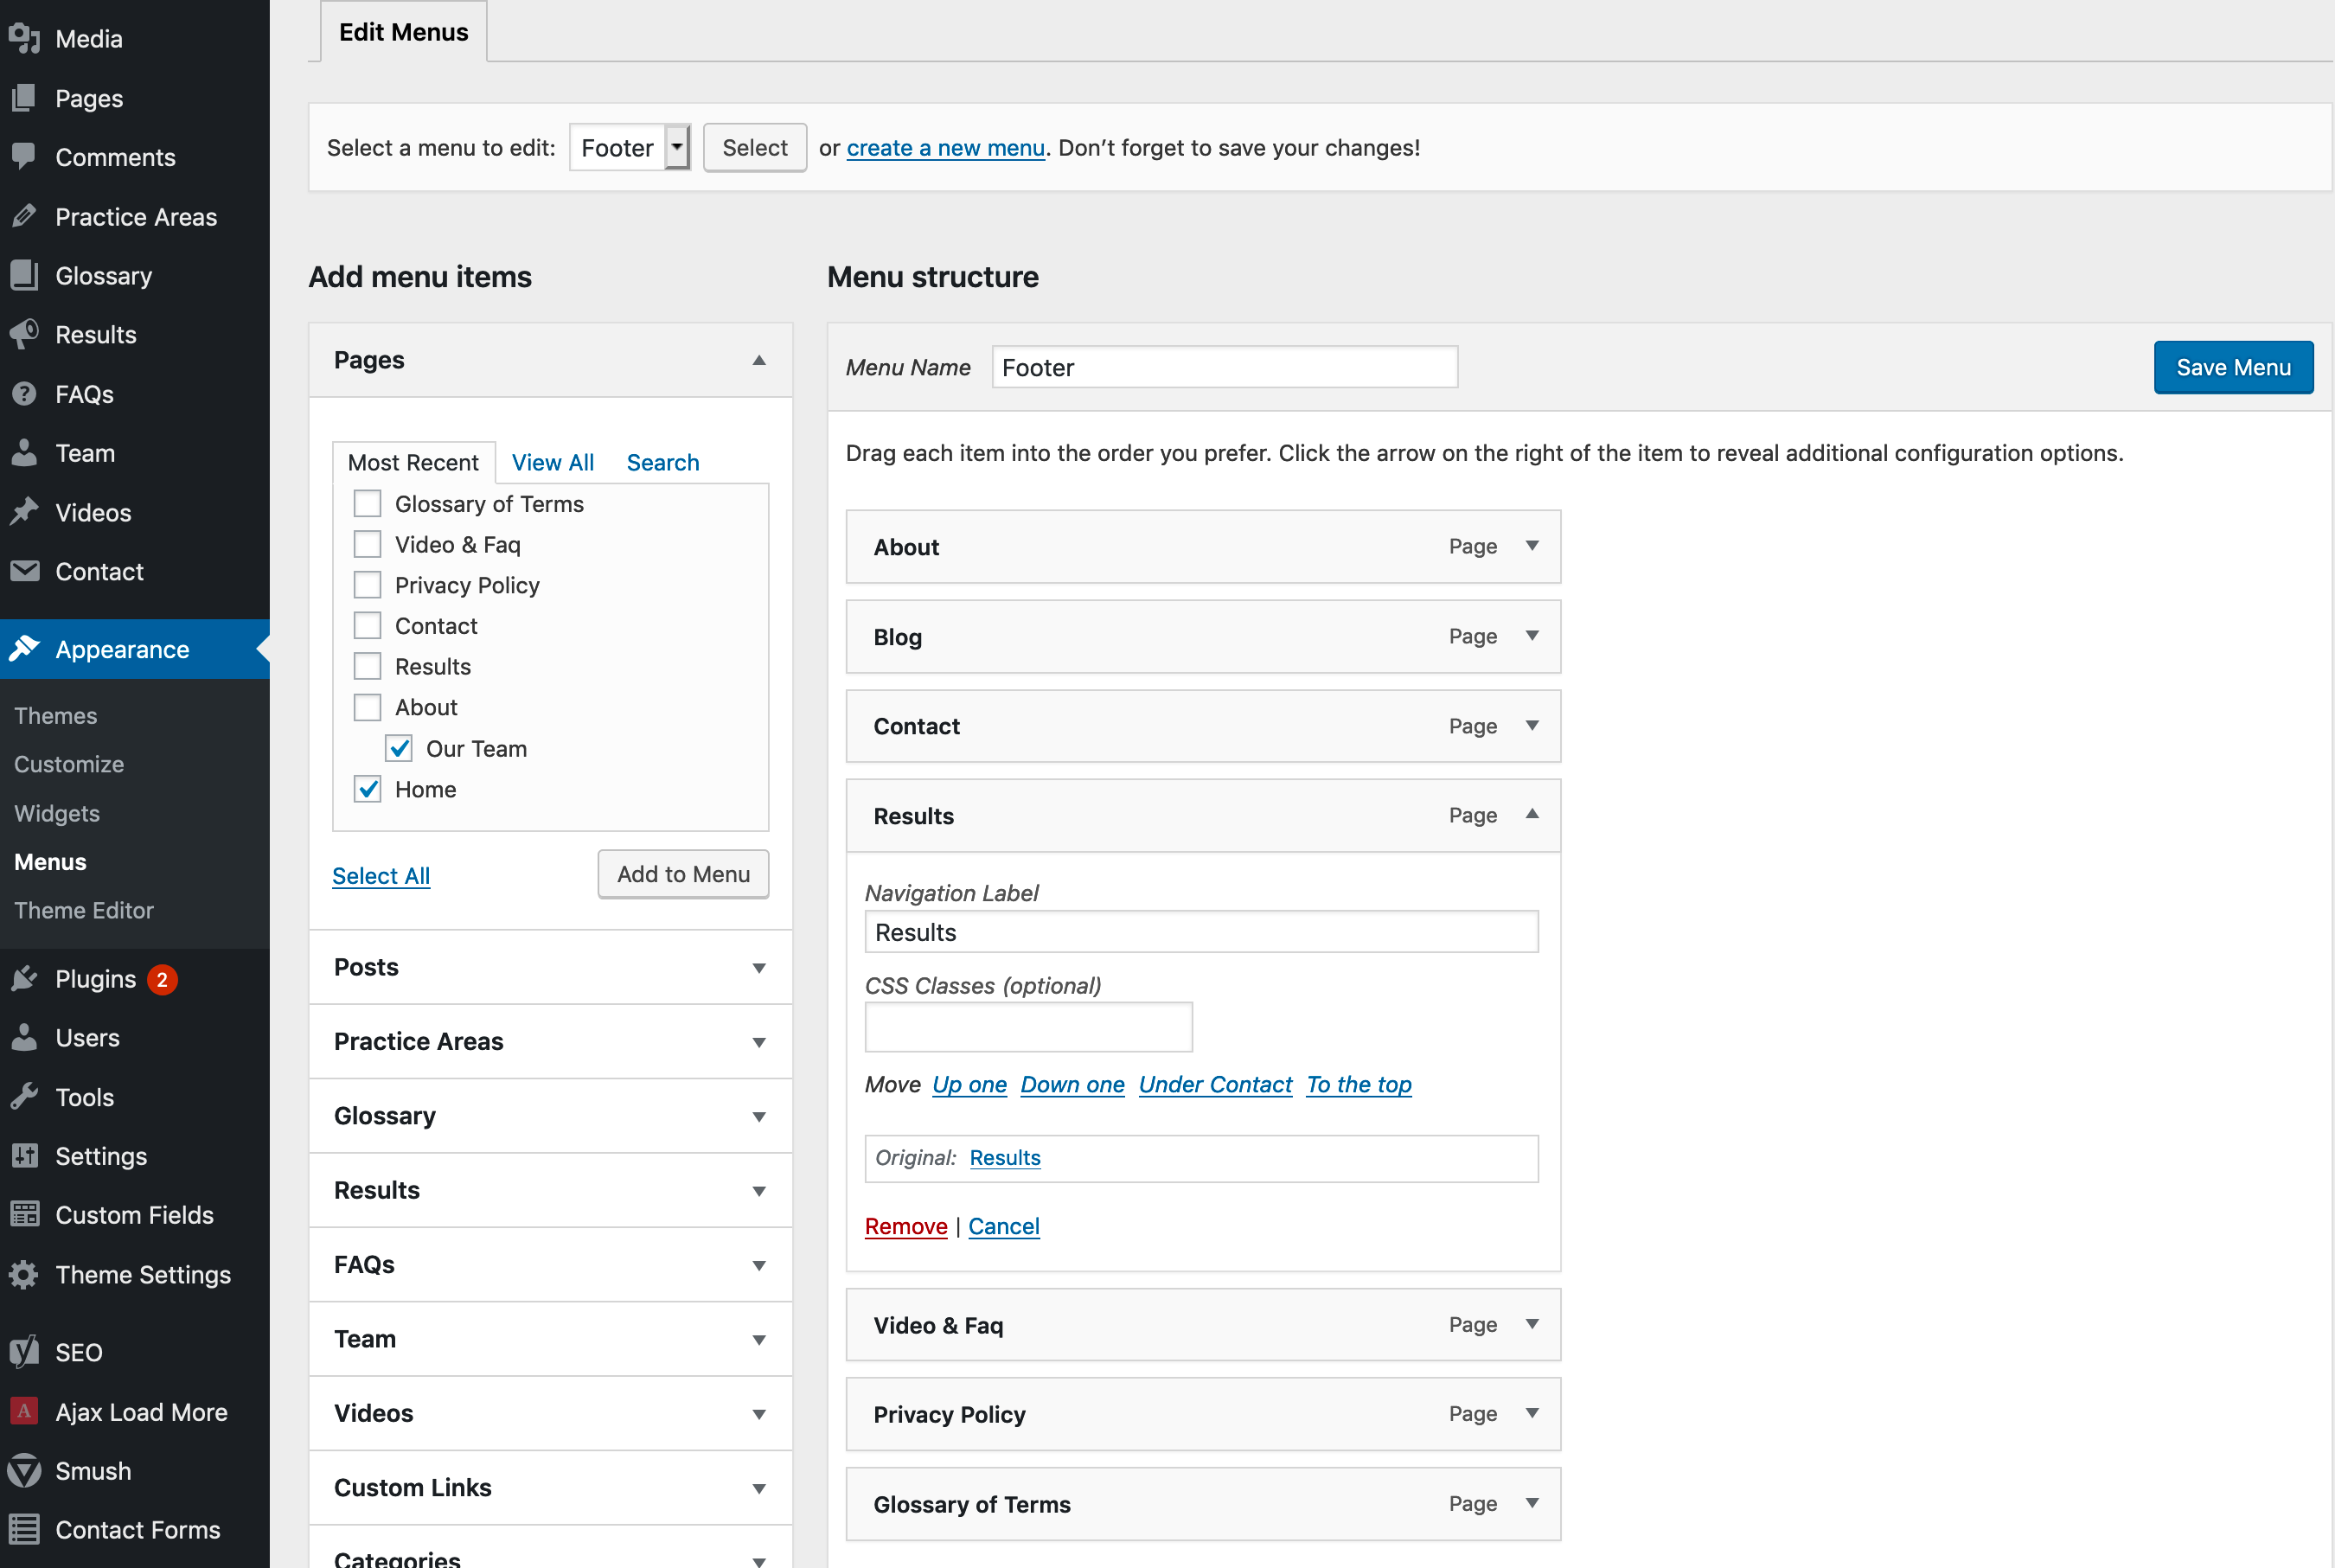
To edit the existing link, you can expand it’s accordion and change the link text.
You can also add custom links that aren’t listed in any of the provided sections, by expanding the “Custom Links” accordion and entering a link URL and title.
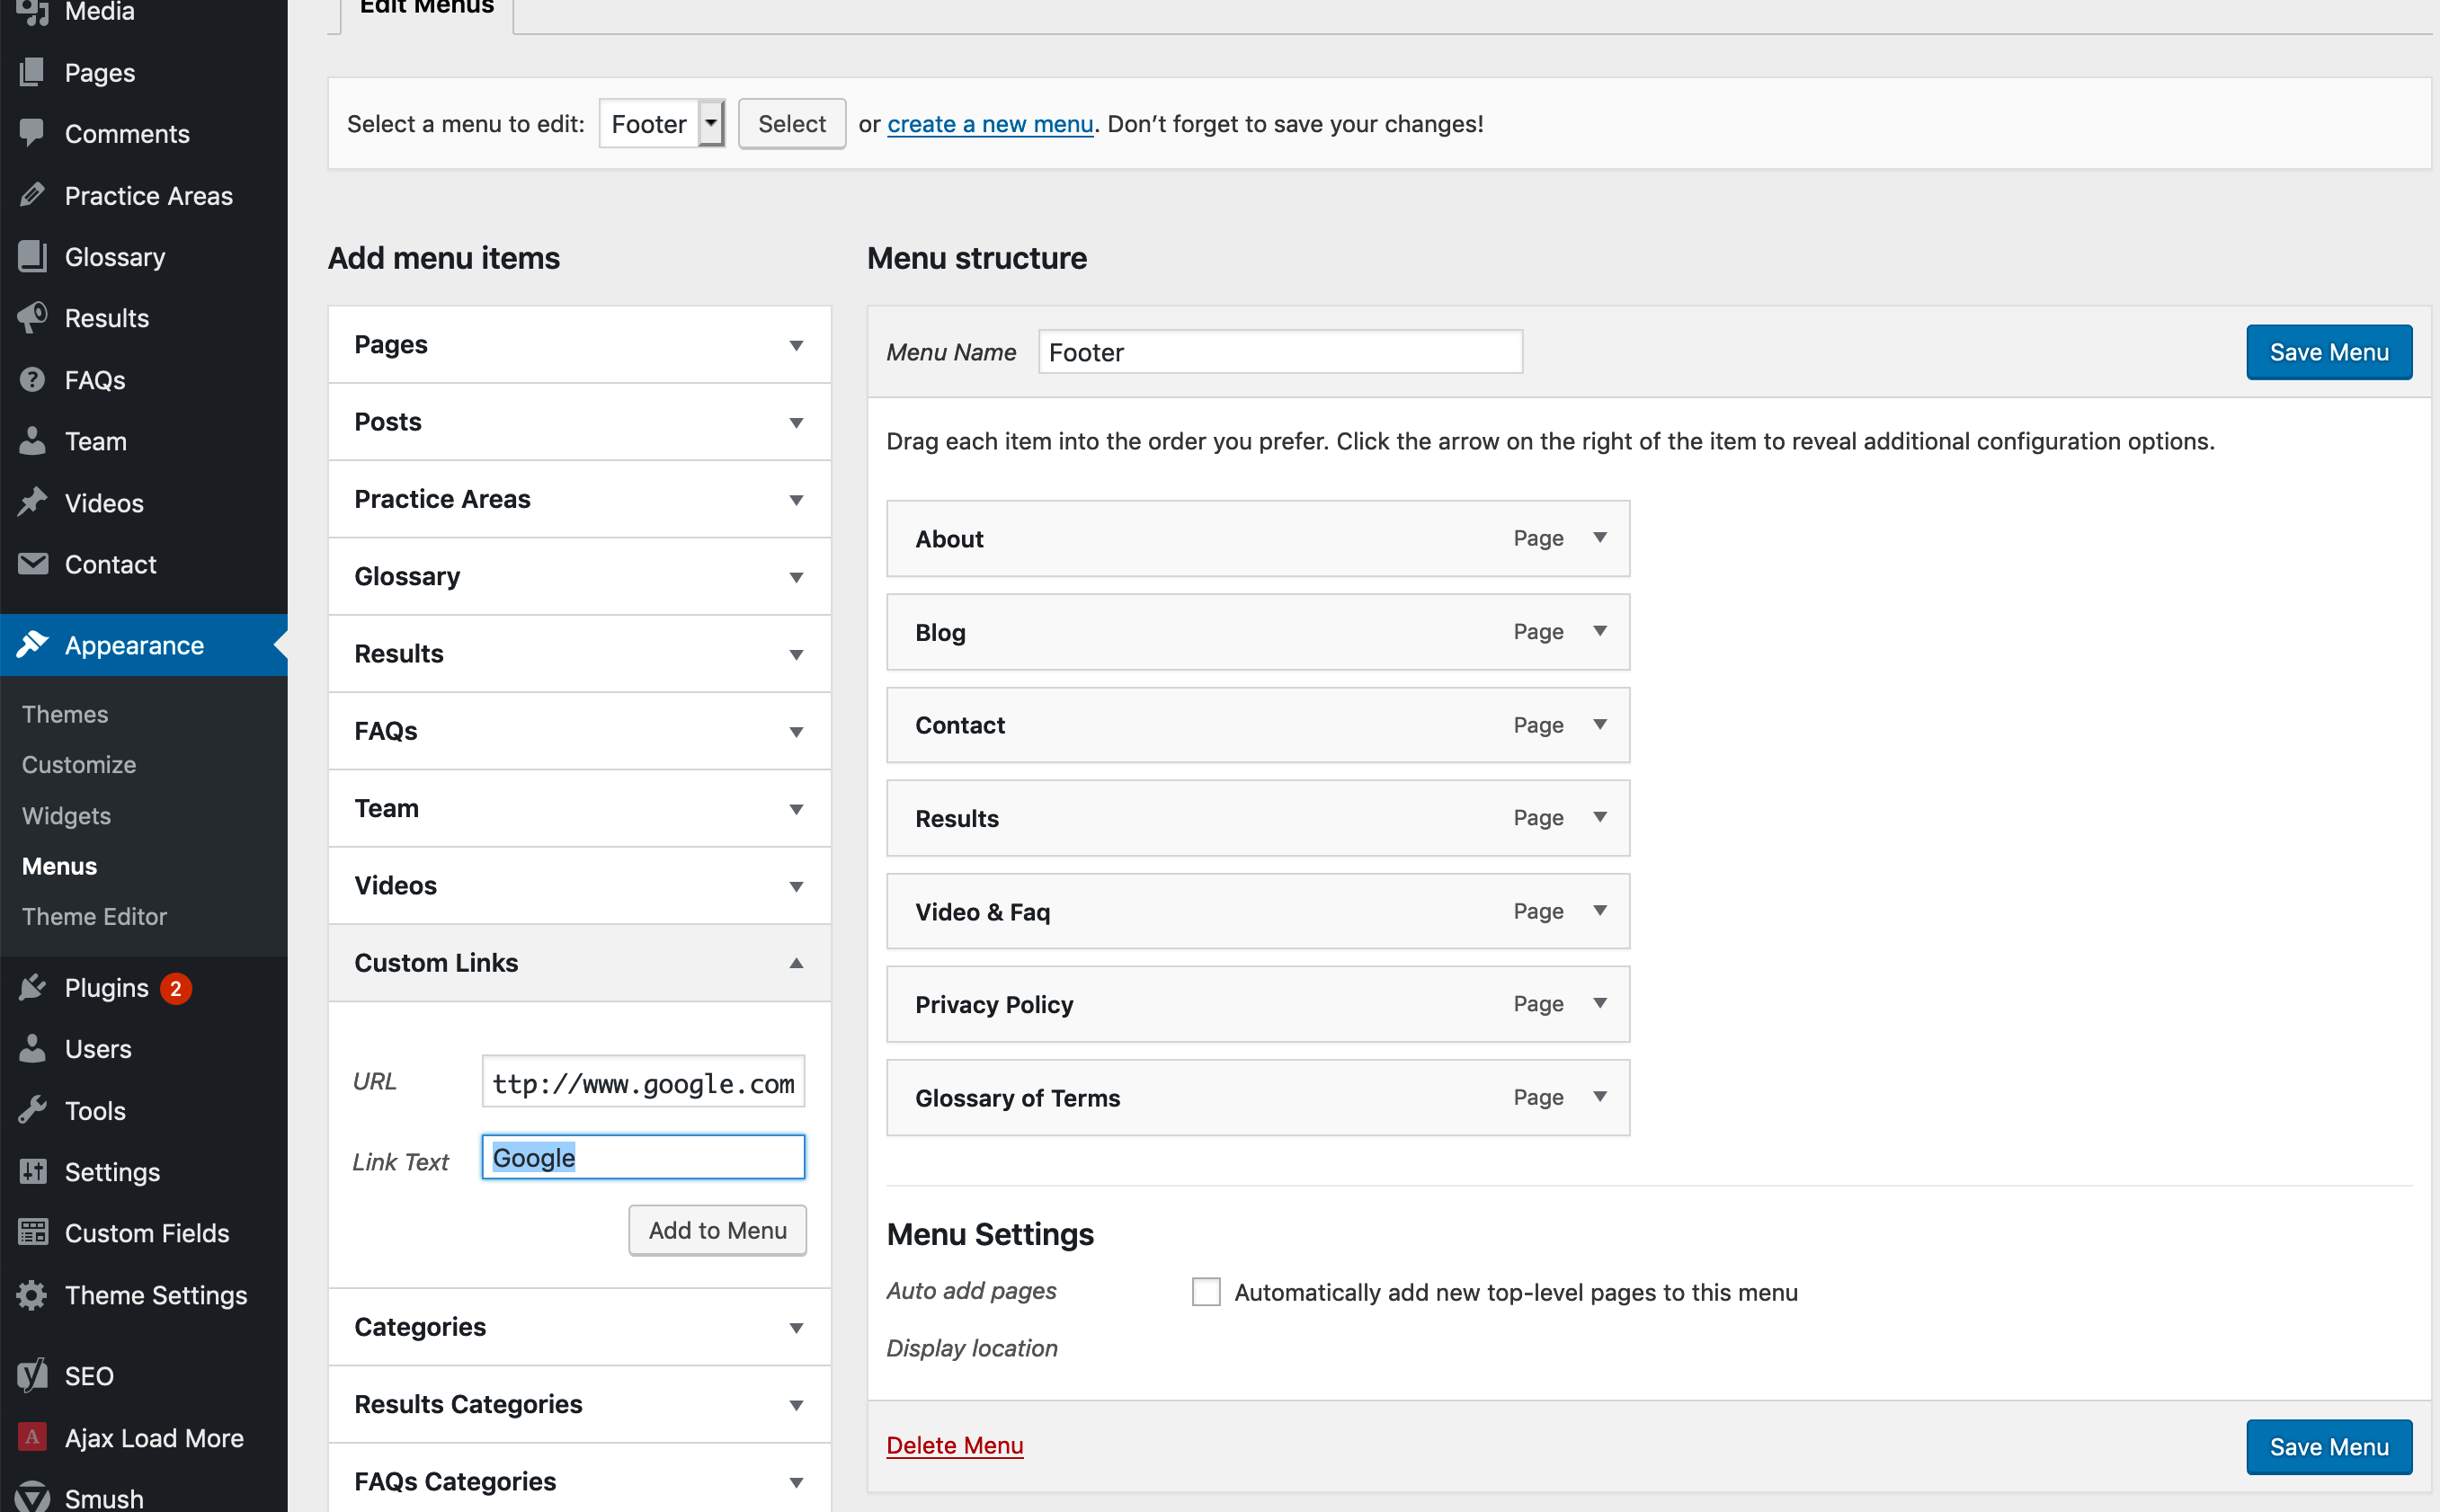
When you’re finished with your menu, don’t forget to click the big blue “Save Menu” button on the right!
Users
In the “Users” section of the WordPress admin, you can add a new user to allow admin access to your site, or update your own profile.
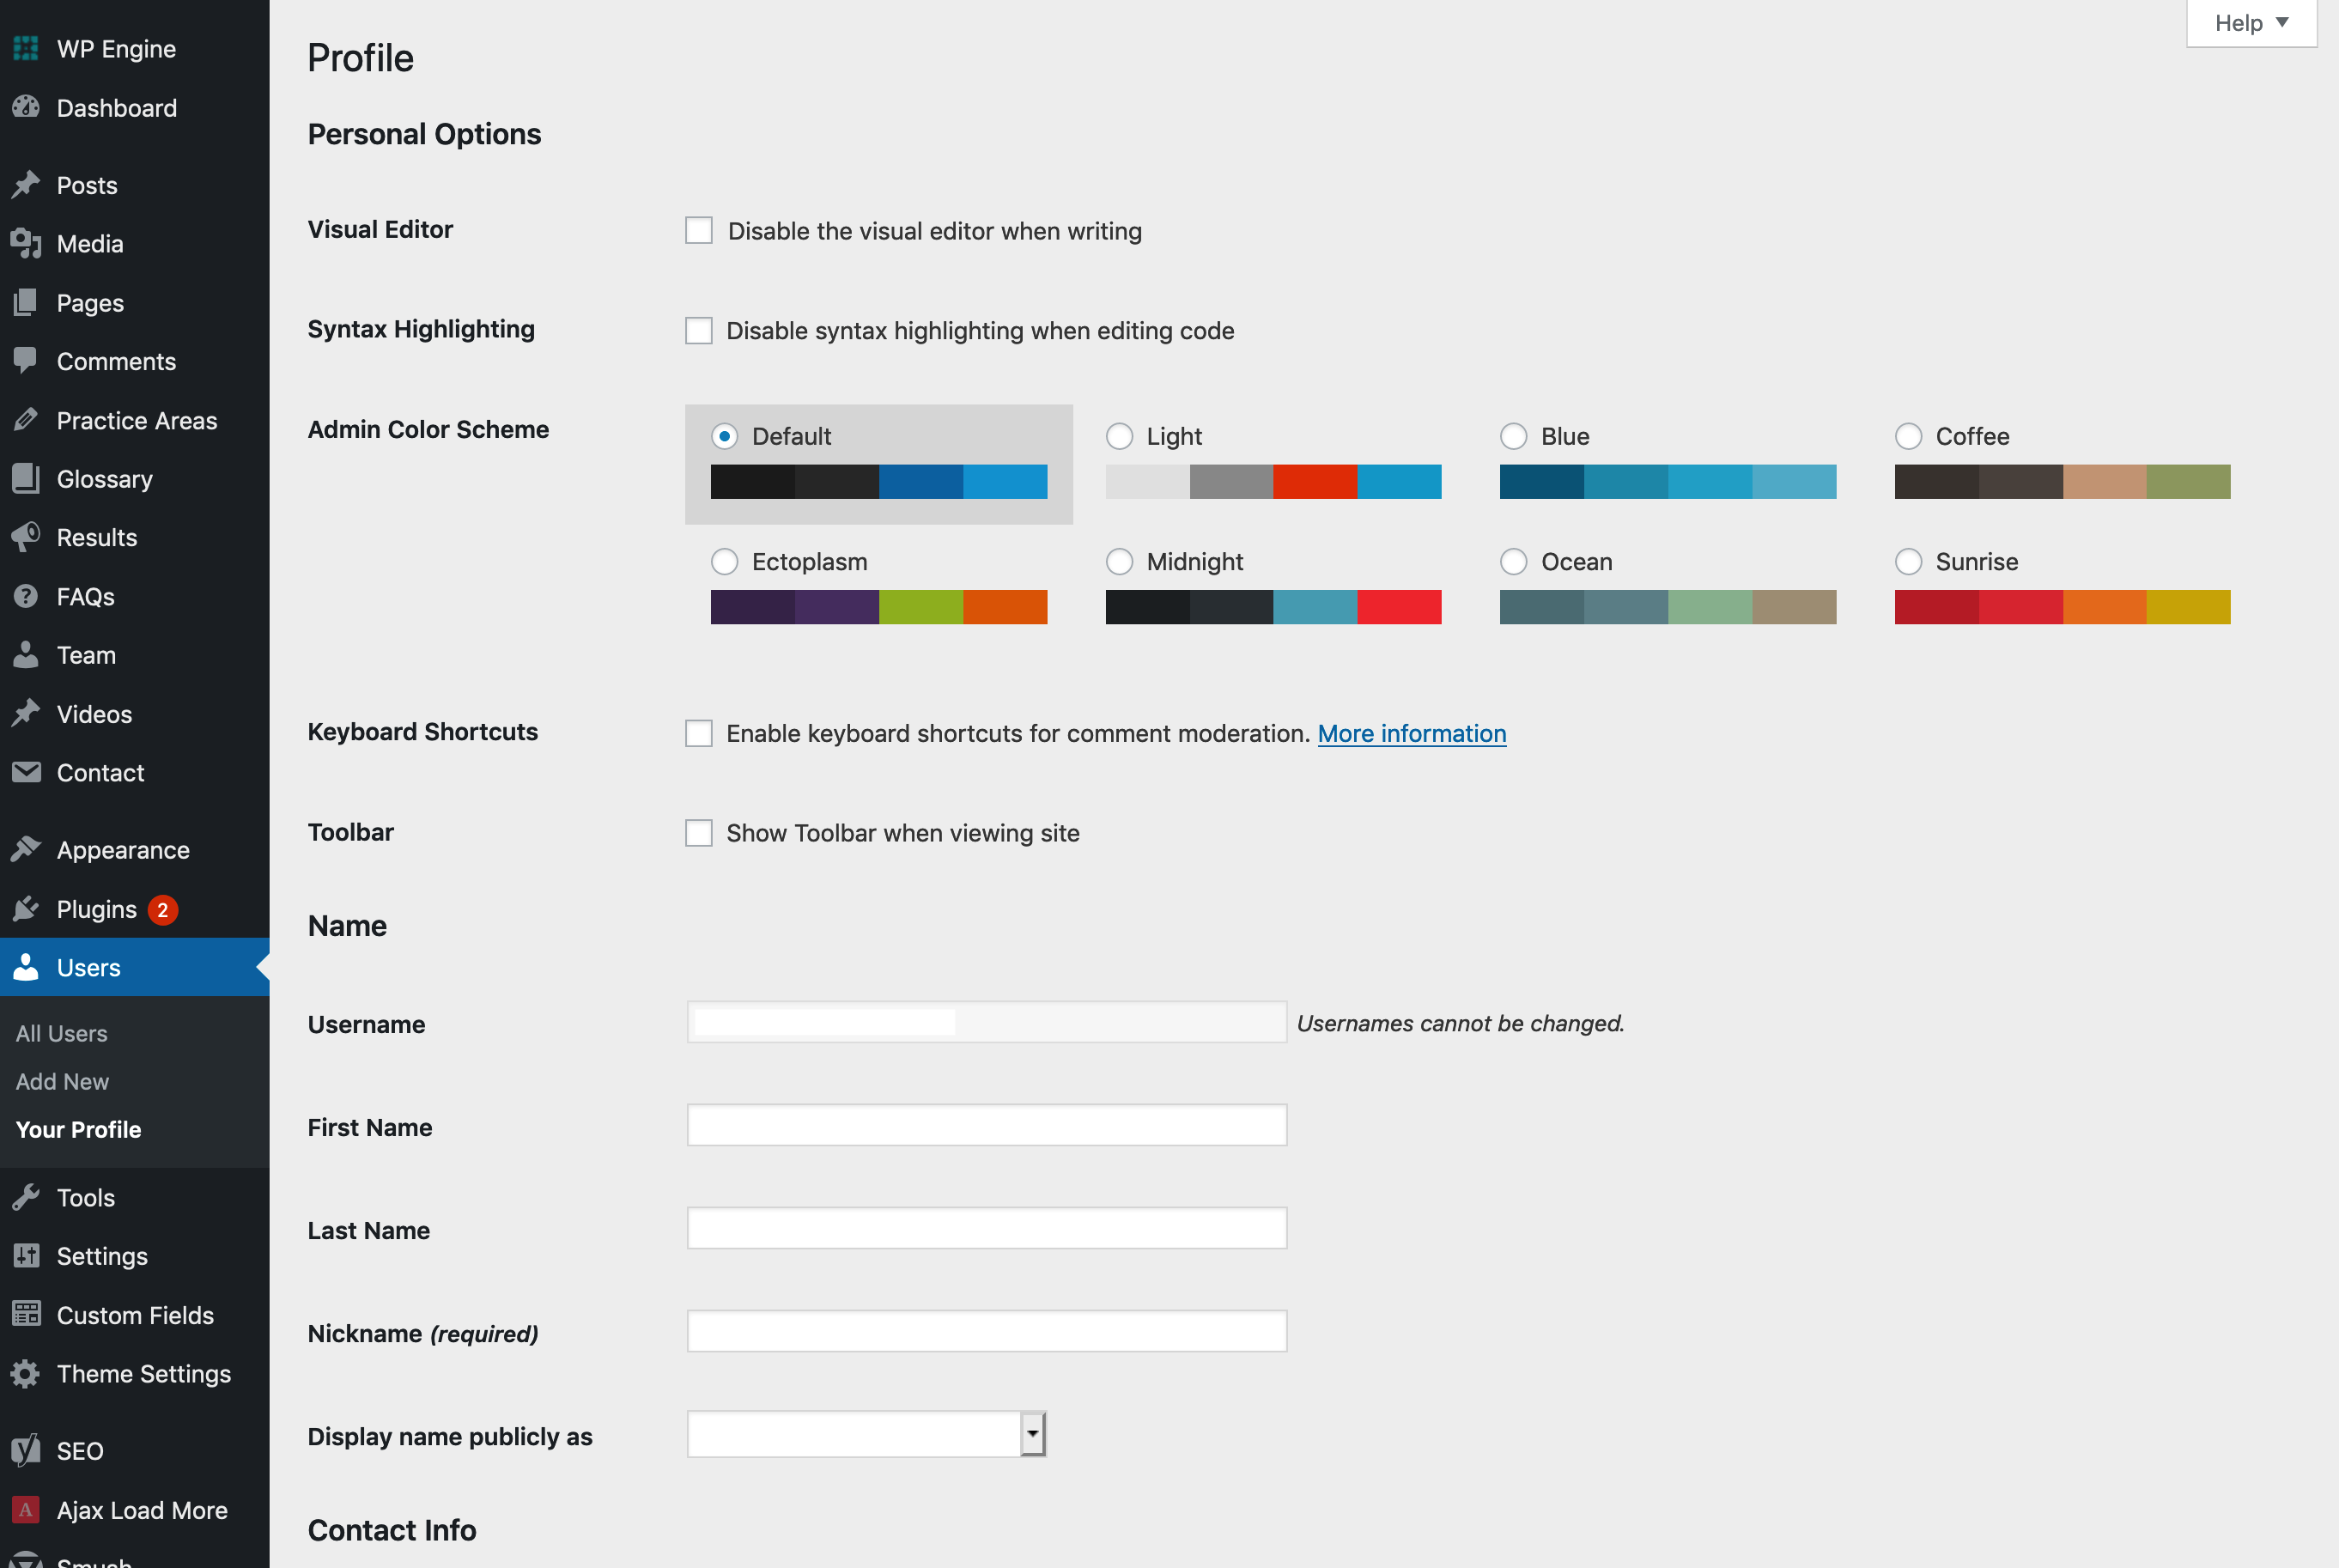
To update your profile, go to “Users” and “Your Profile” in the admin menu.
Here you can update all of your profile info, including your password, display name, and bio. There may also be additional options depending on your theme settings.
If you want to add a new user to your site, click on the “Add New” option under “Users”. You’ll choose a username and enter their email address. The user will set their password when they first log in from the link sent to their email.
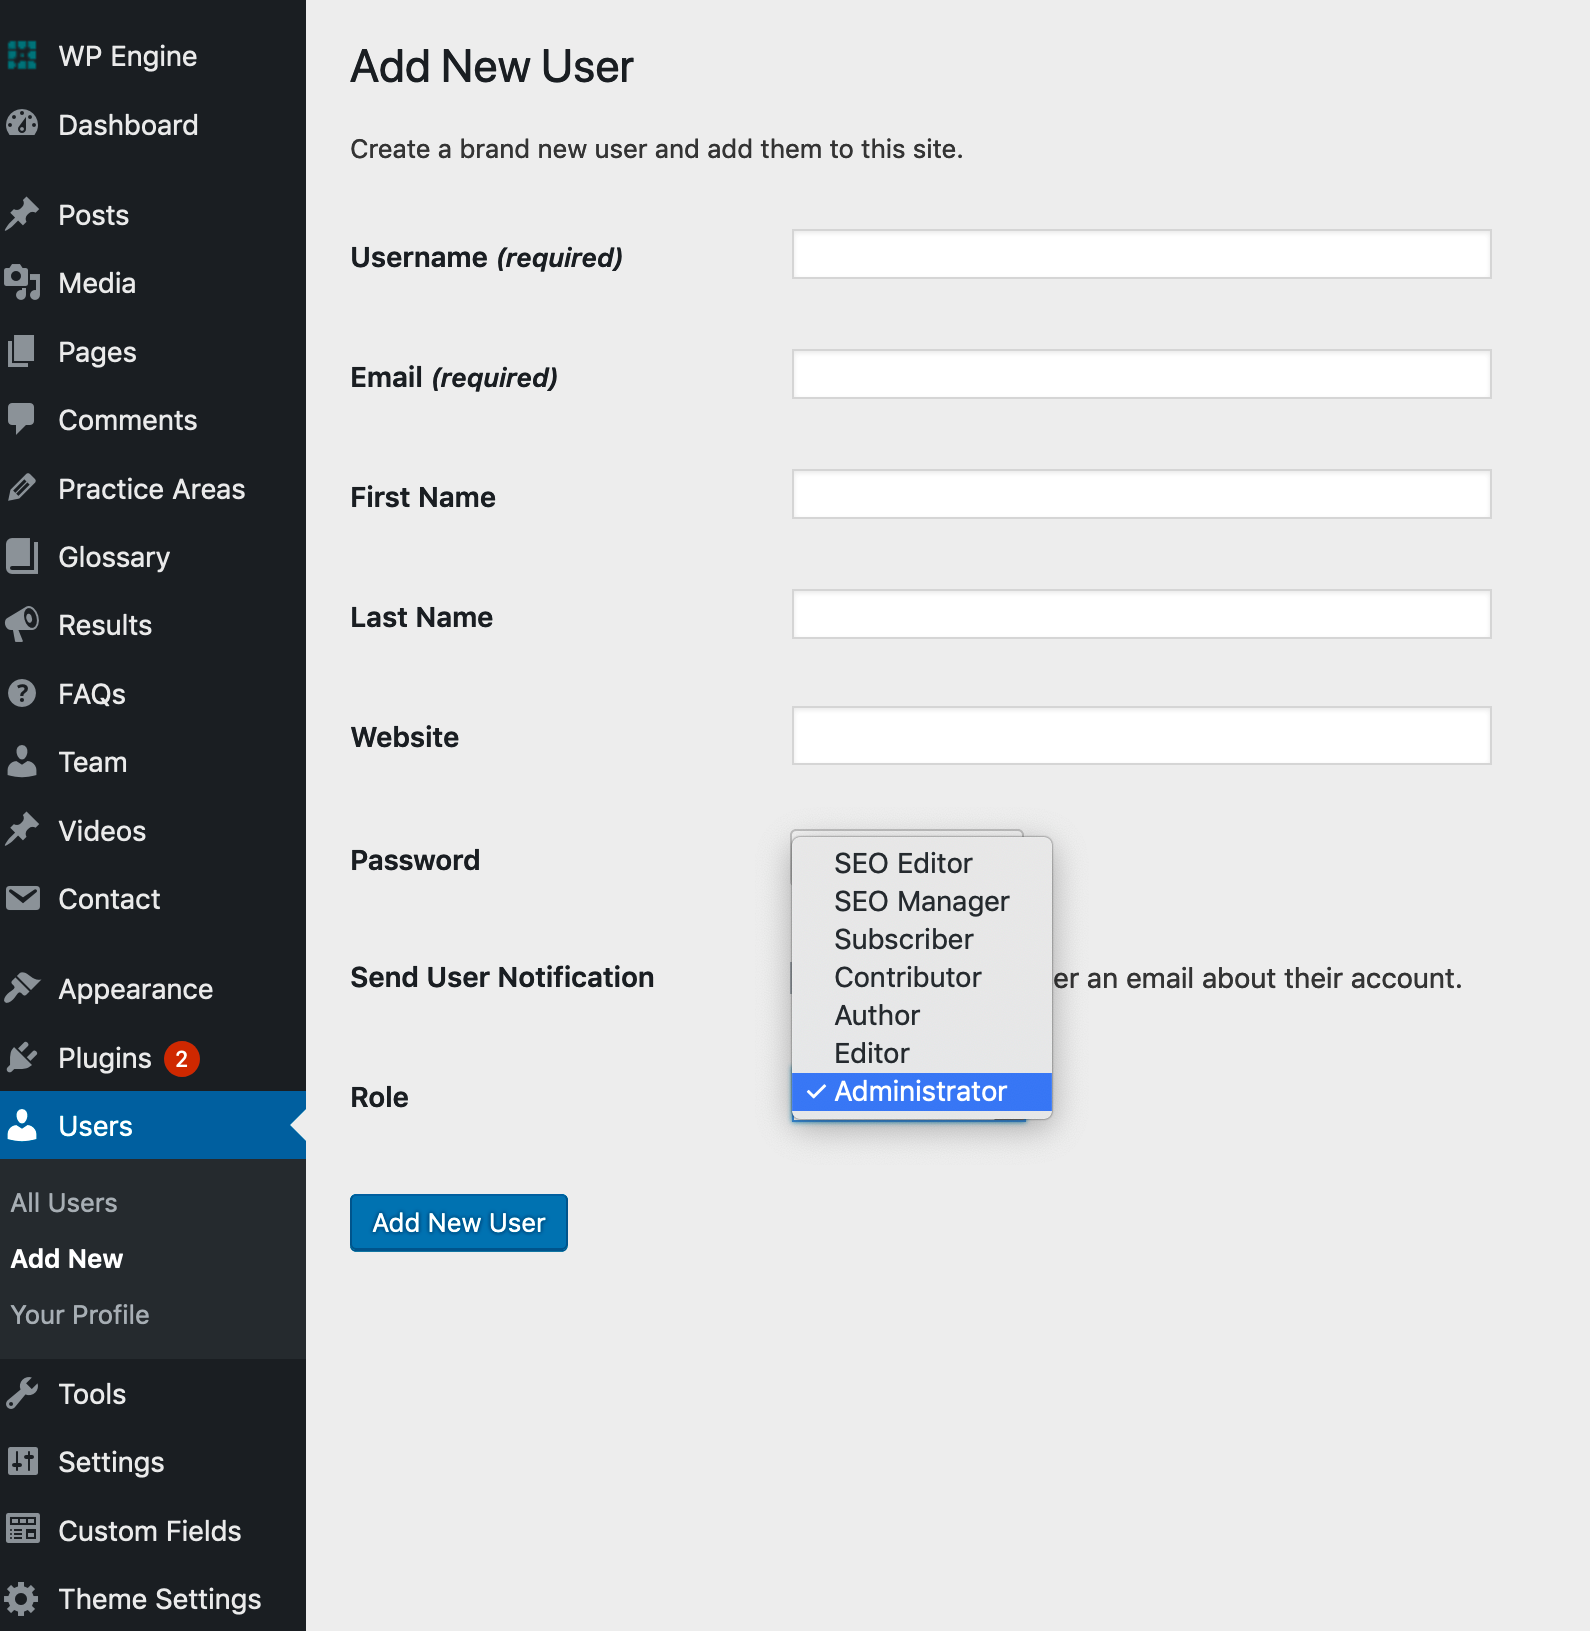
The most important option is the “Role” dropdown. This is where you can limit their access.
- Setting them up as “Administrator” allows unlimited access to the WordPress admin. They can edit and add posts and pages, plugins, change settings and add new users.
- Choosing “Editor” allows them to add and publish theirs and other’s posts. Settings and plugins are also hidden.
- “Author” allows the user to add and publish their own posts, but not someone else’s. Settings and plugins are also hidden.
- “Contributor” allows the user to add their own posts only, but not publish them. Settings and plugins are also hidden.
You can read more in detail about all of the roles in the WordPress Documentation. You may also have additional roles to choose from depending on your theme and plugin settings.
Updating The Core & Plugins
The most important thing to know about WordPress is that you need to keep the WordPress and your plugins updated at all times. This prevents security breaches and ensures your site stays up-to-date. 99% of the time, updating plugins and the core should never break your site, but every once in awhile a plugin author will rewrite their plugin to improve it, which requires some code updating on our end. Therefor always make sure you have a backup before you update.
You’ll know when there’s an update because you’ll see a round red icon with a number on it either next to the “Plugins” link in the admin, or in an “Updates” link at the top horizontal admin menu. Going to the plugins area in the admin will also show updates are needed.
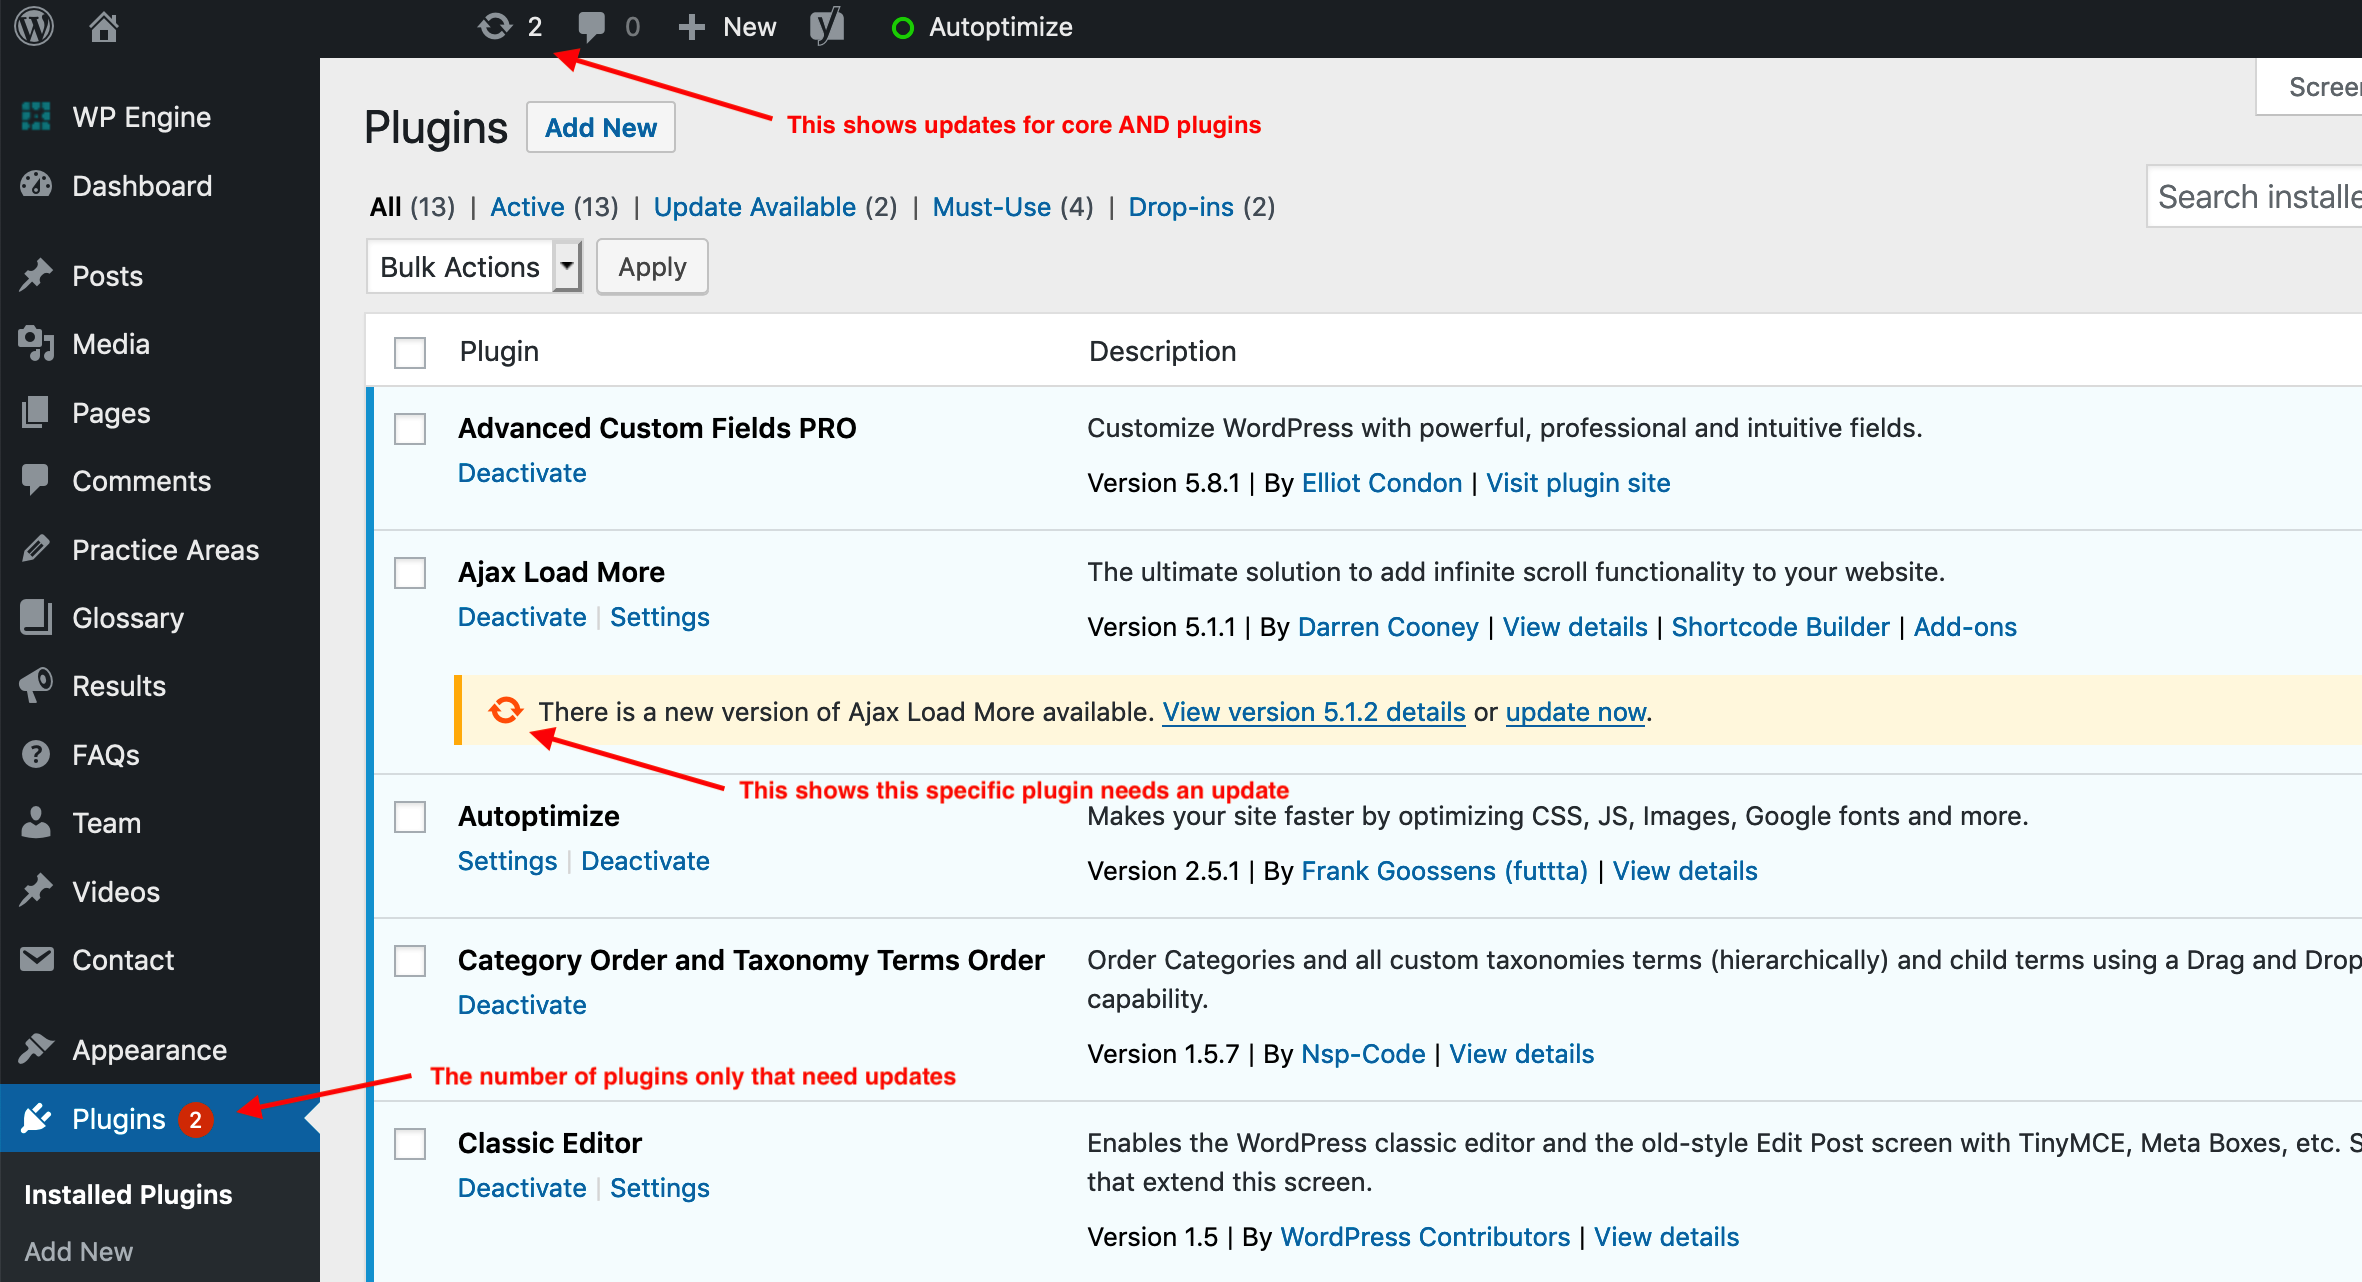
Clicking the update link at the very top of the admin menu takes you to an overall update page, where you can update both the core (WordPress itself) and any plugins at the same time.
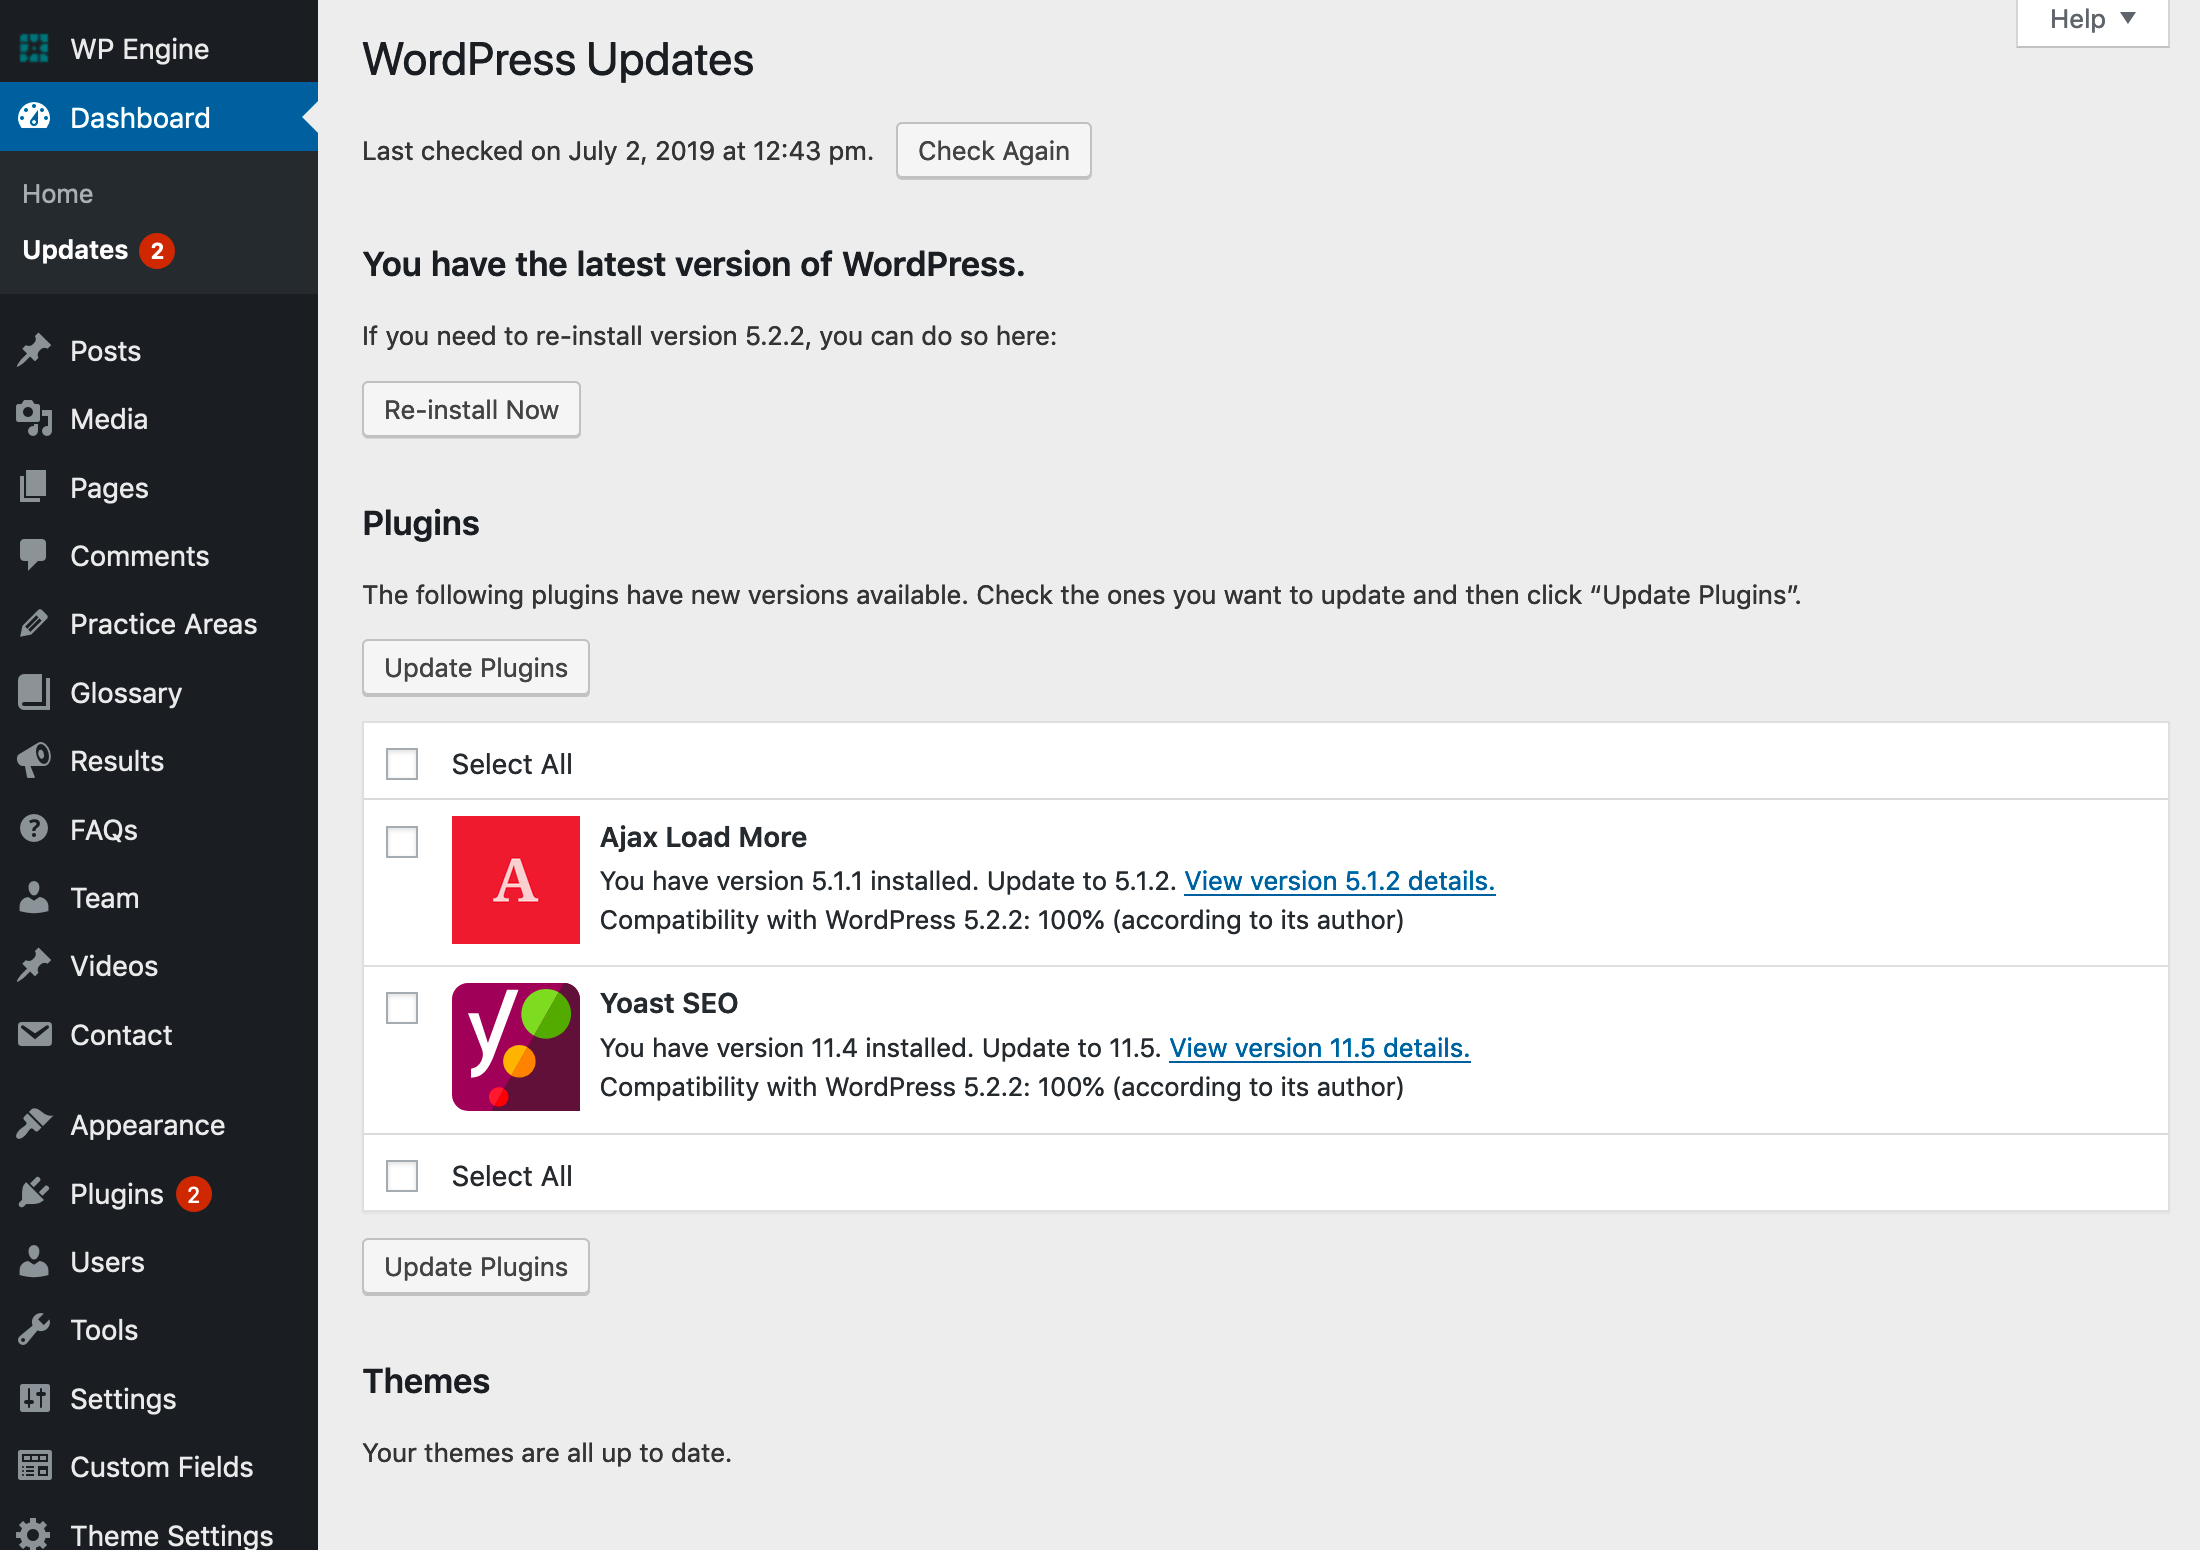
Select the plugins you want to update, and click the “Update Plugins” button and it does all of the work for you! Again, make sure you have a backup first, and make sure you update as soon as possible!
Yoast SEO
One of the plugins we install for every website is Yoast SEO, which allows you to set comprehensive SEO settings from both the site-level, and fine-tune them on a page-by-page basis. To view the main settings, click on “SEO” on the left hand admin menu (towards the bottom), where you’ll be taken to an overview page.
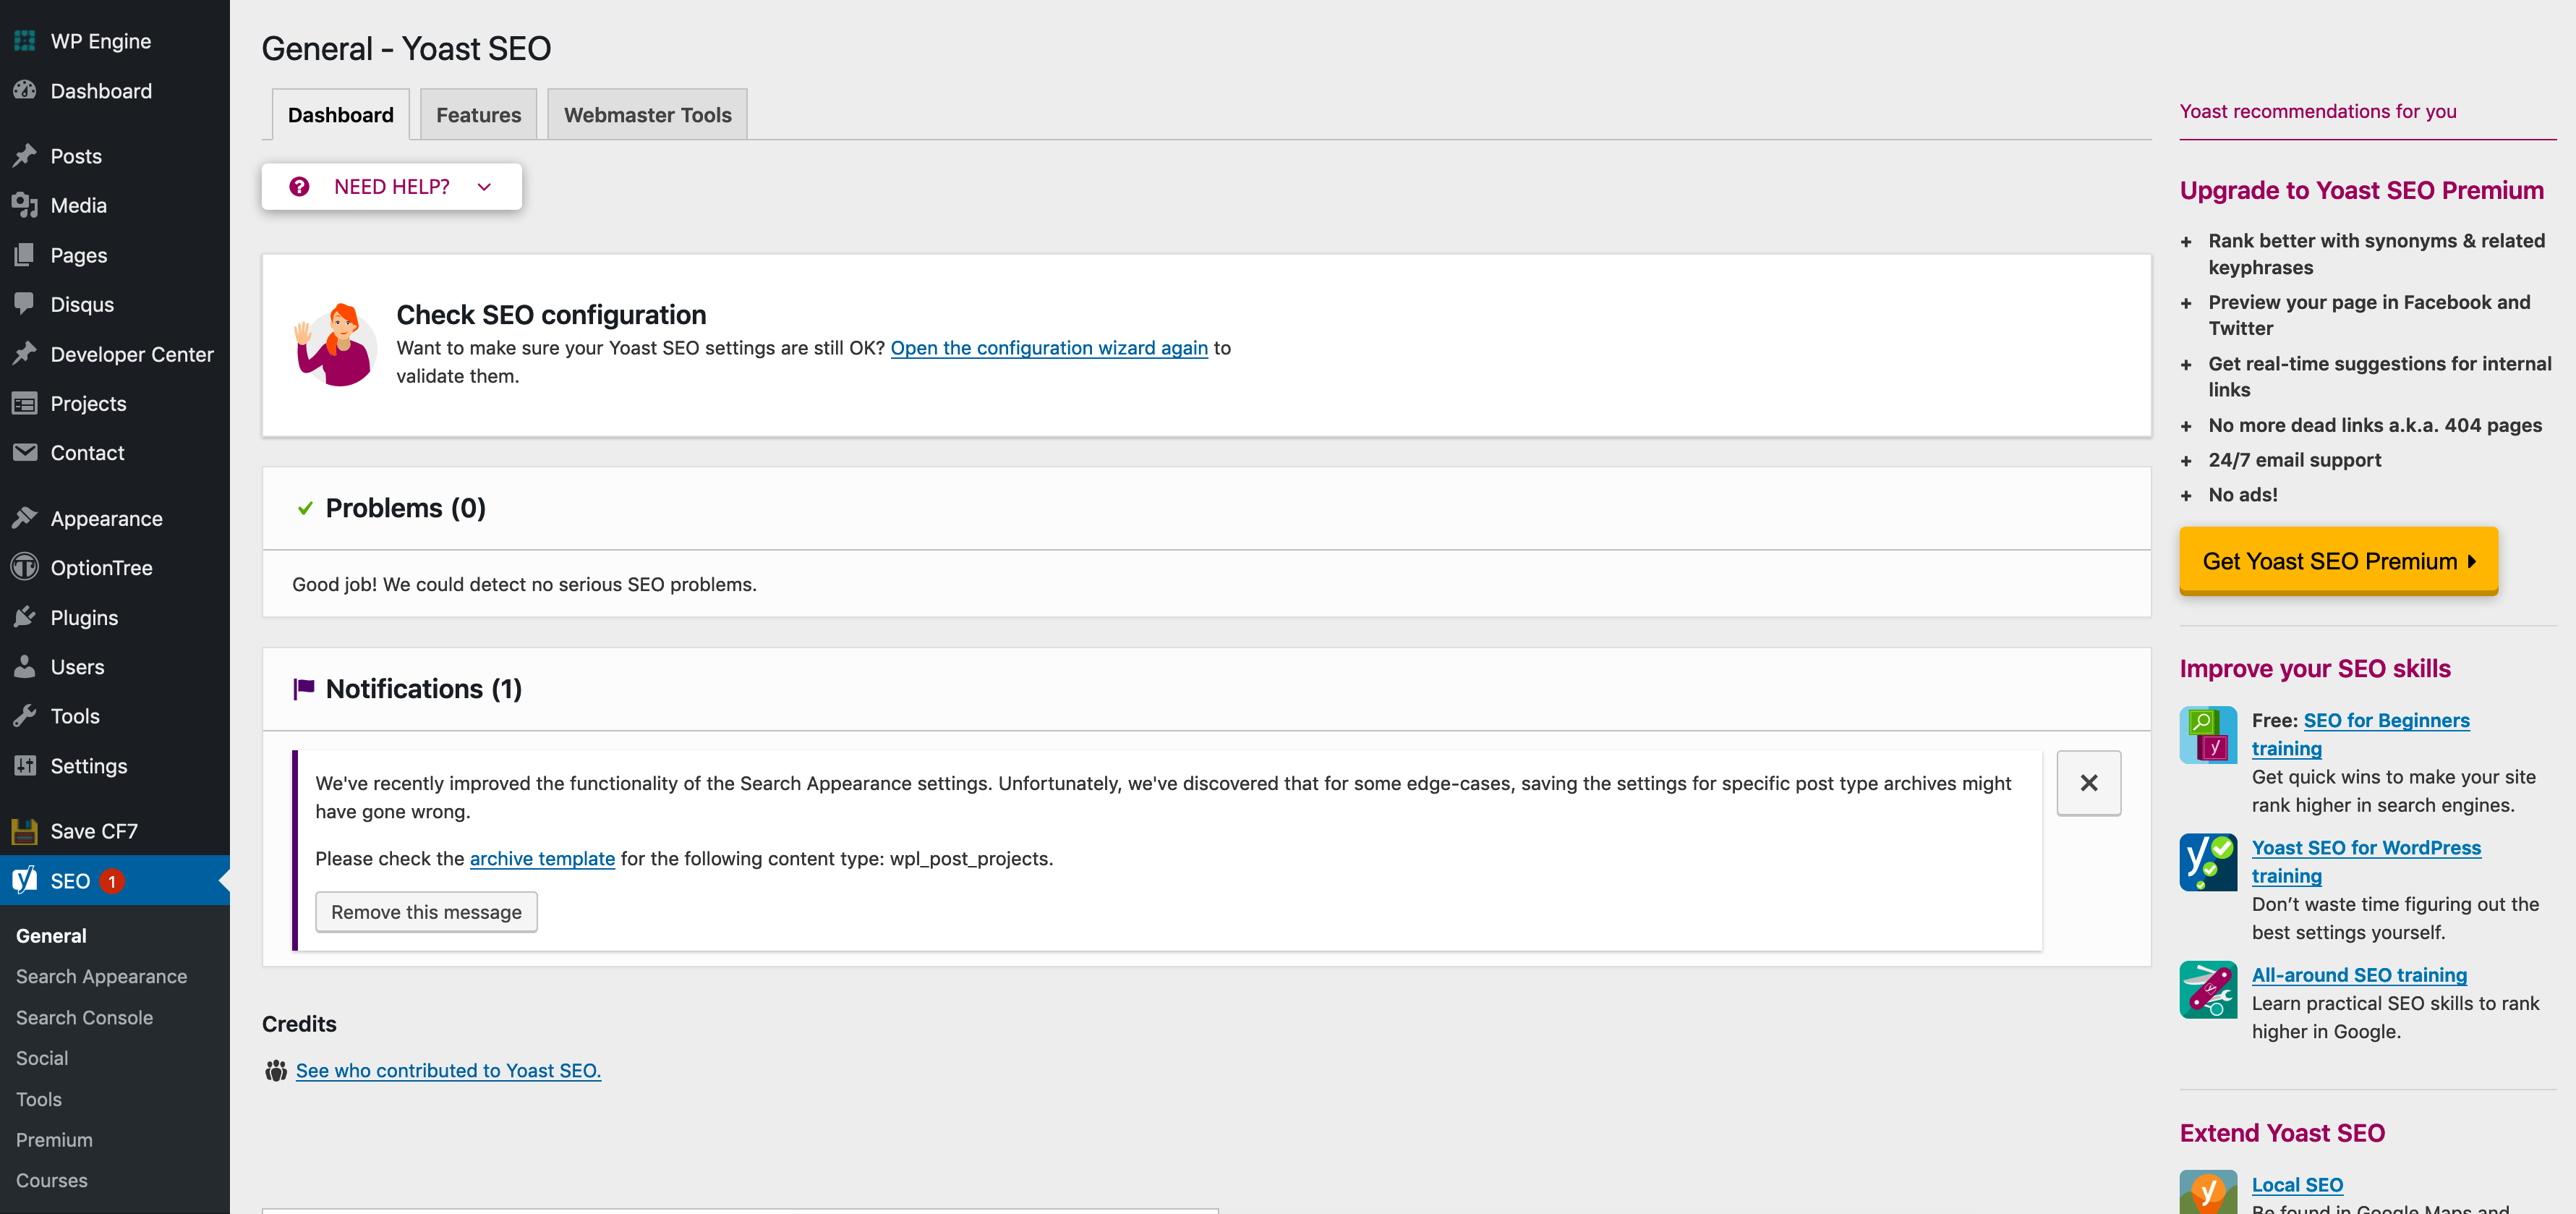
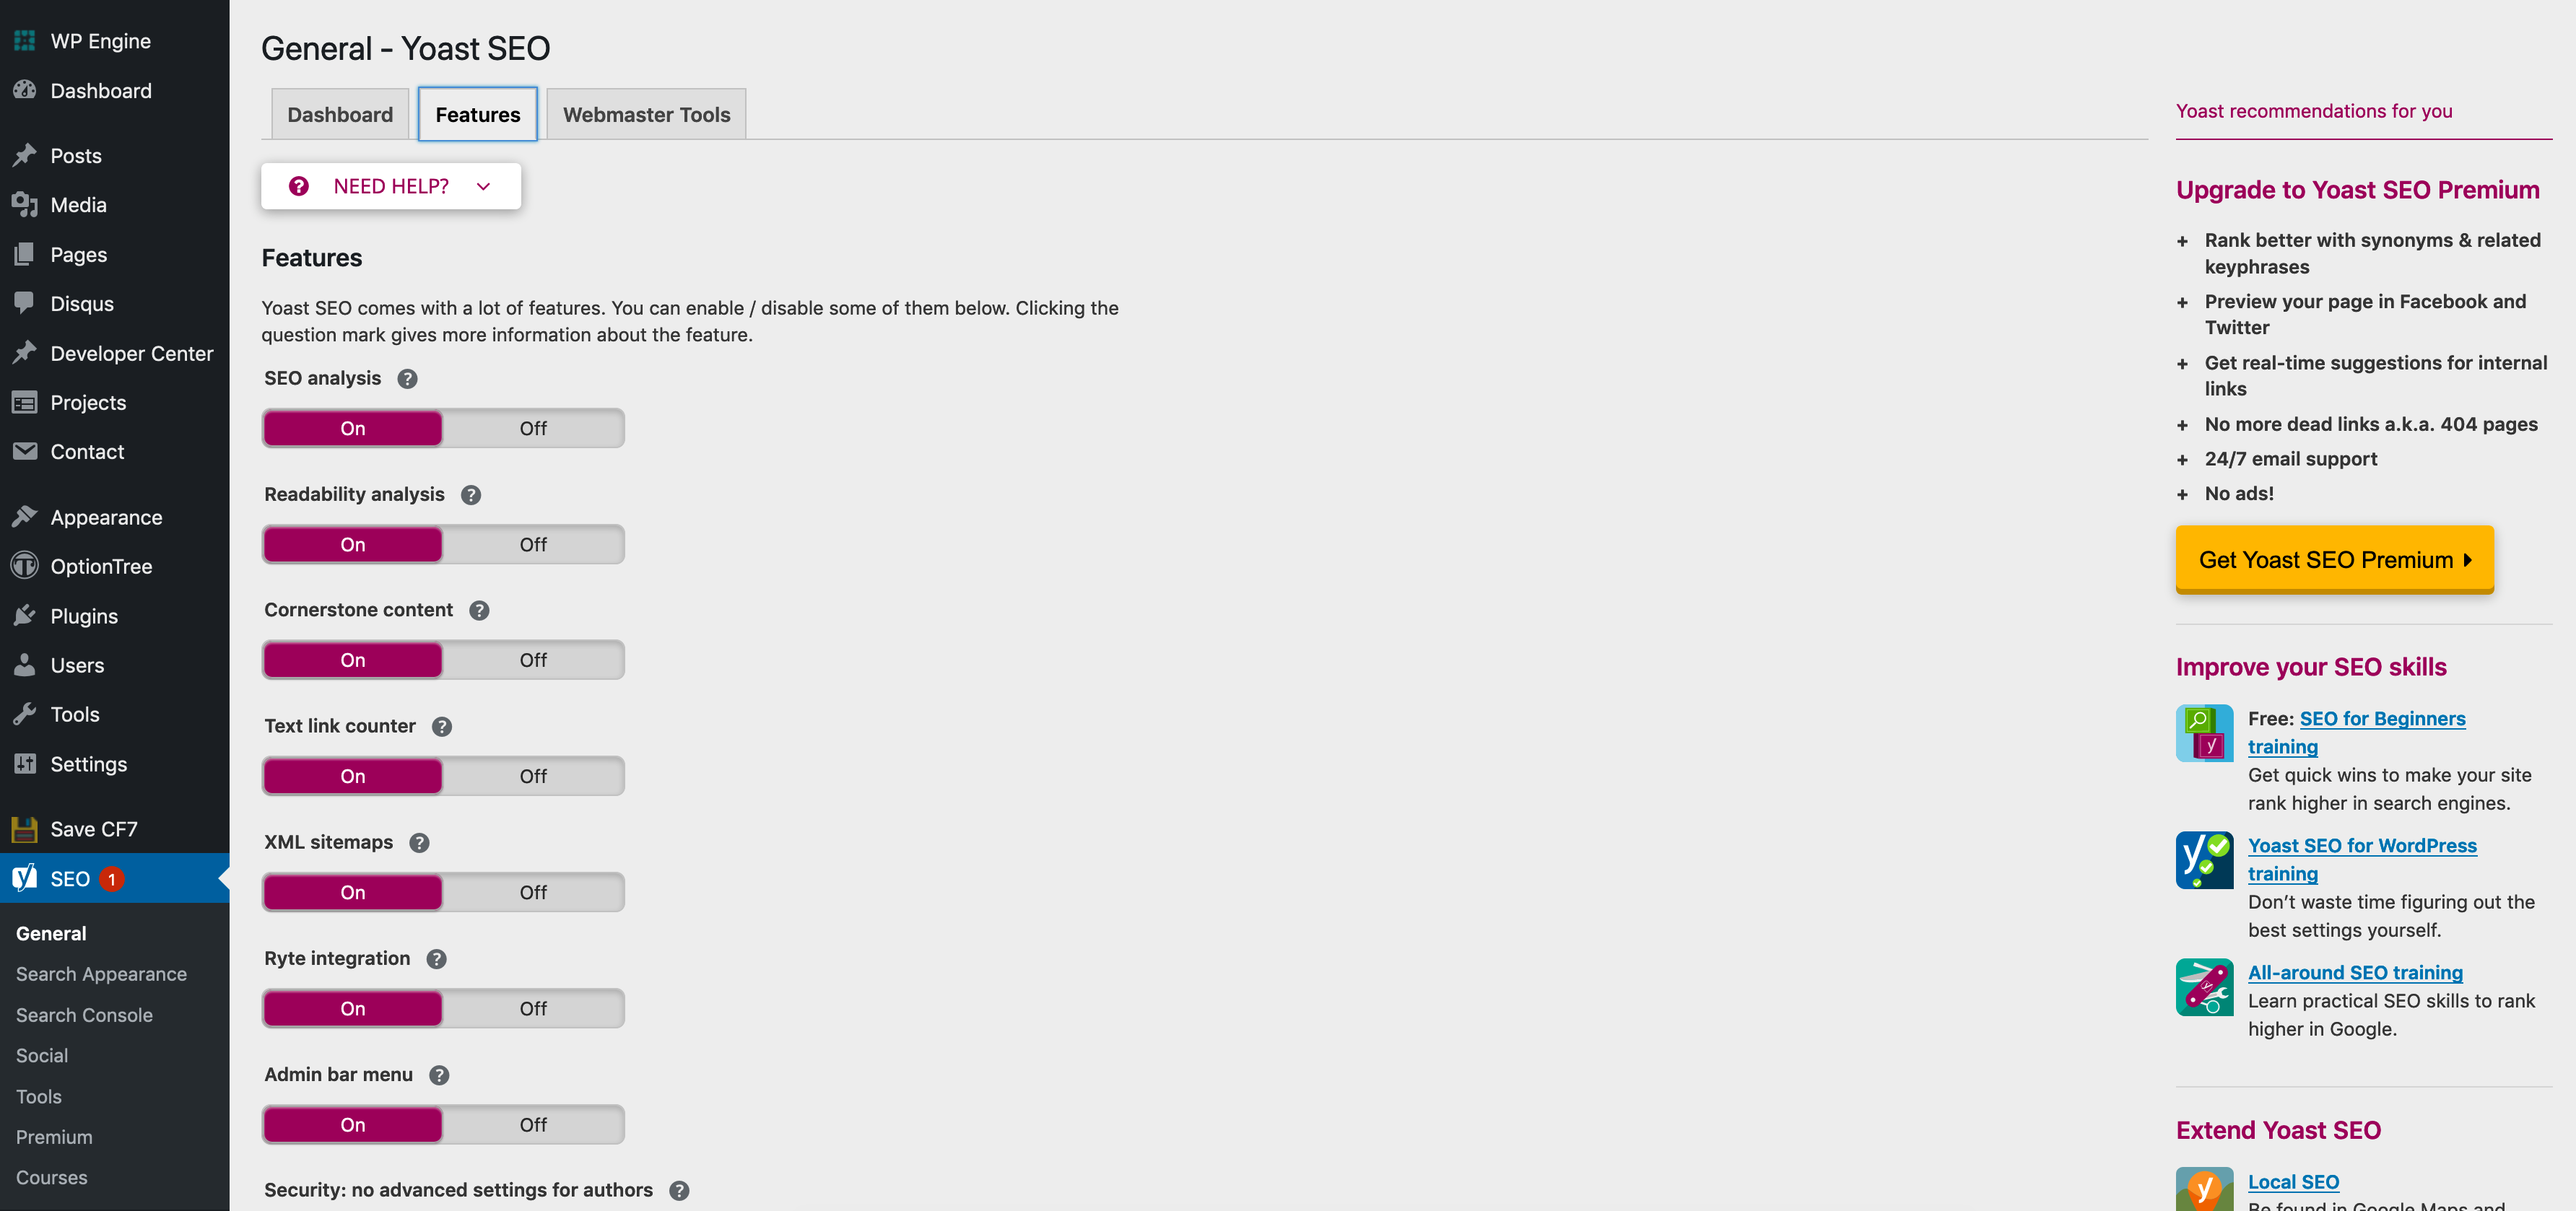
Clicking on the “Features” tab let’s you turn various features on and off, but you’ll probably never need to edit these.
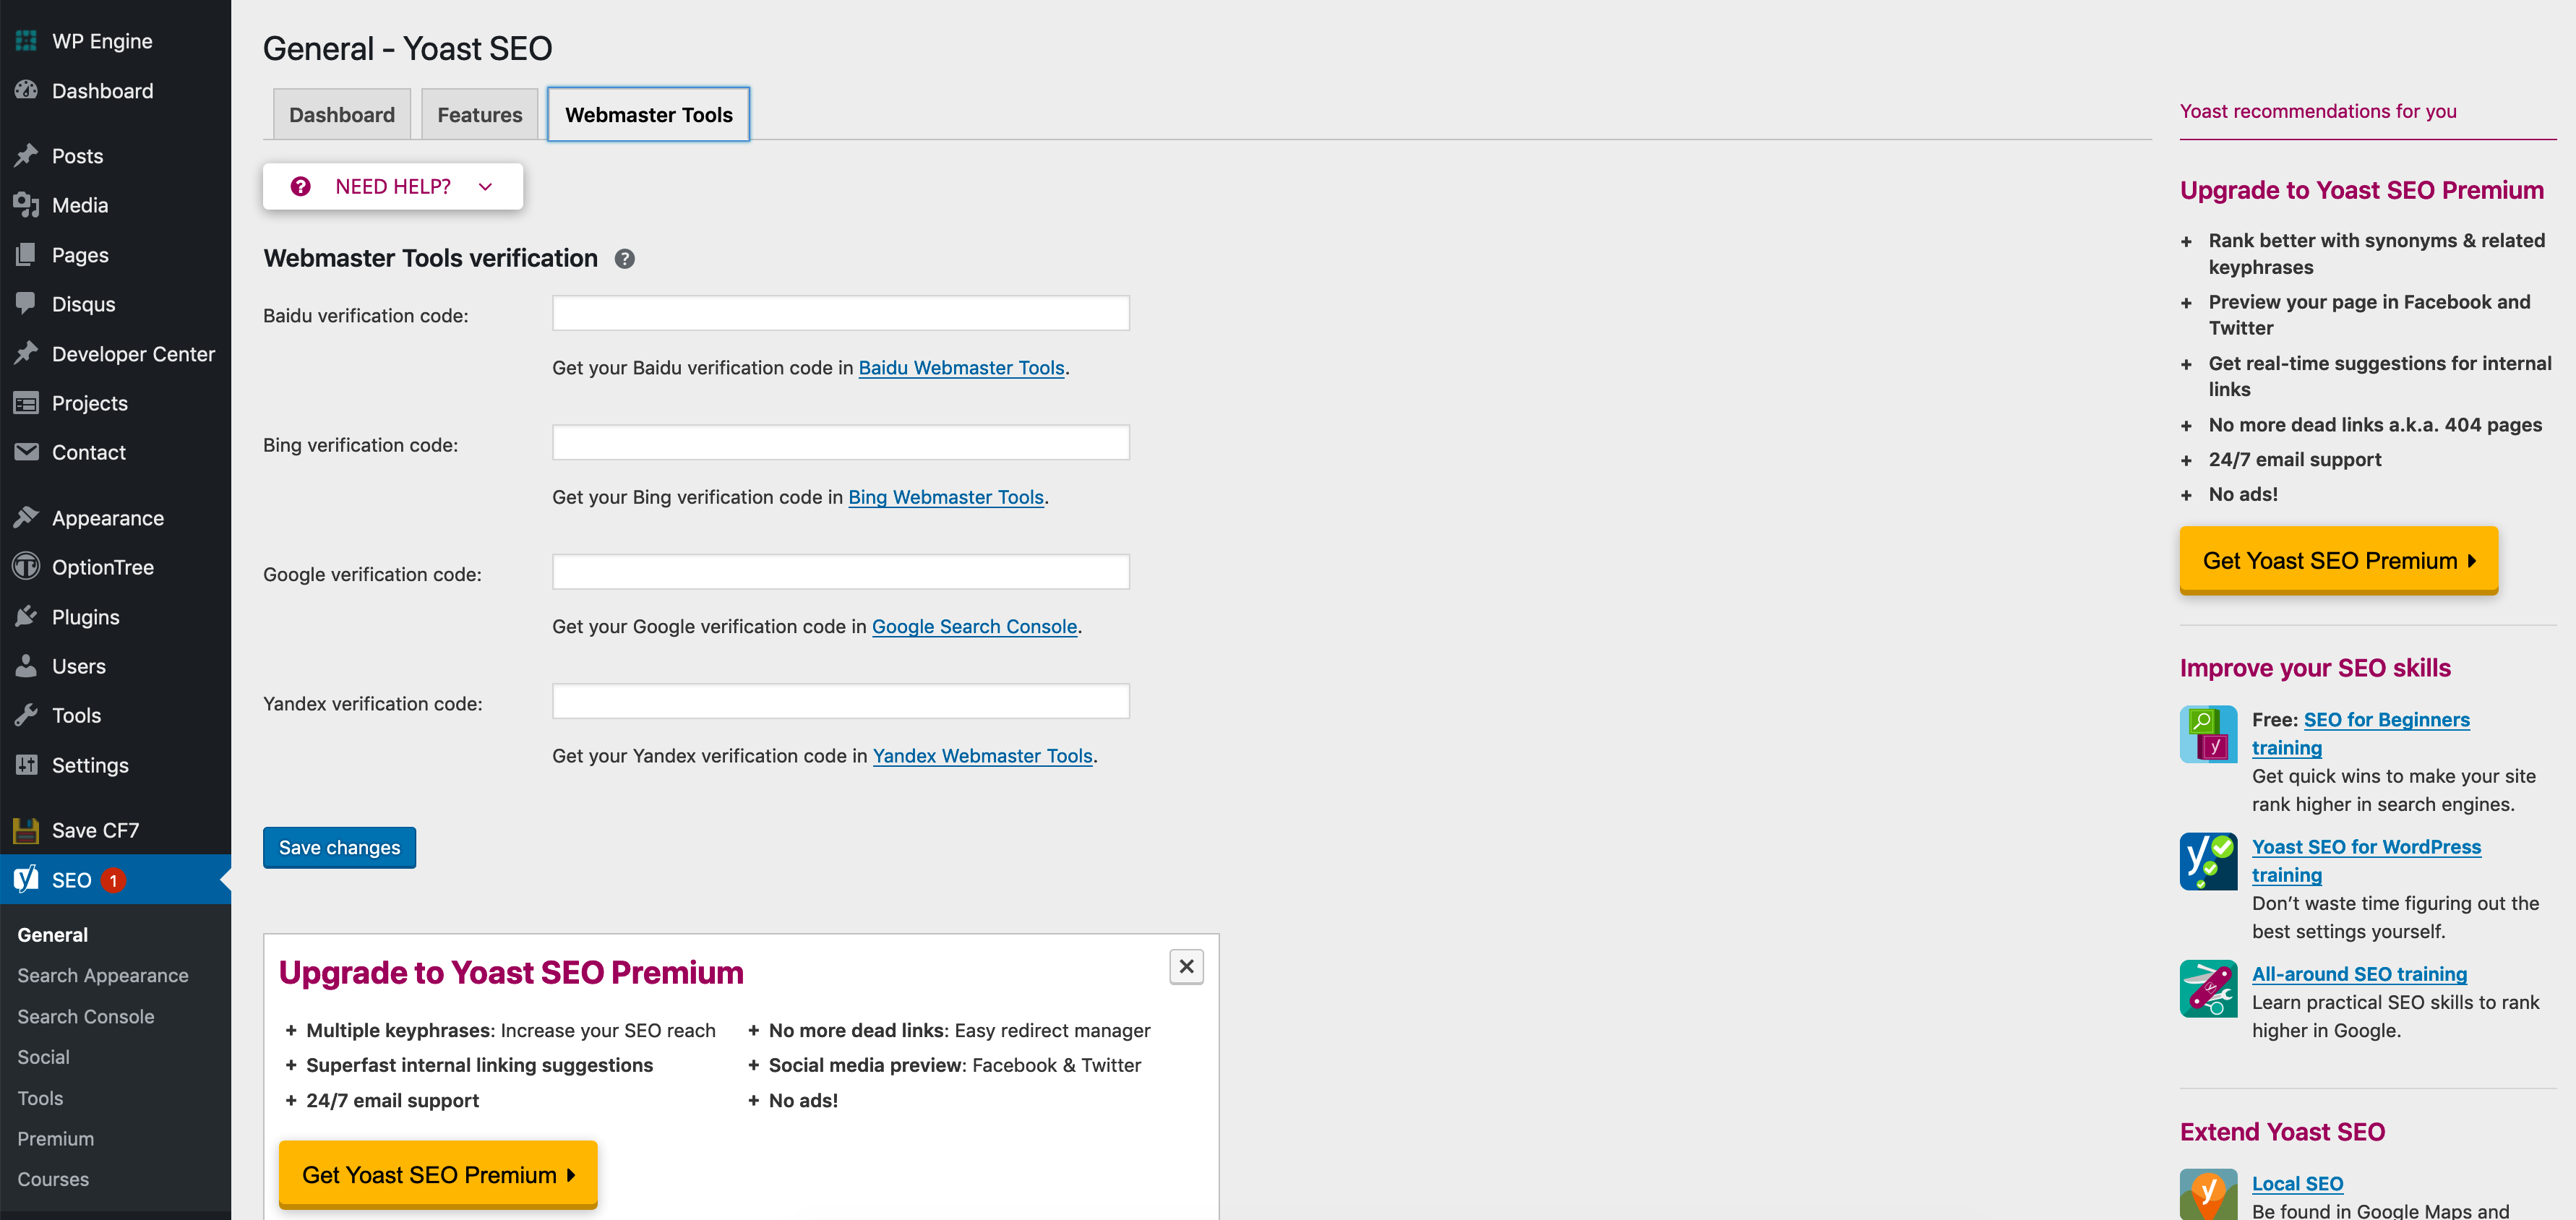
The “Webmasters” Tool page allows you to enter in all of your verification codes from sites like Google, and Bing.
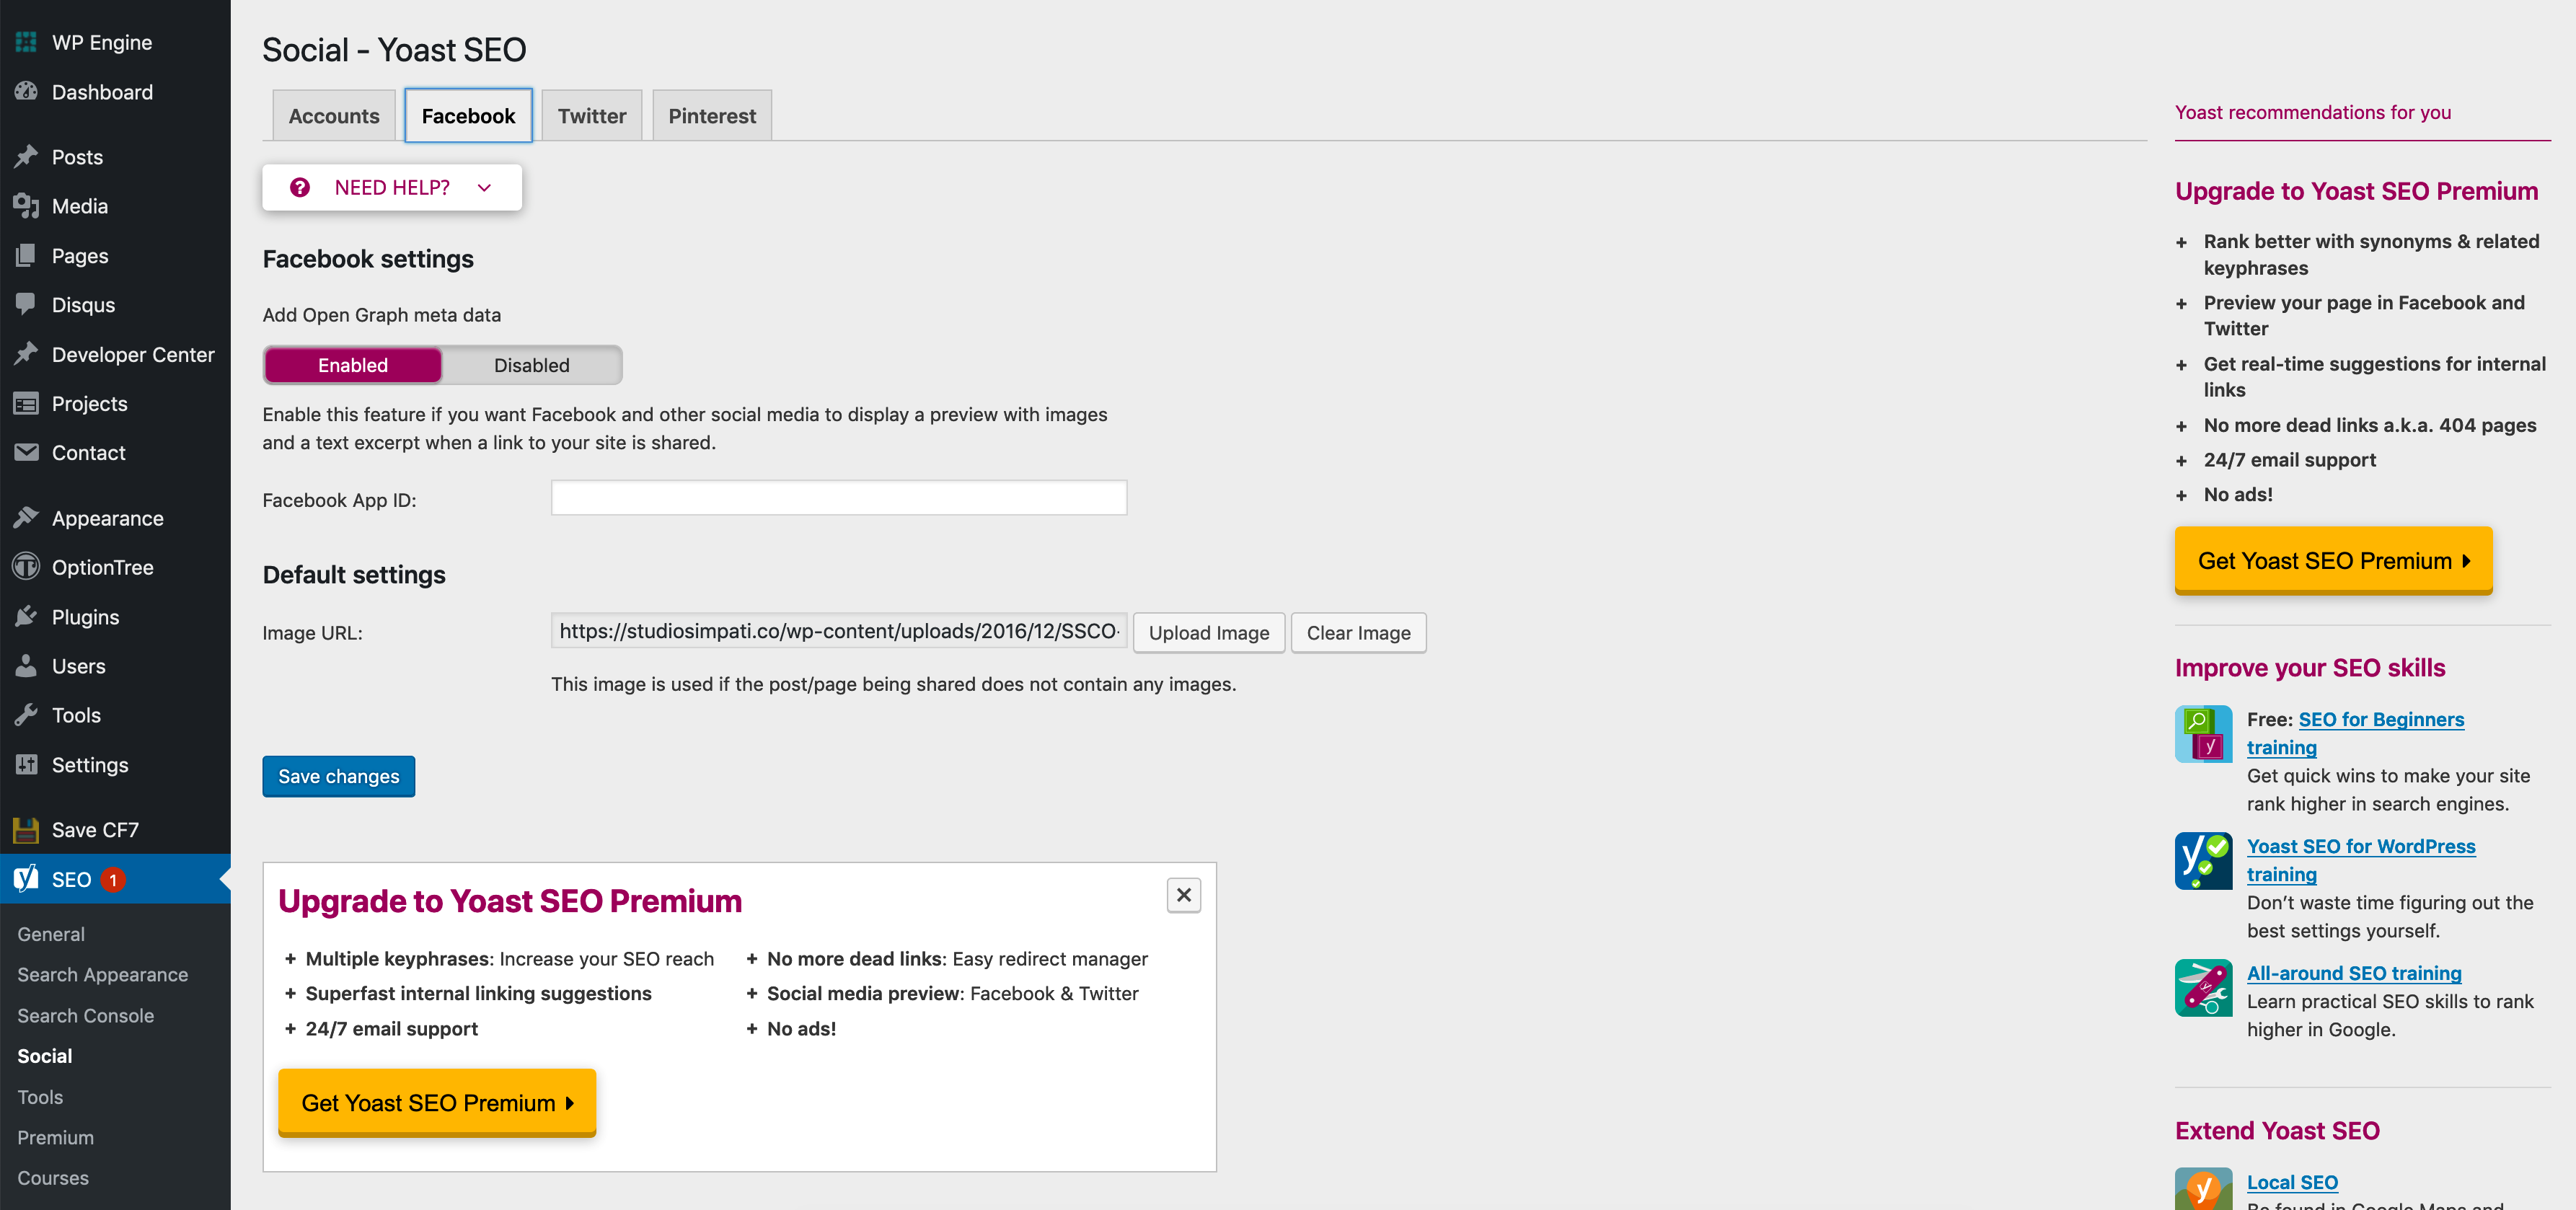
The only other section of the main settings are you’ll probably need to edit, is the “Social” page which allows you to edit URLs and OpenGraph settings. Clicking on the “Social” link beneath the Yoast SEO section in the admin menu brings you to the main page.
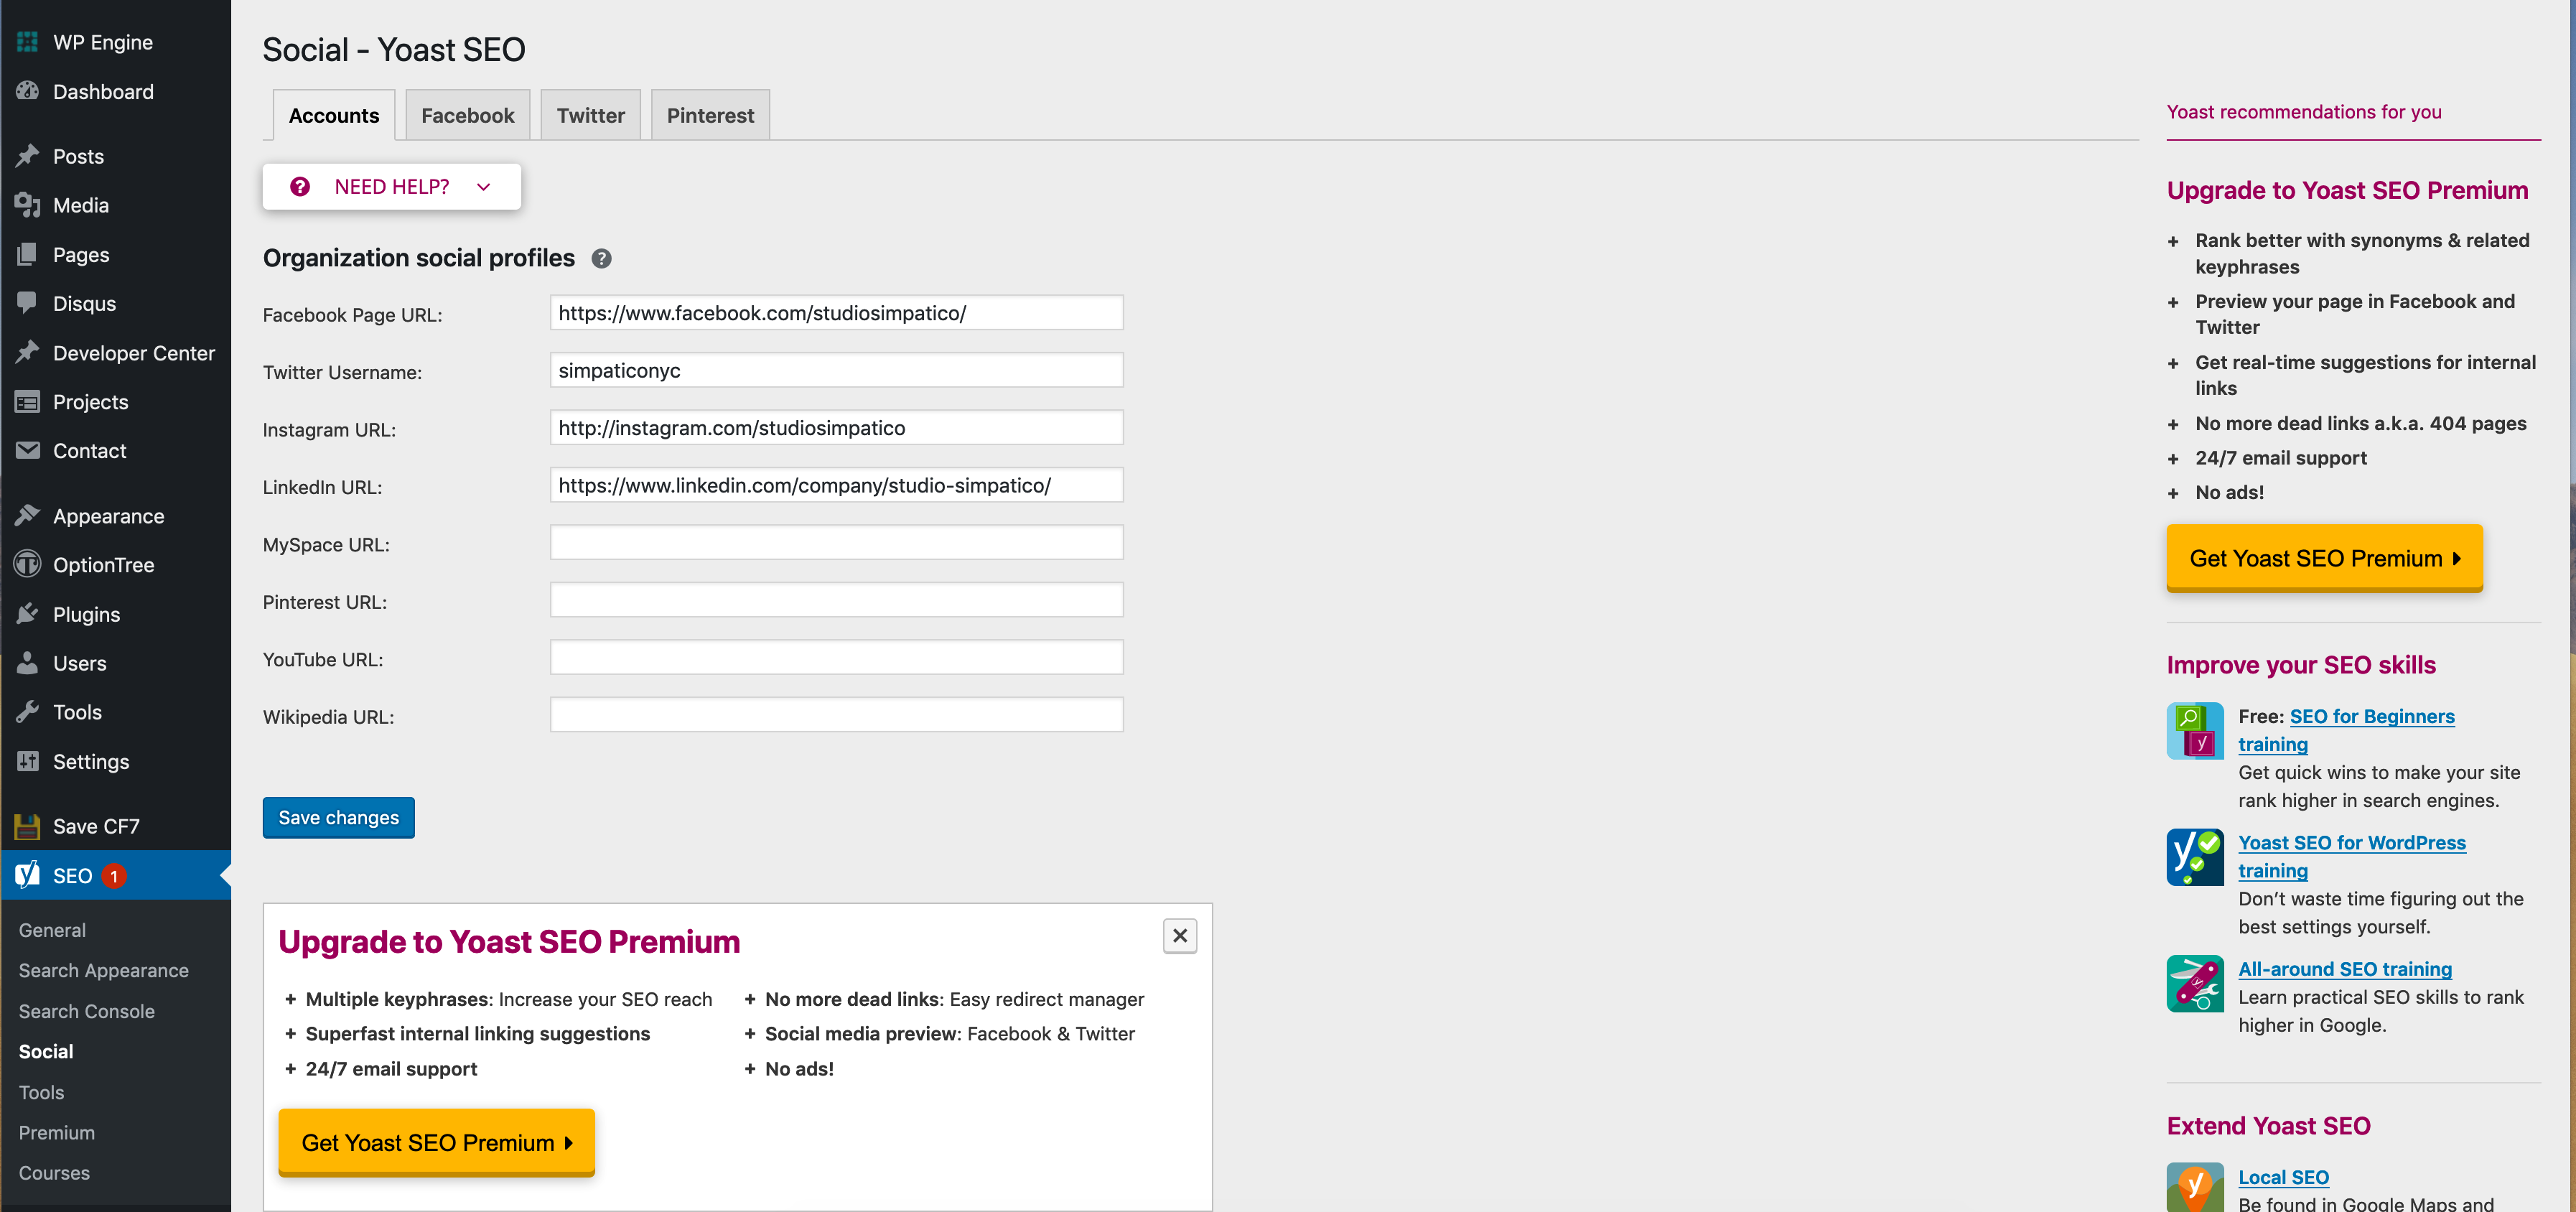
Clicking through the various tabs lets you set the different sharing and OpenGraph settings. Setting a default image here will ensure that when users share your posts or pages, an image will always be uploaded with it, even if the page or post doesn’t have one.
To control the SEO of a specific page (or post) – navigate to that page’s edit screen and scroll to the bottom of the page. You’ll see a box labeled “Yoast”

Here you can see a preview of what your page will look like in search results, as well as get a quick analysis of how your page is doing SEO-wise. You can also enter keywords, specific sharing settings, and set whether you want the site blocked from robots (search engines) or not. Yoast is full of fantastic features and they have a fantastic in-depth guide that I suggest you take a look at if interested.
Voila! You are the master of your very own website!