 hi, i'm
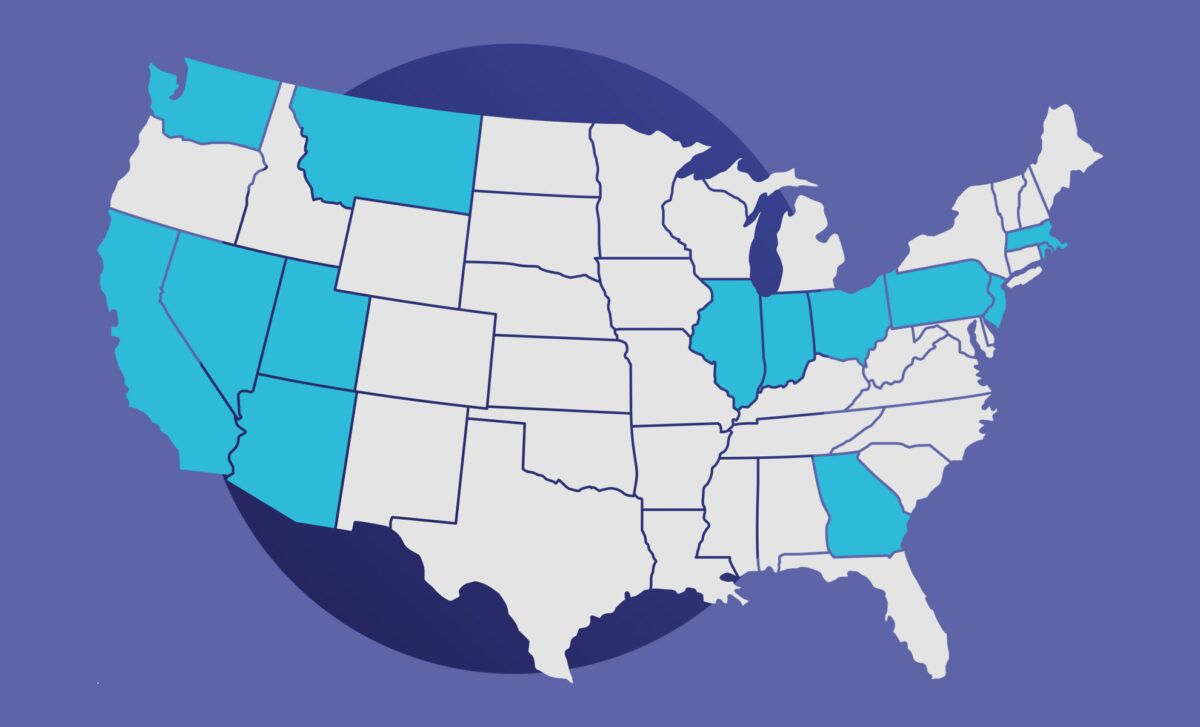
JQVMaps is my favorite go-tos for interactive SVG maps. It’s so easy to setup and customize. But what if your client wants to control and edit the map easily? Hooking up Advanced Custom Fields to take control of a JQVMap is super easy!
Let’s take a simple example – a client of ours wanted a static US map, with states that they could turn on and off as their product grew. This map didn’t need any popups or clickable functionality, but you’ll be able to get a grasp on how to add some more advanced functionality after this demo.
Follow along the JQVMaps docs to get a basic US map set up, your init code should look something like this:
jQuery('#vmap').vectorMap({
    map: 'usa_en',
    backgroundColor: null,
    color: '#E4E4E4',
    enableZoom: false,
    showTooltip: false,
    selectedColor: null,
    hoverColor: null,
    borderColor: '#fff',
    borderWidth: 3,
    borderOpacity: 0.25,
    colors: {
        mo: '#2980b9',
        fl: '#27ae60',
        or: '#8e44ad'
    },
    onRegionClick: function(event, code, region){
        event.preventDefault();
    }
});
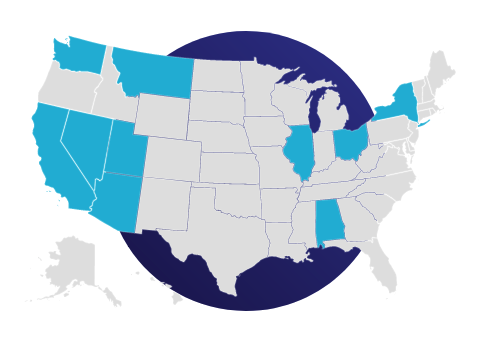
In order to fulfill the client’s wishes, we need to be able to choose a state (via the CMS) and assign it the active color (which doesn’t need to change, so can be static).
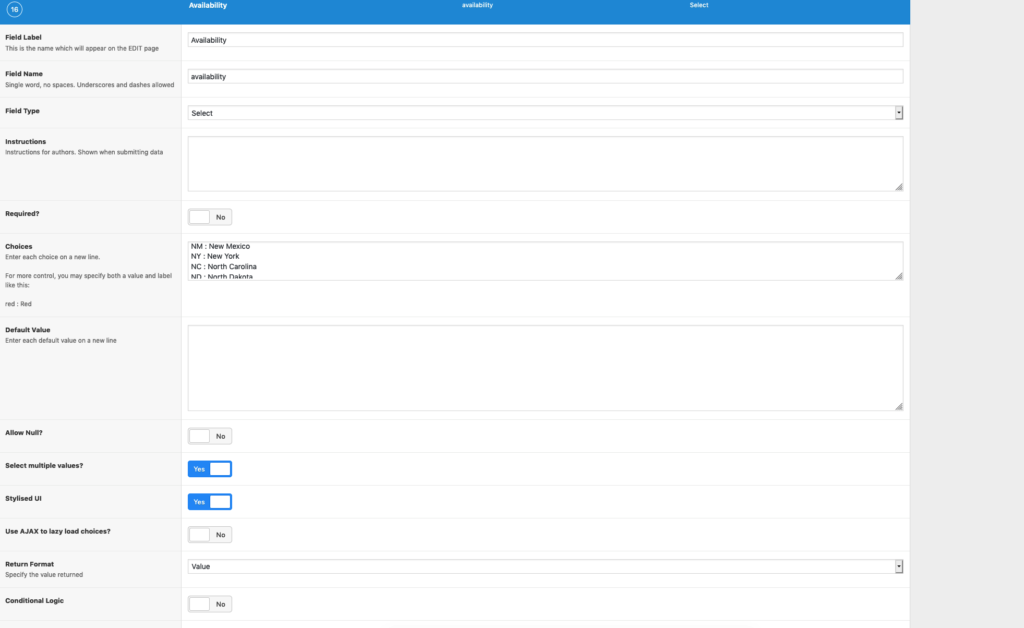
First, we create a custom Select field in ACF called “Availability” and allow it to be a multi-select field, where we add all our states and abbreviations as options. I used this helpful site to get all the values to save me time from typing them all out.
Now that we have both ACF and JQVMaps set up, we need to hook them together. When using the Select field in ACF, it returns an array of of values, which we then need to convert to the proper state syntax that JQVMaps requires. Under the “colors” option of our Javascript code, is where we need to specify the listing of states chosen from ACF.
Since we need to mix PHP in with our JS, I’ve put the JQVMaps init code inside of script tags at the bottom of our WordPress footer.php file:
Our first step, is to grab all the selected states in ACF and assign it to a variable.
This variable returns an array of capitalized state abbreviations. Now, we need to change our PHP array to the correct format for JQVMap, by adding a semi-colon and the active color. So we need to turn TN into TN: ‘#2EBAD9’. This is done using array_map:
JQVMaps requires that the state abbreviations be lowercase, so we simply us strtolower to accomplish this.
Now all we need to do is print it out into our init code!
You can also take this even further by using custom fields to add dynamic popups on clicks or tooltips on hovers. JQVMaps already supports this functionality, so it should be a similar process to add more dynamic content to the map.
Happy mapping!